This guide will help you understand the basics of the Castle Throne, Servant Coffins, and Servant Missions gameplay features.
Summary
This guide assumes that you understand how to create a Castle Throne and capture servants, but have questions about which missions to send them on and how the system works.
Servants can be captured using Dominating Presence form. This form is rewarded through the main questline and allows you to ‘charm’ a humanoid and take him or her back to your lair. You can access it through the quick wheel like wolf form or other vampiric powers. Once in Dominating Presence form, you can use ‘Kiss of the Vampire’ (default keybind R) on a low health target to dominate them. If successful they will become charmed and you can return them to an empty servant coffin to make them a permanent servant!
Mission Selection
The purpose of sending servants out on missions is to passively gather resources, even when you’re offline!
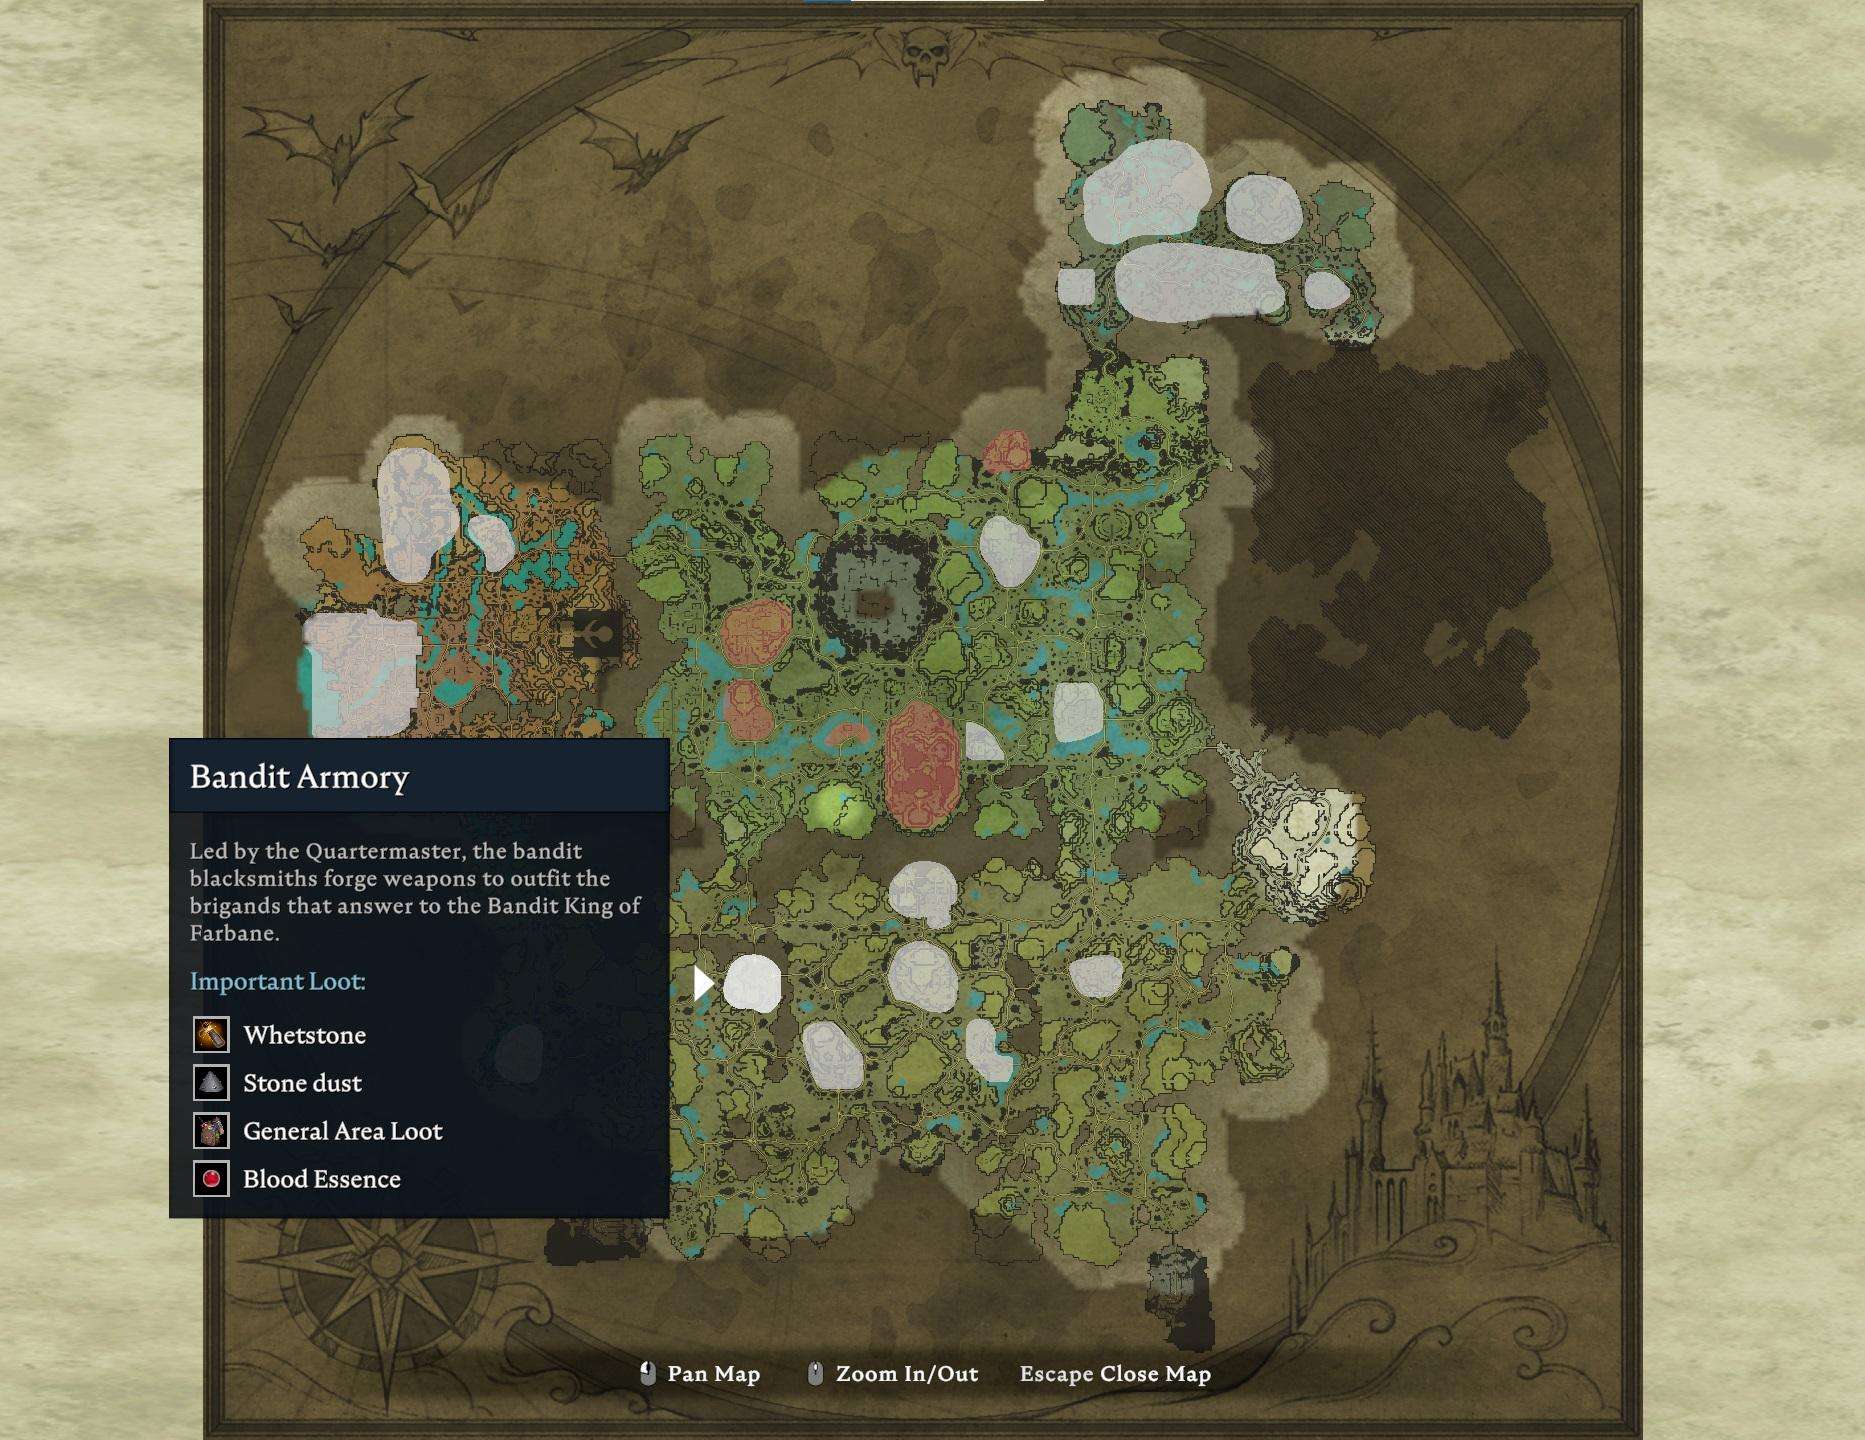
Send your servants to areas that have desirable resources for your stage in the game. Good choices are typically resources that are time-intensive or difficult for you to farm efficiently. Early in the game you might need more whetstones, so you could send your servants to the Bandit Armory area:

Another bonus of sending servants to gather resources is that they can raid anywhere you’ve discovered on the map, regardless of your castle’s location. So you can have them ‘deliver’ resources from the Cursed Forest right to your doorstep in Farbane Woods.
2 hour missions yield roughly 3x more time efficient profits than 24 hour missions as long as someone can be online to harvest the resources. Always send your servants on as short of a mission as possible, depending on when you’ll be back online. The important thing is to keep them out in the field as much as possible. For example:
- Playing during a long afternoon? Send them on multiple 2 hour missions
- Going to sleep? Send them on an 8 hour mission and gather their resources in the morning.
Mission rewards scale linearly with the number of servants, so sending multiple per mission is often a great idea. Sending multiple servants on a mission together will grant them a bonus to their mission success chance. More on that below.
Mission Success Chance
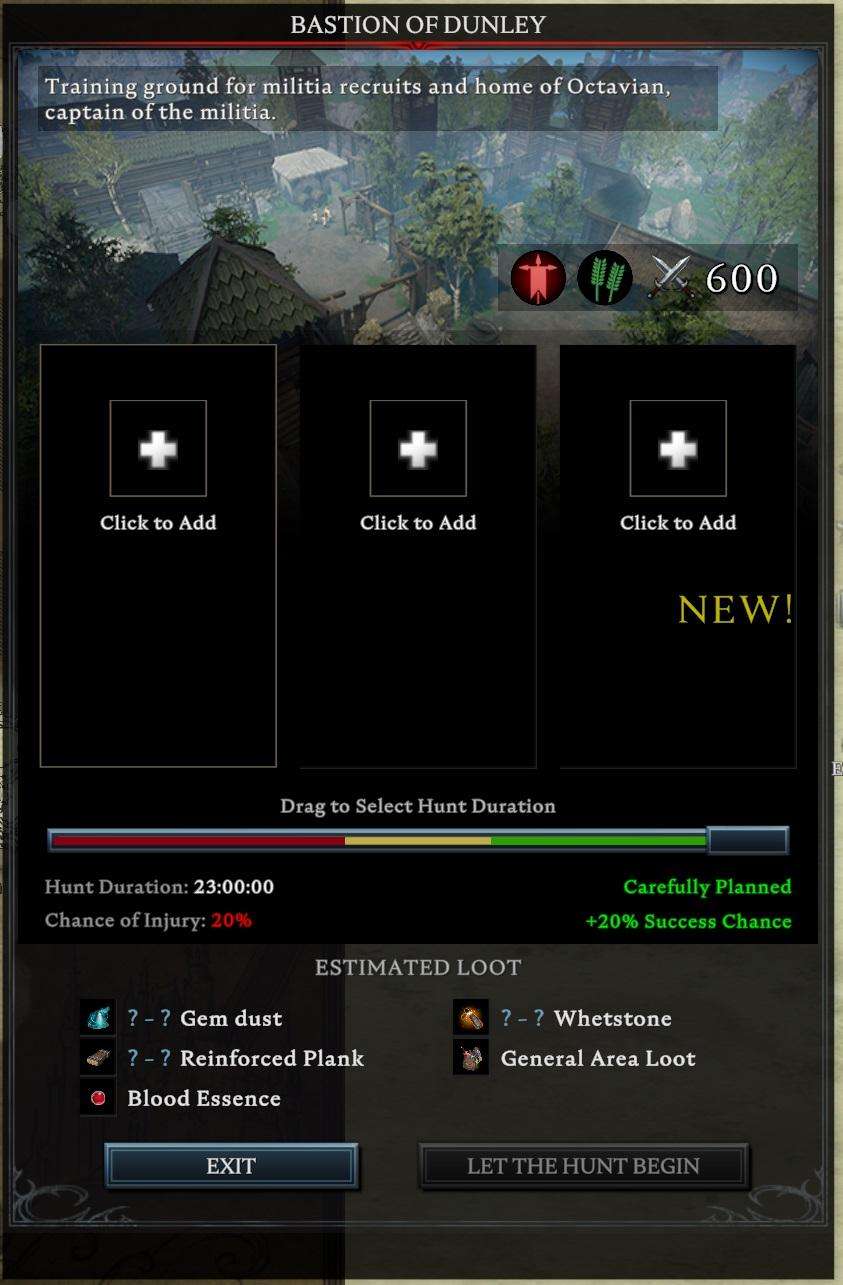
Servants can succeed or fail on a mission. This success chance is calculated by comparing the difficulty of the mission (600 in the example image below) against the Gear Power level of each servant.
Succeeding means they will deliver resources to your castle. Failure means they will die and will have to be resurrected for a small blood cost. Servants can succeed or fail independently even while on the same mission.
Each servant evaluates his or her success chance independently i.e. two characters with 300 Gear Power don’t ‘add’ to each other and become able to succeed at a 600 difficulty mission.
You want to drive mission success chance to 100% using a combination of
- Servant Type (area type expertise, zone expertise)
- Servant Gear (and gear efficiency coefficient)
- Multiple servant party Bonus (25%)
Keep in mind that if you’re sending servants on a shorter (2 or 4 hour mission) you’ll need to offset the -20% mission chance called ‘riskiness’ resulting from sending them on a short mission. This simply offsets each servant’s success on that mission.

Servant Type
Servants have two important attributes: an area type expertise and a zone expertise.
Servants gain area type expertise based on their blood type, which makes them skilled in farming a different type of area. For example, Mosswick Village is a settlement area but the Bandit Armory is a Military area. The blood type and corresponding area types are below:
- Settlement (Worker)
- Military (Warrior)
- Sacred (Scholar)
- Tenacious (Brute)
- Tracking (Rogue)
Note that the blood percentage rating for a unit translates into gear efficiency, a coefficient scalar on their base gear level ranging from 1-25%. More on gear level below.
They will also be skilled in farming one of four different zones: Farbane, Dunley, Silverlight, or Cursed Forest. Usually a servant is skilled in farming the zone in which they were captured. Always send servants to their corresponding zone.
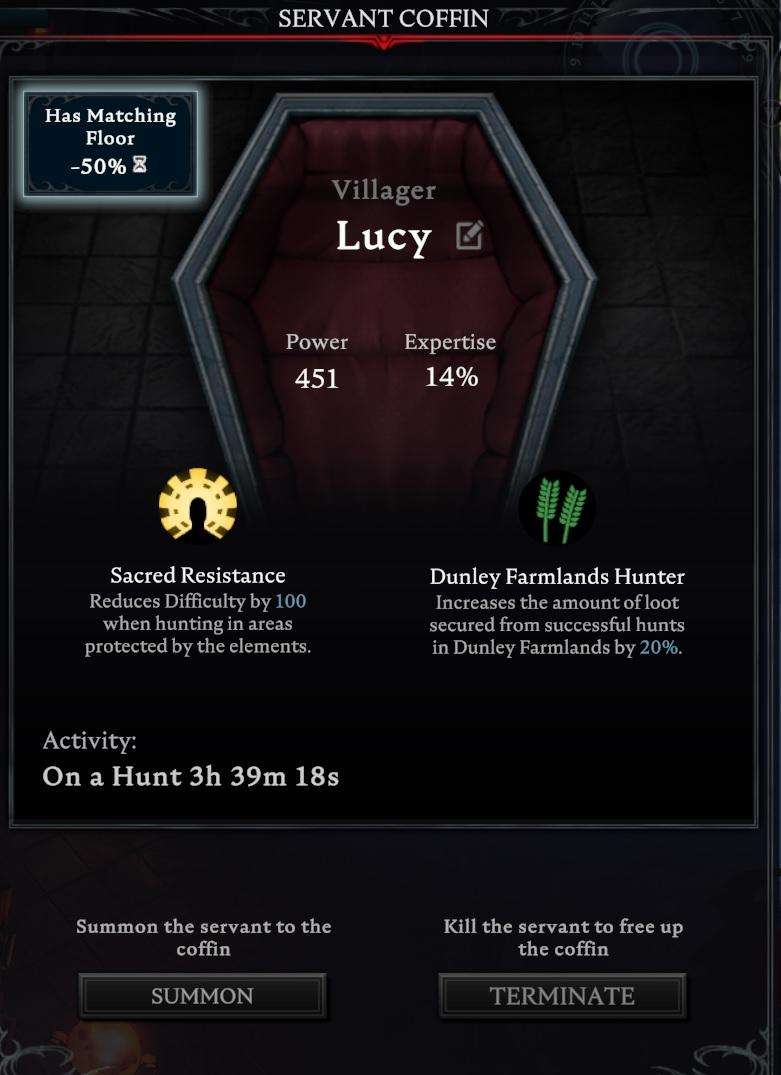
In the picture below you can see that Lucy had Scholar blood type so she is Sacred and can raid Sacred areas like the Dunley Monastery. She was also captured in Dunley Farmlands, so she has zone expertise for that zone. Her Gear Power level is 451, which is a result of the gear I have on her scaled by her expertise (which comes from blood %).

Servant Gear
Servants use only the gear power statistic from the gear you give them, so they will ignore all special effects, set bonuses, and affixes on gear. To be specific, servants gain power from:
- Armor (Chest, Boots, Legs, Gloves)
- Ring / Amulet
- Weapon
Each of these represents about 1/3rd of aservant’s total gear level. Tip: don’t throw your old gear away! Give it to a servant.
You’ll only need to equip gear good enough to send a servant where they need to go – any more is a waste.
Chance of Injury
Getting injured means that servant must stay in the castle for 60 minutes before going out on their next mission. They will hang out in your castle and you can click on them to see what humorous injury they’ve sustained.
Keep in mind that even with injuries, 2 hour missions are still more efficient assuming you’re online to send characters back out immediately once they recover from injuries.


Be the first to comment