
Contents
Italian Destroyers: In-Depth Guide
By Greg242.
Often I see Italian destroyers being regarded as some of the worst if not THE worst in the game. And while they do have their weaknesses, I’d also like to highlight their strengths, and in general give you a new way of seeing them that might even make you want to check them out. This guide includes both text explanations and in game screenshots to help make concepts easier.
Misconceptions about Italian Destroyers
- Are they the worst in the game ?
No. They are more specific in playstyle and require some aiming and getting used to. If used correctly they will give good results. Understanding ship strengths and weaknesses is the same as in Air and Ground battles. If you try to use the same tactic with all vehicles you will lose more often than not. You can try to use Nashorn as a brawler or Do335 as a turn fighter – both will usually give bad results. Same goes for Italian destroyers. Correct use is the key.
- They have the worst reload (RoF) in the game ?
French, Japanese and some Soviets have similar reloads. Only USA and UK destroyers have a very high rate of fire on most destroyers and are able to overwhelm by sheer volume of fire.
- Why bother with APHE, if HE is meta ?
HE works only against unarmoured or weakly armored ships. HE is both unreliable in damage dealing and is not able to make a quick ammo rack in most cases. HE was meta in old times ( and during a short period of time in recent times due to some bugs). Currently AP is the naval meta,why you may ask? First reason is that we aim for killing enemies quickly, not slugging it out like medieval galleons. The second is that the sooner you learn to ammo rack with AP the better.
- Italian destroyers got no AA ?
That is not true, while indeed the AA armament is generally sub-par, you need to remember that planes in wt naval are rare and often by themselves. Only really good pilots know how to dodge the AI gunners, and for them you have a time fuze round for your main guns.
- Are the torpedoes weak?
All torpedoes are situational, let’s be honest here. Torpedo usage depends on map, positioning and enemies being blind. As for Italian torpedoes specifically , they are not so bad. They are short range, but go really fast,making them useful in close combat. With torpedo mode installed they have very good range, and are still quite quick. They have an average warhead size, but it’s not an issue most of the time.
- The Italian navy is overall bad, so is there even a point to starting?
In short, it’s not bad, not at all. It is a very fun tech tree that if you know what you are doing will give you good results, just like any other tree. It’s just a navy that is not focused around mindless HE spam in the direction of the enemy.
- I cannot seem to hit anything, is the aiming system bad?
It takes some time to get good aiming. Nobody does well at their first battles. Good aim comes with experience. If someone says he was making 20/1 KD from the first battle and ammo racking left and right.. Well if you choose to believe it it’s on you.
Think of learning how to aim in naval as the same as learning how to use energy to fight in air battles, or learning map knowledge with ground battles. Both essential skills that aren’t obvious at first but become really important if you want to have some degree of success.
Of course, you need a reason to dedicate yourself to grinding a line,I’ll try to provide one for both seasoned and new players.
For seasoned captains who already have grinded out a tree or two, the Italian DDs will probably feel like a nice change of style from the usual HE spam meta of the lower tiers, as their main gimmick is that they have a dedicated APHE round for every single ship in the tree.
This means that while playing them you need to focus more on the engine compartments of enemy DDs, taking time to calculate the lead and the ballistics of your shot, but if you do that you’ll be rewarded with amazing damage.
Of course their HE performance suffers in comparison to others, but that doesn’t mean you shouldn’t use it against other ships, I’ll go into more details later. In general, you can think of them as a complete opposite, at least armament wise, to the Japanese destroyers.
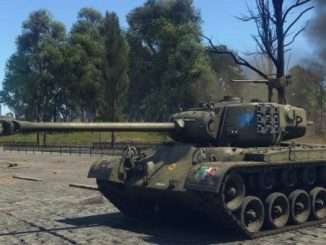
Make sure to watch out for the Impetuoso DD at 4.0, a neat ship with a pair of American 5”/37s, so you know it’s going to be competitive and it should help you get acclimated to the rest of the ships, providing a familiar baseline as you learn their different playstyle.
As for new players, I’d say that they can be a more challenging grind in the beginning, especially if it’s your first true time playing naval, however the reserve tiers are decent enough to let you get a grip on the naval mechanics without being outmatched by other ships.
This in turn, makes them great at teaching you the peculiarities of APHE in naval, which becomes ever more important the further up you go in any tree, so better to start right from the beginning no? (They’re also really pretty ships to look at).
Part 1: APHE
As I mentioned, their main gimmick that makes them different is the fact that they have a dedicated APHE round from the very first ship. This means that, especially against destroyers, they can always access their engine compartments, which in turn allows them to really dish in the damage when hitting those areas.
Now it’s true that there’s other ships from other countries that have SAP ammunition, sometimes with even more filler than the Italian APHE round, however if there’s one thing that it has over the rest of them, (except the French 130mm),is the longer fuse time of 0.025 sec.

This might not seem like much of a difference, however, what it allows you to do is to make the shells travel along the insides of the ship when they are angling much more than with other countries’ cannons. Couple this with the high muzzle velocity and high penetration, especially at close ranges, and you can almost consistently destroy/damage half of the enemy’s engine rooms with a shot straight through the bow, while the decent amount of Tnt filler finishes the job. This means a whole lot of damage on angled targets, which is what you’ll be facing a lot of the time.
And well, that doesn’t mean they don’t work on broadside targets,on the contrary, you have more of an opportunity to damage specific modules.
Part 2: Ammoracks
The main capability of the longer fuse of the APHE round is that it allows you to more consistently destroy the ammoracks of enemy DDs. Sure a bigger explosive filler would help too, but first you need to get the explosion to happen there in the first place.
So the longer fuse time allows your shells to reach deeper into a target before exploding, meaning that that one shell that landed just a bit too short on the side of the Moffett might go from some crew damage to one less annoying ship on the enemy team. (And a salty wallet warrior in some cases).
I used the example of the Moffett because it’s one of the most common DDs you’ll see in a match at the middle tiers, but I’ll go into more detail later about your common enemies. Just know that, especially with these ships, it’s really rewarding to learn the locations of enemy ammo racks and learning to hit them consistently.
Part 3: Surviving in a Match
You can’t do a lot of stuff if you’re dead, so here’s how to avoid that, or at least try to.
First of all, don’t expect to last an entire game with a single ship (it doesn’t mean you can’t) . Destroyer combat is inherently chaotic, especially at War thunder’s normal combat ranges, which means dodging is harder and leading enemies is easier, which is also why the American DDs are so strong despite their lower shell velocity.
The biggest thing you’ll need to learn if it’s your first time naval is that even in destroyers, you can tank some hits, unlike planes or tanks, which are way more prone to being one-shotted.
Of course there’s the occasional ammo death, but they’re more rare than you expect, especially because your ammo is quite decently protected most of the time on italian destroyers .
Instead, more than 90% of the time you’ll die because of losing too much crew, and it’ll be easier for you to die than for your enemies. This is just a matter of fact, usually Italian DDs are smaller, more compact, which in turn brings a smaller crew, which makes it easier to kill you.
So you avoid this by playing smart and hiding in plain sight.
Being smaller also means you stick out less, especially compared to a taller and larger American DD like a Moffett or a Fletcher, but still, how you act and how you observe the enemy is critical to your survival.
One of the most important skills you should learn is to watch the shells through the smoke of your funnel, that’s because the black smoke highlights the shells completely, making it easy to see their trajectory. From there, you need to see if those shells are coming from you, if not, then check other angles, if they are coming from you, don’t expect the enemy to miss and start evasive maneuvers. Remember, even a couple of centimeters matter.
If you notice that the enemy is still firing at you, make sure to distinguish between the green/white and red/orange tracers, these are respectively the tracers for high pen SAP/AP and He/base fuse HE (most of the time at least).
Here I’m being shot at with AP.

Here with HE.

This makes it so you know what might happen in case you are hit, and so you get to plan your damage control and next maneuvers accordingly. I know that this might be getting a bit complicated, so let me give you an example in a hypothetical situation.
For this, let’s take the Coral islands map, the one with the B point at the middle of a ring of small islands and the entire map shaped like one big circle.
Ok now let’s have you spawn on one side of the map and an unknown enemy on the opposite end of the circle. Because of the vegetation and islands in the middle, plus the general chaos that there might be with the other players joining in (they’re being ignored for this example), neither you nor the enemy can understand what ship you are in, however the enemy has spotted you and locked on to you, while you haven’t.
So after a bit he waits for his lead indicator and starts firing.
Meanwhile you on the other end of the circle haven’t moved much, however since you know that there’s a good chance of early game spotting, you’re staying vigilant and checking the sky for tracers coming your way. Suddenly you notice a salvo that’s not moving sideways to you, so you look up through the smoke of your funnel and are able to guess that the salvo is coming in your direction.
In this case, especially when facing more advanced destroyers, the enemy has likely fired at the predicted impact point from his FCS, plus aiming a bit lower due to both of you most likely closing the distance between each other.
If this is the case the best course of action is to turn away from the enemy and start putting some distance between the two of you. A lot of naval players don’t expect this as they’re used to always getting closer, so it throws their aim off balance, giving you valuable time to find them and start shooting back.
As you can see here I aim for 7.30km instead of 7.20 because I am moving away from the enemy (look at how my guns are angled in the bottom left). This means that I need to aim higher to compensate for the motion of my ship.

Don’t forget to use your smoke screens too, since they only come out from behind so you can only use them while retreating.
Most of the time a normal player will lose interest in shooting at a difficult target, thus either leaving you alone or at least giving you enough time to refocus and re-range him to engage them on more equal footing.
This will of course be helped by learning to maneuver your ship well,while still being able to land your shots. It’s too long of an argument to go into detail here, but just remember that it’s the green circle with a T that needs to be aimed at the red FCS arrow, not your crosshairs that you control with the mouse.
Here is a good example, a perfect hit in the engines, look where the green circle is in comparison to my crosshairs, right under the FCS arrow.

In terms of maneuverability the Italian DDs are quite agile, with mostly good acceleration and top speed except one ship, so you should have no big problems with maneuvering around enemy shells. This coupled with the overall generous firing angles, especially when firing backwards, gives you a good basis to always have your maximum firepower ready when facing an enemy.
The longer reload of the guns is actually beneficial to you in this case because it allows you to focus on dodging the enemy shells instead of keeping your guns in target, which only need to be re-aimed once the reload is done.
It also allows you more opportunities to use the shell cam, which can turn handy if the enemy is hiding behind an island of some sorts.

Anyway, back to the example from before, one good thing to focus on is the number of shells coming your way and in what pattern.
Let’s say, six HE shells coming in 3 groups of two? If the ones to the left are closer (assuming both ships are going in the same direction), then it’s a Japanese Destroyer, most likely with the 100mm guns. Instead if the shells are the same but with frontal two pairs are closer, then it could be either a German Z47 or an American 3 turret destroyer, most likely a Gearing or some similar ship.
For example, see how here there’s 5 shells at around equal distances to each other coming towards me?

In this case it wasn’t the enemy I have locked that was shooting me (look in the up right corner of the Pic). Instead it was his Fletcher teammate! That’s because the middle shell is too far apart from the other two groups to be from this German destroyer, meanwhile the pattern lines up much better with a fletcher’s gun layout.
This is just the tip of the iceberg, but it’s a useful bit of knowledge nonetheless.
Once you have engaged an enemy, try to understand if they’ve seen you or not. If they haven’t, go for a shot to the bridge or machinery spaces, then either try hitting their guns if they notice you or keep shooting the engines with AP, of course depending on the target and situation.
A good shot with AP can easily cripple any destroyer.

Notice how I’m not shooting this ship here, that’s because it’s a very low tier ship in a 4.3 game, meaning that it’s most likely to be a bot and thus give me less rewards. In fact a moment later a true player pops up and I start focusing on them.

Overall, having a good sense of how the game develops and where people might go/ how they might act, is crucial to your survival in these more fragile destroyers.
Part 4: Common Enemies
Despite the wide selection of ships available, you’ll often find yourself facing very similar ships at least design wise, which means that while recognizing each ship by its particular name or class would be optimal, there are some characteristics peculiar to each design:
British destroyers: their all forward armament on the lower tiers makes them both more vulnerable to AP, as they tend to stay angled more, as well as harder to hit due to being a smaller target. Nevertheless, they aren’t the scariest ships around, and they’re usually a fair match if you meet one on equal terms.
French destroyers: Good luck finding one of these, but still, they are often forced to show large amounts of broadside due to their bad firing angles, meaning that they’ll rarely be bow in to you. Still, their reload rate is somewhat similar to yours and despite the lower shell density due to using single guns, they’re still big shells. Think about them as more of a glass cannon kind of ship.
Japanese destroyers: immediately recognizable by their rounded hull tips and the flat dome-like turrets, they boast a high rate of fire, but they lack any armor piercing. They should only become a problem if they start spamming you down, so take them out quickly before they start destroying your guns and bridge.
German destroyers: big and bulky destroyers with lots of juicy engine room space for you to shoot repeatedly until they die. They are most recognizable by their boxy design with that big 152mm double gun turret in the front. Don’t be scared by the caliber however, as they lack AP of any kind, apart from the Z47 if I remember correctly, however that one only has 6 128mm guns. So, just like with the Japanese, take them quickly with the massive crew damage from shooting their engine rooms. I’ve also found that their ammoracks under the rear turrets are quite vulnerable, though it depends on the situation. Either way watch out for that 150mm HE.
Soviet destroyers: Honestly I’ve almost never seen someone play any Soviet DD that wasn’t the 5.3 post war stuff. Still you’ll end up seeing them quite a bit, so aim to knock out their turrets, or try to finish the fight immediately with a well placed shot under the rear turret. Otherwise be always wary of these if you know that they are in game, as they are scary even for some early cruisers. If you happen to find a DD that isn’t one of the 5.3s,just go for engine shots and try to avoid getting hit, as they have some nasty 130mm SAP. The same reasoning I mentioned for the 5.3 DDs can be applied to the SKR7 as it has the same rear turret ammo rack.
American destroyers: Overall your most common enemy, you’ll be facing these guys constantly, so let’s start by making a distinction between two “classes” the ones with multiple single gun turrets (ie, the fletcher and ships similar to it), and the ones with the double gun turrets (sumner and of course the damn Moffett).
This one here for example is either a Moffett or a Sumner,both scary DDs.

In general, since these guys have anti-fragmentation armor, HE will be very ineffective against them, so you should use it only on guns and bridges, but at that point you might as well stick to AP, as they have very big engine rooms that often house a majority of their crew. For the single gun (Fletchers) DDs, try your best to kill their mobility, they’ll often need to stay more broadside since they have guns along the entire length of the hull, making it easier to hit specific components. However, their ammo is well protected, so in general you’ll get less ammo kills against them.
Instead, for the double gun turret destroyers, they always have a “shoot here to win” spot right in front of the rear turret. Not under, in front, just a bit, which is easy to access with your AP. These guys are scary as long as they are alive though, so either go for the instant kill, or focus on their engines too, just remember to hit different sections to kill the entire crew.
Since their turrets are so big you can disable most of them in one salvo if you aim it right, however I’ve found that they usually repair the damage too quickly for this to be useful. Another tip I have against them is that at close ranges or at really long ranges when shells start coming down at steeper angles, their frontal ammorack becomes available. It’s a difficult shot, but very fun to pull off.
Part 5: Game Strategy and Dealing with Uptiers
(Including a review of the 4.3 br lineup)
Alright I feel like I’ve yapped enough, so let’s try to imagine what actually happens in a game, using this 4.3 BR lineup:
- Corazziere
- Da Verrazzano
- Leone
Before going into the tactics I use in a game, I’ll first shortly cover each ship individually, starting with my favorite one, the Corazziere.

Now, armament wise it’s nothing to write home about, 5 120mm guns with good APHE and decent firing angles, while the HE is a bit underpowered. What this boat shines in however is mobility, with a respectable 70 kph max speed and a really good agility. This makes it great at avoiding the enemy shells and at doing strategic pushes when the time calls, the solid torpedo armament with the twin triple launchers (and decent upgraded torpedo speed as well), makes it good at covering busy lanes or catching the random ship off guard.
Of course out of the three of them it’s the most fragile one, but this is made up by its great agility which allows you to avoid more shells.
Now, moving on to Verrazzano, well this one is a bit of an outlier, it’s very slow, I’m not sure if intentionally or not, but in any case that makes you more of a weapons platform rather than a full on destroyer. Still, the 6 120mm guns make you a very strong platform in the right circumstances and if you apply what I told you earlier I’m sure you will be fine. I’d say prioritize fast firing ships before anything else.

Finally we have the Leone, which is itself an odd ship, being basically an evolution of the reserve turbine class. Still, don’t let her looks fool you, she packs a punch with her 8 guns and despite the gun angles being somewhat strange, she’s agile and fast enough to avoid that becoming a problem most of the time, letting the 8 APHE shells do the talking for her. Of course the reload isn’t the best and the torps are few and not very good, but still her salvo weight and damage potential, along with rather large size, makes her great at being played aggressively, making pushes even with the very real risk of dying.

So, with all the three ships covered, here’s how I would act in a match:
First spawn I usually go with the Verrazzano, its lower speed means that it would be less beneficial to bring it out later in the match as there might be a need to push towards a cap to avoid a loss.
Instead, by spawning it first, while I do gradually advance towards the caps, I still let the rest of the team overtake me, thus drawing attention away from me and allowing me to fire at the enemy undisturbed.
(Notice how I immediately aim for the most dangerous ship I can see)

From here on it varies greatly depending on what happens in a match.
If my team manages to capture a point, I then go to reposition and try to find a suitable area to move to to help defend the point and flank the enemy. The slow speed but high firepower makes it great at this kind of defensive playstyle, or even at supporting a push.
(Me and these 2 other friendlies for example are moving together towards the B cap, notice how there’s a stream of red HE shells coming at me visible through my exhaust smoke)

If I do end up dying, I go and make a choice between Corazziere and Leone.
If it’s in the middle of the battle that I died, with the enemy pushing en masse to capture a point for example, then I usually go with Leone, As her extra firepower comes in handy and her decent speed allows me to limit the tickets lots to the enemy players. If instead I died for some other reason, or the point I was defending is being captured by an enemy and the game is almost over, then I go with Corazziere, her high speed being essential in reaching the cap in time to try and secure the win.
Overall the choice between the two is very split, with just a few situations where one is better than the other so I’ll leave it up to you, I just recommend that you always take out Verrazzano first, then each one depending on how the game progresses.
As for taking out cruisers, or at least dealing with them, let me tell you something first. If an Atlanta catches you, you’re dead. No chance, none, nada, zero. Now if you do catch them distracted, that’s another story.
In general, the AP makes it great for at least damaging cruisers. Sure He spam works, until it doesn’t and you can’t do anything against them. With AP you can always hit them and damage them. Most importantly you can take out a lot of their turrets, for example the weakly armored ones on the American heavy cruisers,or English, Japanese ecc…
(Here I manage to heavily damage and disable a Koln class cruiser, one of the ones you’ll see most commonly)


(Higher tier cruisers are tougher targets of course, but you can still hurt them)

The only cruisers with turrets you can’t really destroy are probably the Trento/Bolzano, but in that case you have enough pen to access their engine compartments,just like with the rest of the early cruisers.
So in general you’ll have enough pen to hit enemy cruisers where it hurts, just that the damage might not be the best due to your “relatively” smaller guns. Using the torpedoes is difficult, but they work well.
In uptiers you should also watch out for post war destroyers, most notably the Mitcsher class and Blagorodnyh class, as they have really fast firing accurate guns which can overwhelm you quickly, while also being rather hard to kill.
So in general in full uptiers try to stay more in the backlines, while still trying to exploit moments of opportunity when possible.
Part 6: Enduring Confrontation
Bringing these ships in enduring confrontation can work, however remember that the minimum br of entry is 4.3 and in general you shouldn’t enter in EC without at least a cruiser of some sort in my opinion.
In general however you’ll always be fighting at a disadvantage in terms of br, and there are some better options for a destroyer-like gameplay (Most importantly the Attilio Regolo, expect a guide coming for it too, it’s my second favorite ship duh).
That’s not to say that you don’t have any advantages however. Most importantly, the good ballistics of your guns, which synergize perfectly with the longer ranged combat of EC and your AP is heavy enough to maintain some decent pen even at longer ranges.
Posting this again to let you double check for the longer ranges:

Part 7: Conclusion
We’re here! If you reached this point let me first of all thank you for taking the time to read all of this and I hope it was a worthwhile read. I only have a few last things to say.
Personally, I wouldn’t recommend a premium ship. While the options are great, I feel like, especially if you are a new player, you need time to learn how naval works, just like with any other mode. Starting from the much easier lower tiers and taking your time to reach the top is what’s needed to really make you good at naval,especially because of how many new things you might have to learn if you started out like that.
Of course I have nothing against speeding up the grind for the higher tiers, we all know how long that takes for ANY mode, but still I recommend that you first learn the ropes in the lower tiers, then consider getting a premium only when you reach the same br of that ship, even when you want to grab something like the Pola.
Also, do remember to bring a destroyer for higher tier games, especially for certain maps where cruiser play is chaotic and it’s tough to make progress.
No map illustrates this better than African Gulf, here’s for example my 5.7 lineup:

Still, even if you don’t end up liking destroyer gameplay, it’s the basis for all the tactics you will use on bigger ships, even after armor gets involved, for example this might look just like a normal end-of game spawn with the Zara (I got a guide for her too), but try to notice what I mentioned throughout the guide and you’ll see that there won’t be too many differences.

That’s all!


Be the first to comment