
Destiny 2 Guides:
- Beginners Guide 2019.
- Returning to the Game? Start Here!
- Moon Lost Sectors Locations Guide.
- Moon Region Chests Locations Guide.
- All Essence Locations (Lectern Guide).
- How to Acquire: Outbreak Perfected Exotic Pulse Rifle.
- How to Acquire: Truth Exotic Rocket Launcher.
- How to Acquire: Lumina Exotic Hand Cannon.
- How to Acquire: Year 2 Pinnacle Weapons.
- How to Get the Wish-Ender Exotic.
- Codes to Redeem (2019).
- Crucible Map Callouts.
This guide will be going over each encounter and how to get passed each encounter, this will be a generic guide so not class specific.
The First Encounter: Necropolis
The first encounter is pretty straight forward, find the 3 towers, defeat the guard to gain entry and eliminate the threat within.
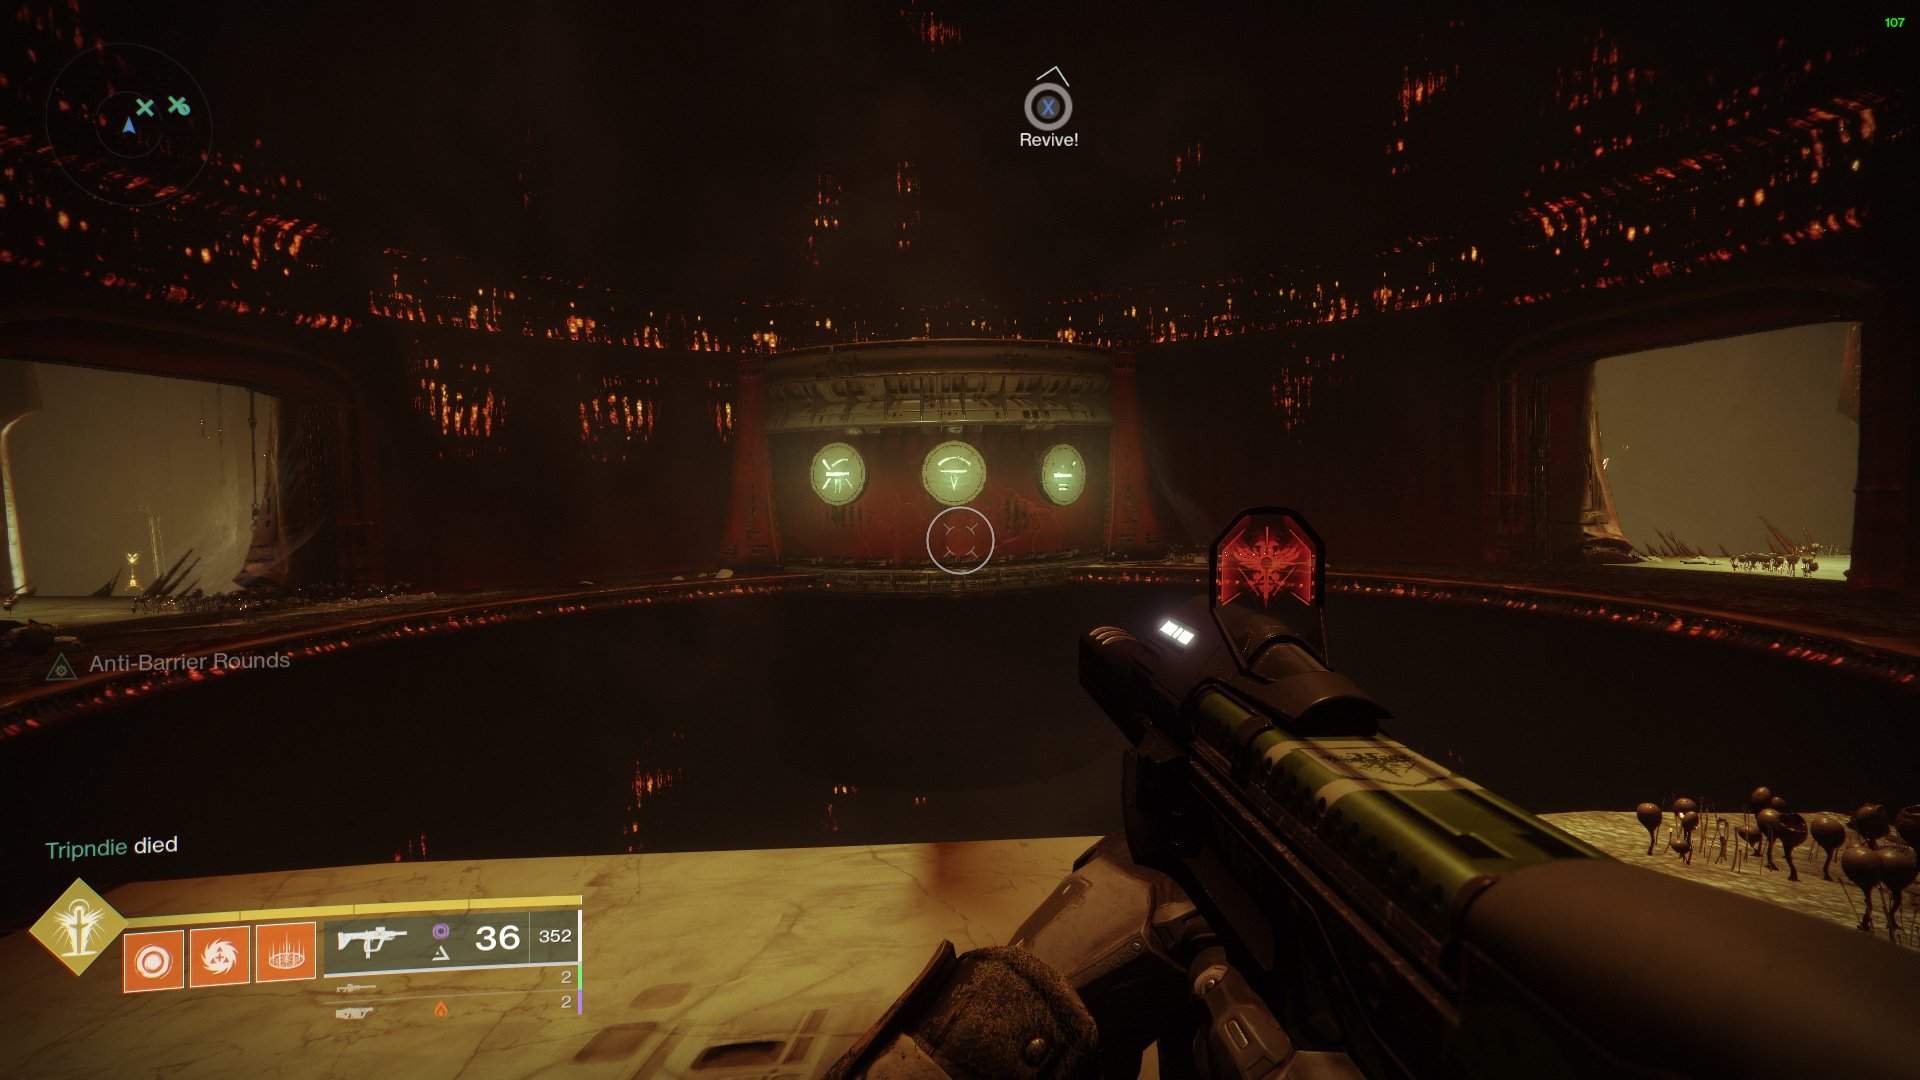
Scattered around Necropolis are towers with a large Hive Knight. It also includes the 3 icons you will need to locate around the map. Kill the Knight and you will receive a Hive Relic Sword, you’ll need this sword to defeat the 3 mini-bosses.
- Mouse 1 to damage the Hive Knight mini-boss
- Mouse 2 to damage the Hive Wizard mini-boss
- Block (Might want to check your settings, should be “C”) to damage the Hive Shrieker
Once all three enemies are killed make your way to the bottom center of Necropolis where a beam of green soulfire is coming from. Defeat the guard and make your way to the next area.
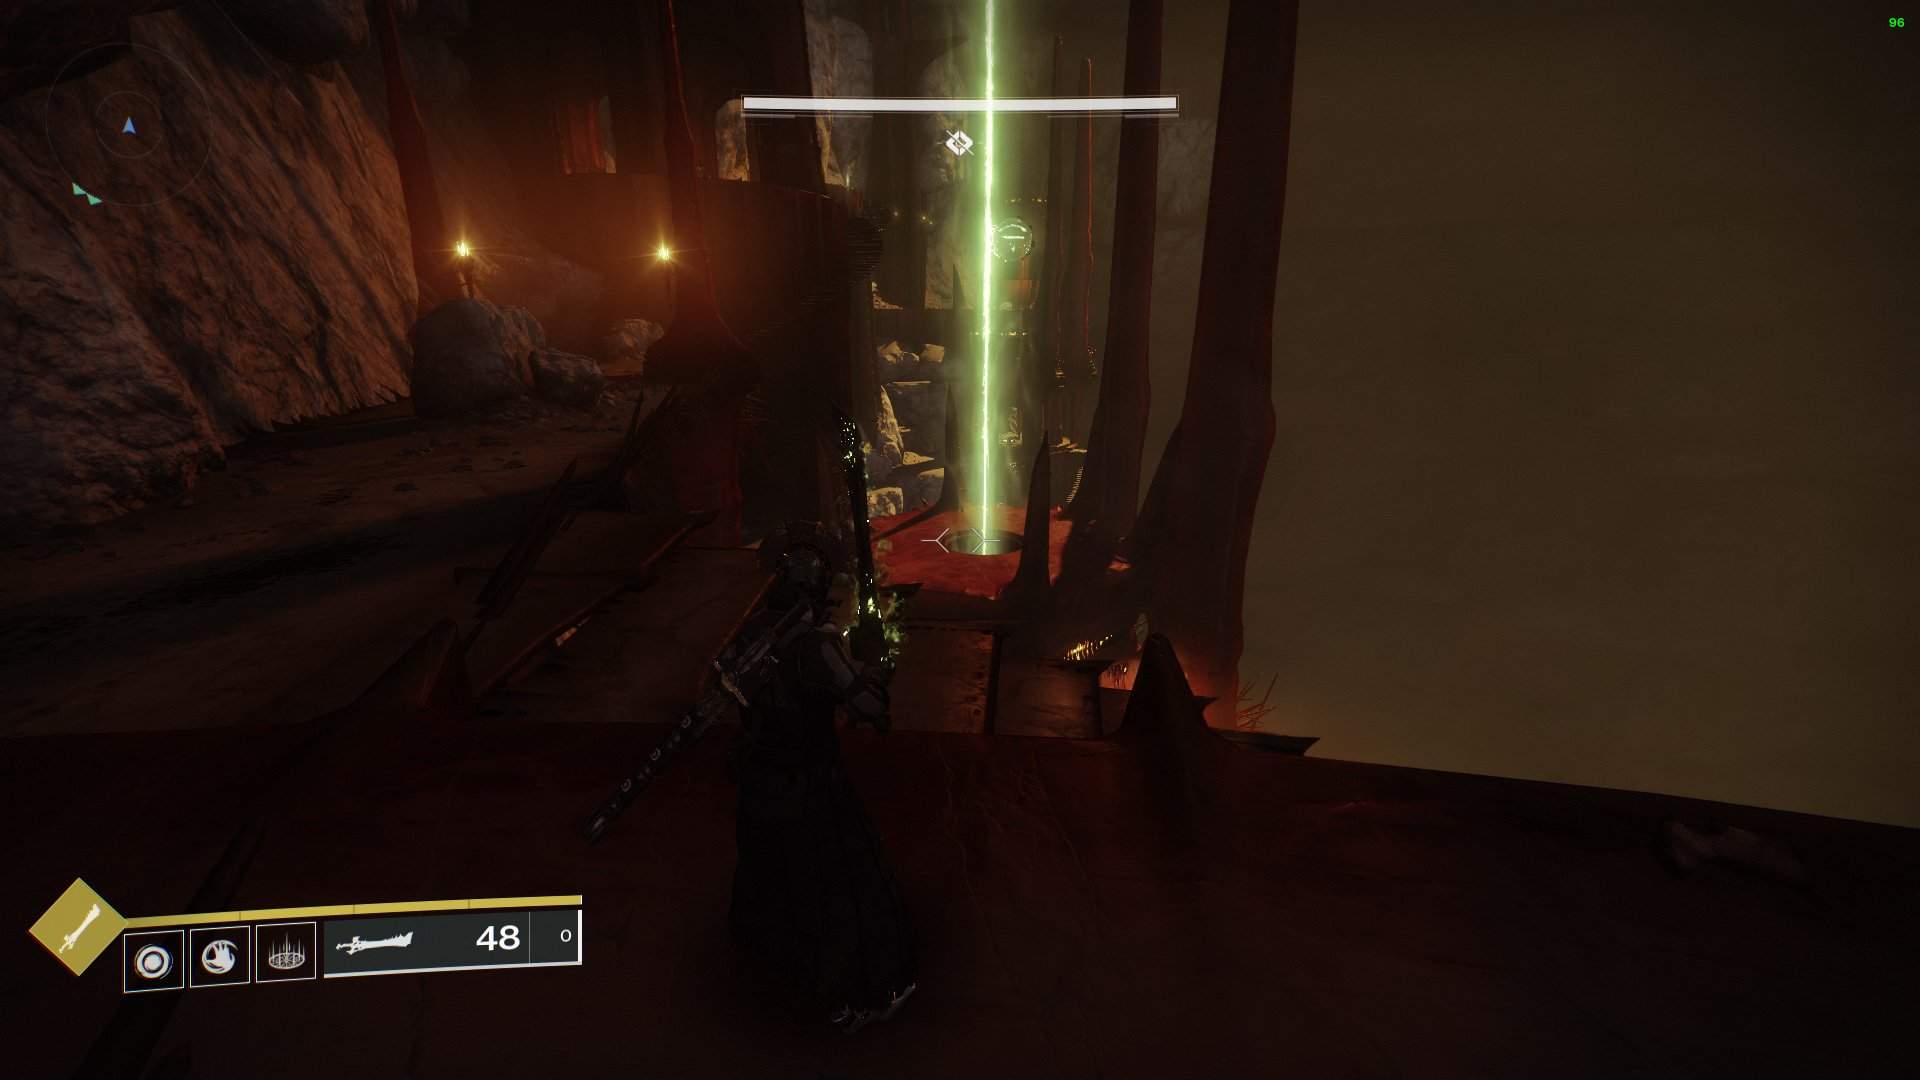
To actually get to the next area you will need jump down to a spot once you see a wall of doors. it’s down and to the right at the end of the bridge. From here follow the path and drop down into the next area.
The Second Encounter: Tunnels Of Despair
The second encounter is really, really, easy if you know where to go, so here is a map.
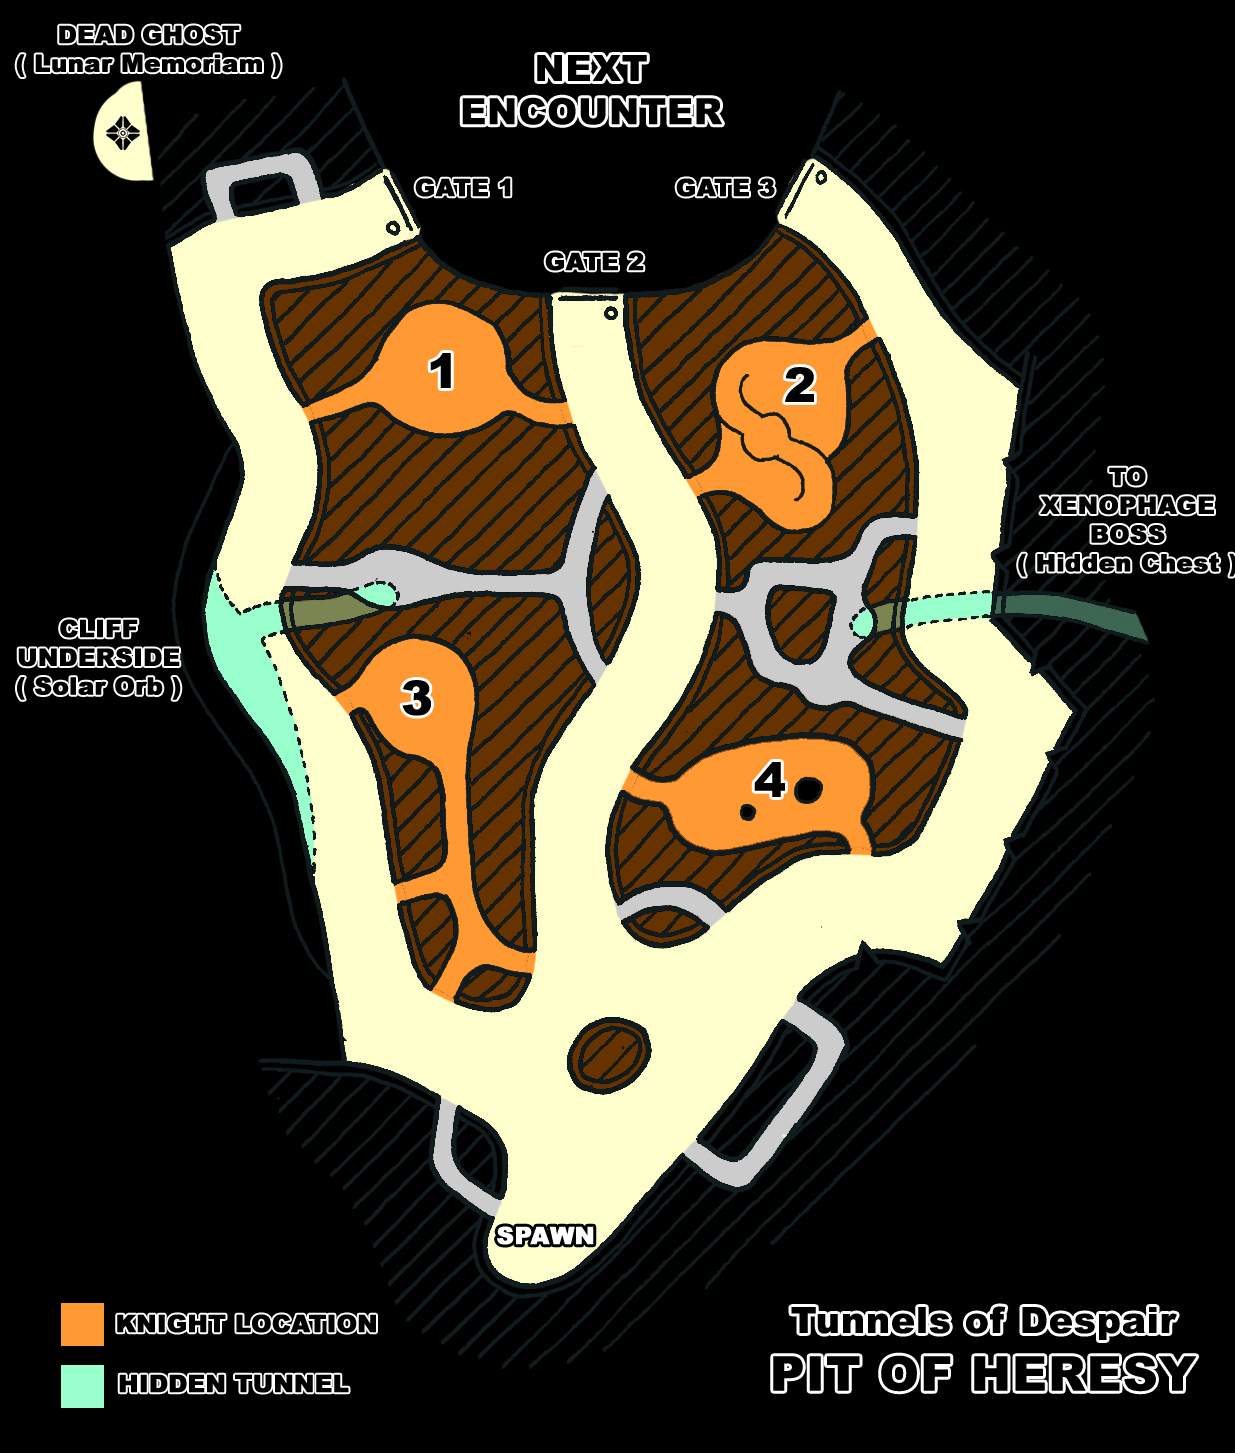
When you enter the Knight Tunnels it is best to take them out from a far. They pack a punch. Once defeated, these Knights will spawn a void ball. You will need to place them in 3 containers. Find the containers near each gate and dunk the ball.
I would suggest taking the Ball from 3 and placing it in the 1st slot. Then taking the Ball from 1 and putting it in the 2nd slot, and finally, putting the Ball from 2 and putting the 3rd slot. Personally it is just faster to do it this way.
Avoid the Ogres or just run past them, they aren’t so bad if you have a team, but standing still, (While still in the tunnels) they will leave you alone. If you are alone I would suggest retracing your steps and drawing them away.
The Third Encounter: Chamber Of Suffering
This encounter is easily the hardest. For soloing there are many builds you will need to survive endless shooting but if you are in a group it’s still somewhat hard.
In the center of the room there is an Annihilator Totem. You will need to stand on this to ensure it does not wipe your team, you can stand step off of the plate but only until the Totem glows red, you’ll have about 5 seconds to get back on it.
Behind the Totem there are going to be 6 Hive markings, these markings don’t mean anything besides how many void balls you will need to dunk at the container which is next to it.
Very Important: Curse Of Suffering This de-buff will slow your regeneration speed of your health, to reduce your de-buff back to “x1” you will need to dunk a void ball.
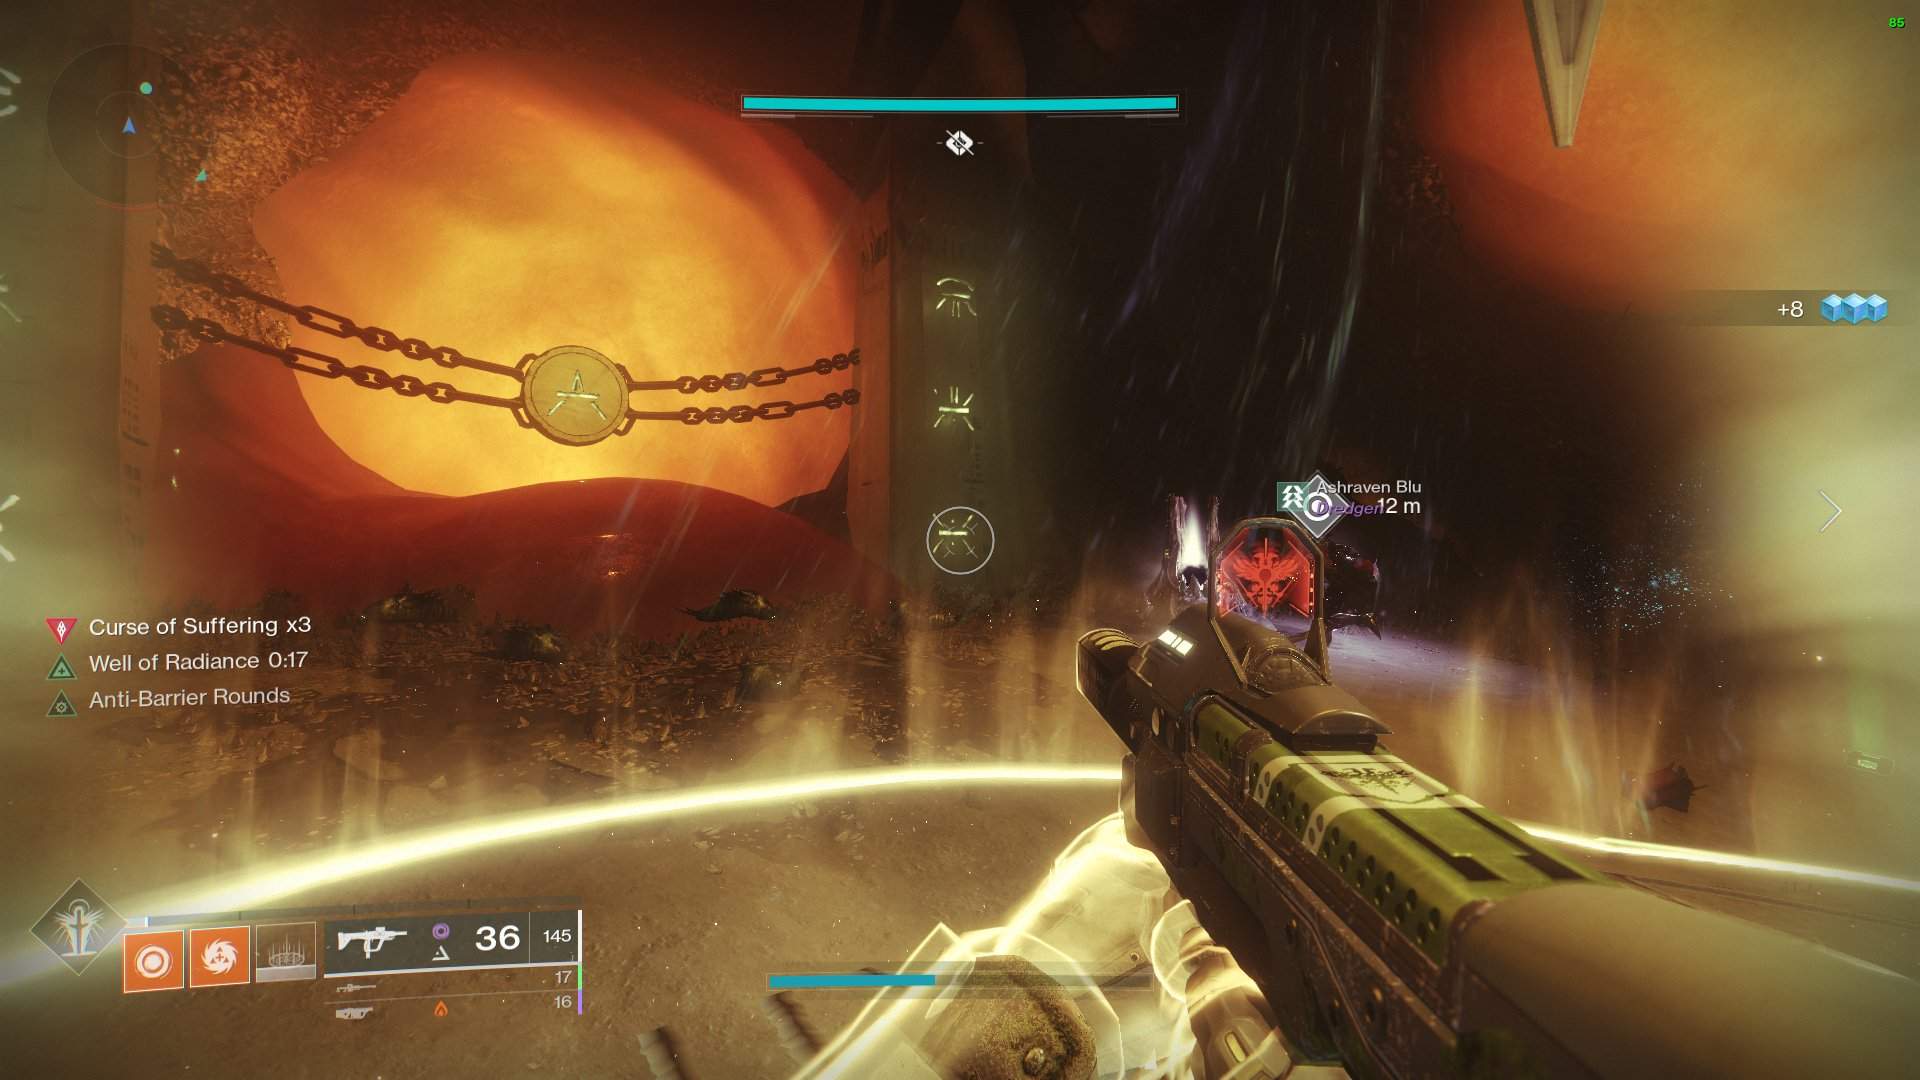
Defeat Hive Knights to obtain the void balls and dunk them in the container. Once you dunk a ball, 2 Hive Boomer Knights will spawn on 2 platforms above you. They are easy to kill but they need to be dealt with as soon as possible. They can easily wipe your team.
Continue dunking until all the symbols are gone and you’re done. Collect your look from the chest and shoot the Hive sludge ball to reveal the next area. Jump down (Try not to die) and you’ll be at the 4th encounter!
The Fourth Encounter: The Harrow
So close but so far! This is a tedious jumping puzzle which I personal despise as it ruined my Solo Flawless Blink only challenge but anyways. Here is a map of the encounter.
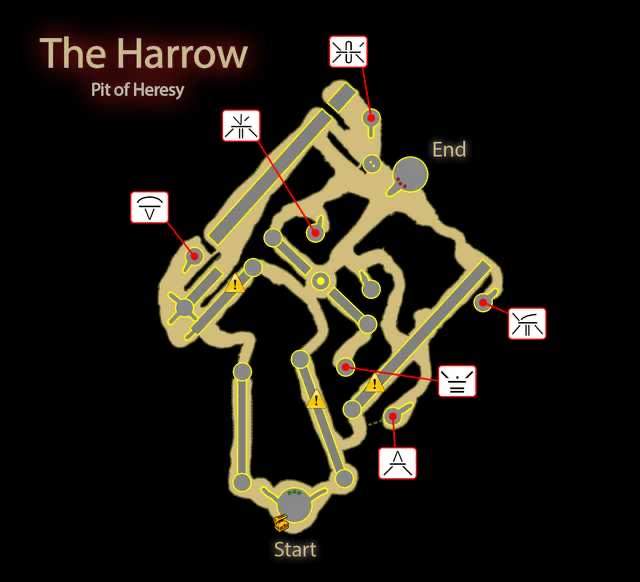
There will be 3 Hive Symbols are the start of the encounter, find the Hive Wizards at each spot and kill them. Avoid the swinging death lanterns and spinning death logs as well. For the Hive Wizards they are not the special Hive Wizards that can only be defeated with the Hive Sword Relic.
Note: They won’t be the same symbols each time.
From here go the the exit which is on the top center of the map and make your way to the final boss room.
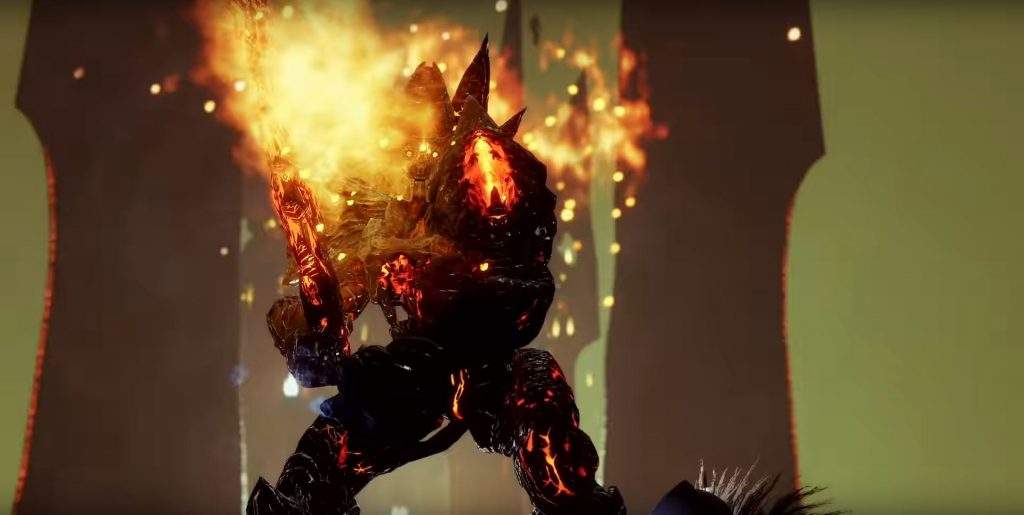
The Fifth Encounter: Cradle of Damnation
This boss fight is really simple as well, it just uses all the previous elements of the Dungeon and piles them into one fight.
There are 3 sub-towers around the main tower where the boss is standing. Each contains a mini-boss.
- The Hive Shrieker is at the top
- The Hive Knight is on the left
- The Hive Wizard is on the right
There are 3 initial Hive Knights that you can kill to get the Hive Sword Relic, kill one and eliminate the mini-bosses. (I would start with the Hive Shrieker, then the Knight, then the Wizard)
When slain, these bosses will drop a void ball like the Heretical Knights in the Tunnels Of Despair. Take the void ball and dunk it in one of the 3 containers surrounding the boss.

Repeat until the 3rd ball is dunked and immediately run to the opposite side of the giant crystal from the boss. His sword and fire can one shot you. From here you can damage him but be weary of the exploding thrall that spawn in.
If you do not one-phase the boss you will need to leave the circle of green soulfire to avoid being killed. You will know when to leave when he slams his sword into the ground. Once this happens and the boss is no longer damageable you will need to kill the 3 mini-bosses over again and start another damage phase.
Other than that once you kill the boss the dungeon is over. Congrats!


Be the first to comment