
This guide explains a lot of the nuances in Everspace 2 that never made it into the manual and will hopefully remove a bit of frustration so you understand what / when to do things.
This will only get you through the first part to when you jump into Union. From there in you’re on your own.
Introduction
This is a beginner guide for Everspace 2 and it’s intended to help you with the early part of the game, explain some things, clarify what is important / not and generally make the early part of the game more enjoyable so you’re not frustrated trying to learn so many things at once.
IMO, the most important thing is to modify your controls and that is the very first section of this guide. With just a few changes to the default mapping, I believe this will help you a great deal both in how the ship handles as well as giving you an edge in battles that is turned off by default.
This is a great game that rewards exploration and thinking. It rewards you a lot for taking time to fly around and look for resources / loot boxes / puzzles that will may contain even greater rewards. The bonus is that this game looks absolutely brilliant and you’ll be taking a lot of pictures of the fabulous sights along the way!
But you’ll be hounded by those pesky outlaws that will attack you on sight! So you need to be ready to fight as well as explore and solve puzzles.
This guide should give you a solid foundation and prepare you for when you jump out of the beginner system.
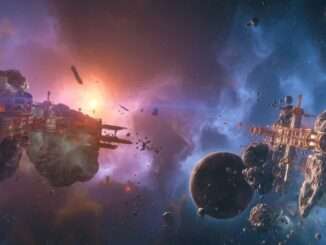
One of the first pictures I took while in the beginner system. Something to look forward to!
How to Use This Guide
This guide is really meant to be read through beginning to end to introduce you to all the things in the game and then you can periodically come back to it when needed.
However, it kind of depends on when you are reading this guide:
- Have you finished the tutorial and are at the base with Dax? Then proceed normally
- Are you reading this guide because you are having difficulty with the tutorial mission and have not reached the secret base with Dax? Then I suggest you set difficulty to EASY and read the CONTROL section of this guide. (you can change difficulty at any time and change it back) and then hopefully make it to the base.
I found that as I played I was constantly going “WTF is this” and having to stop playing and go research something so I knew what this was. My hope is this guide removes a lot of these for you and when you do encounter them, you may not recall it specifically, but you may remember enough to continue and progress without having to pause the game.
Controls
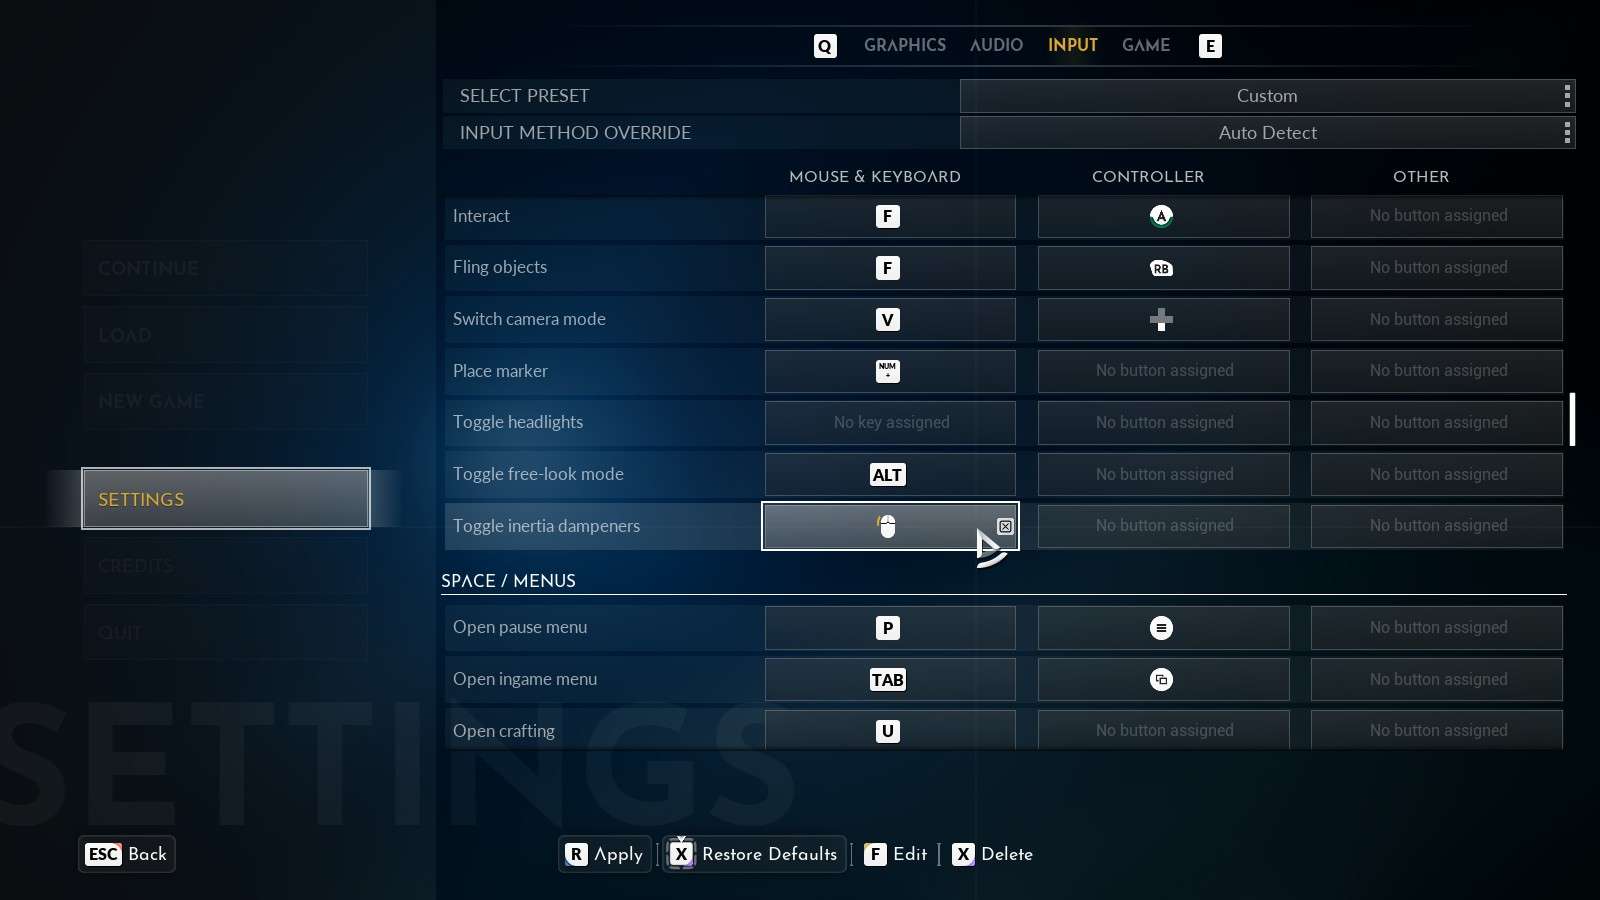
This is for mouse / keyboard. You can use something else but for m/k you want:
- Reduce your mouse sensitivity so you’re not jerking all over. The ships are incredibly twitchy and this will help a great deal while you learn the handling. Later you can increase it.
- Swap the C and LEFT CNTRL keys with Strafe down and Hyperspace Jump. You’ll use the C key all the time when in tight quarters and maneuvering – strafing down is imperative to have literally at your fingertips. You use the Jump key like every 20-30 minutes, so it can be the CNTRL key.
- Enable Energy Dampeners (not mapped by default) and map it to your Mouse 4 key. These are like regenerative brakes and don’t let you continue to coast. In open space battles you want these turned off. When not in battle, or attacking a base, you want them turned on for better maneuverability. So map it.
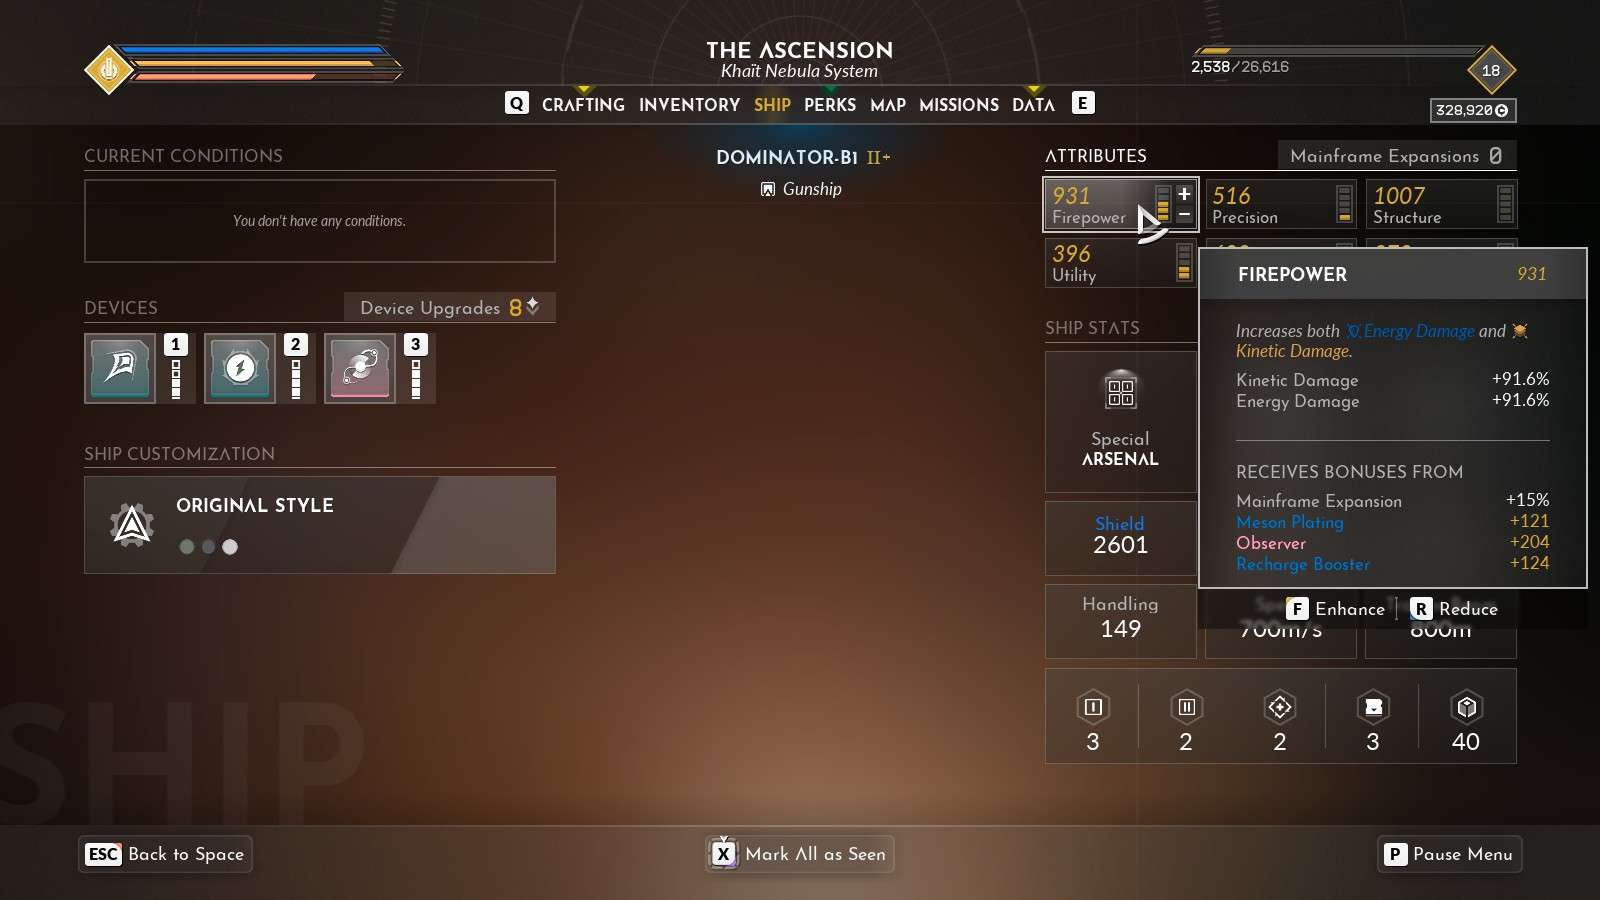
Setting Up Your Ship
Press the Tab key!
Your ship has a lof of slots! Soon these will be all filled and you should periodically review the level of everything to make sure it is within -2 of your existing level. Anything that is 3 or more levels behind your current level will be weak and you want to either look for an improvement, swap to a newer weapon / component.
Devices are super important and will help you a great deal in battles. Devices are mapped to your #1 and #2 key. These are ONLY visible when on the SHIP tab.
Consumables are things you can use to supplement your ship and are immediately used and removed from inventory once activated. These are assigned to your #5, #6, #7 & #8 keys. These are visible when in the INVENTORY tab. (The starting ship has 4 slots, the ship I”m flying in this screenshot, gunship, only has 2).
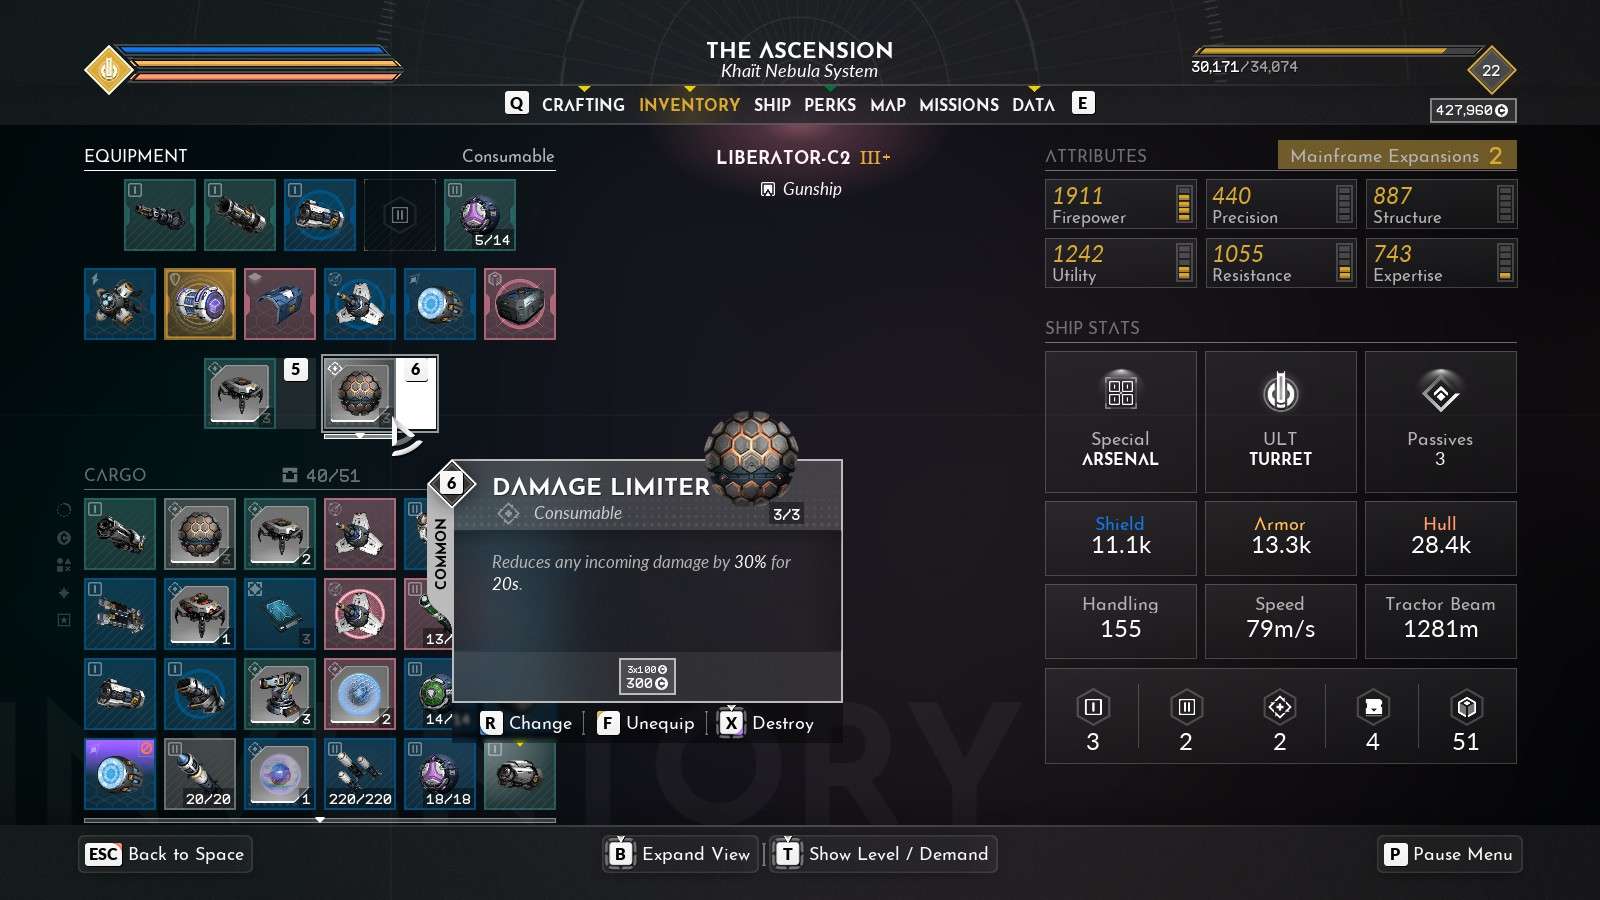
I would suggest that consumables that reduce damage are more advantageous than things that give more damage.
Important: While you can swap out consumables during battle, there is a 25 second countdown timer that will occur before you can use the new consumable.
The Map
You can access the map by pressing M or click on the MAP tab once you’ve pressed TAB
The Map shows the local area and will show many things (eventually – the game at the beginning has limited sensors and as these are upgraded and you venture out, more will be exposed).
Move around the map by pressing and holding the LEFT mouse button. You can zoom in / out with the mouse wheel.
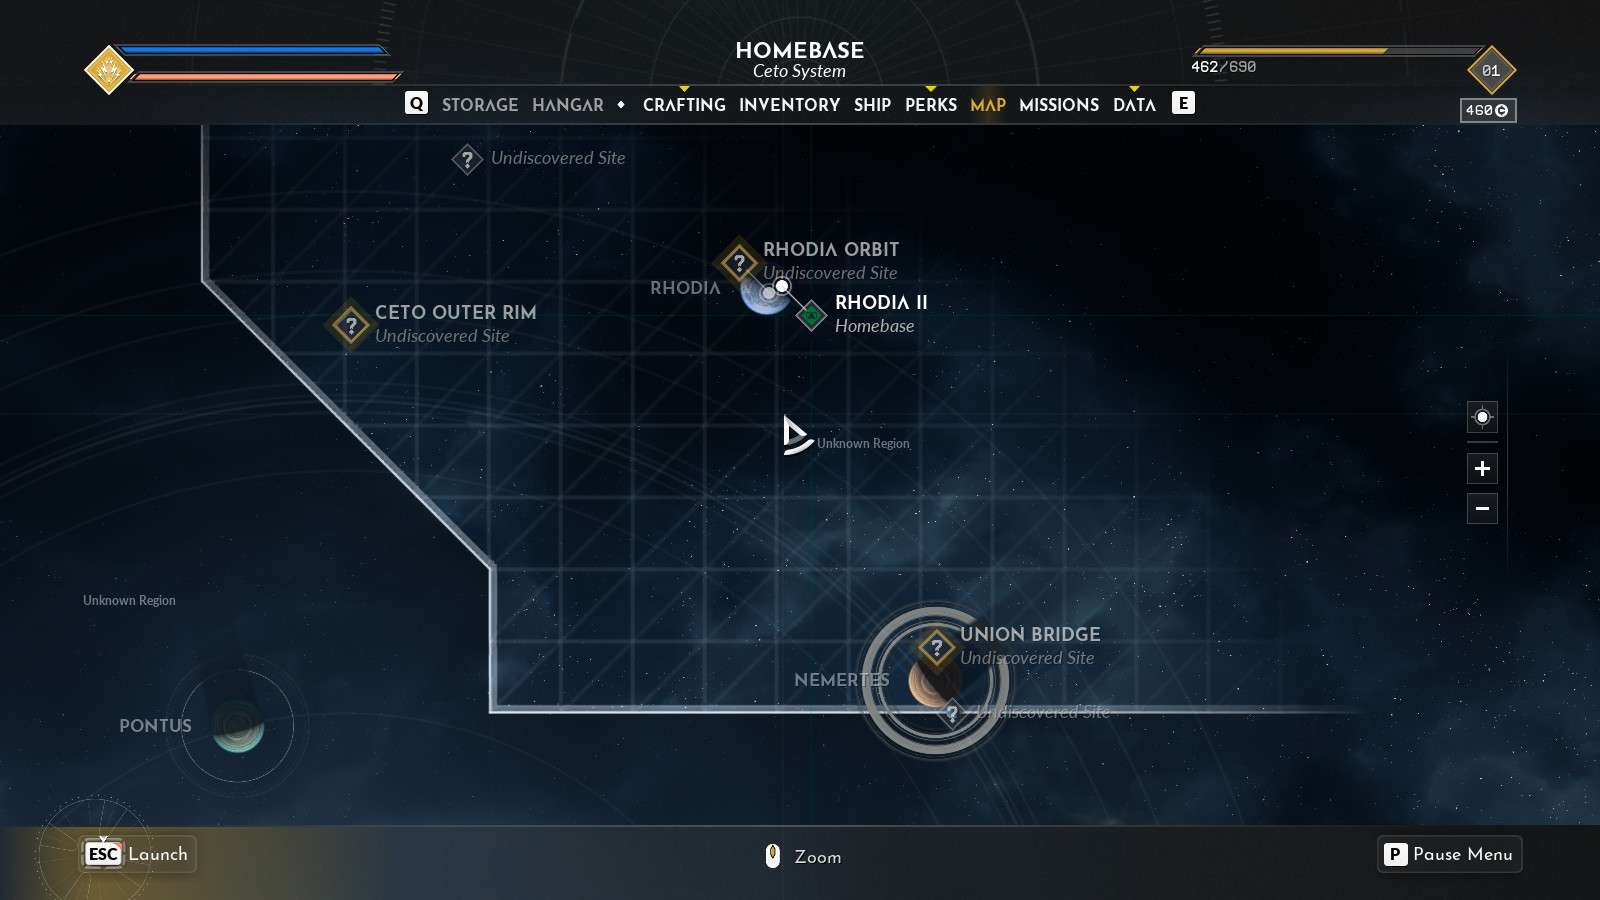
You have to go to places on the map to discover what is there! The map will not disclose location information (shops / missions / challenges) until you have visited that location.
The Map is imperative to use to create waypoint markers. When in the Map, you can mouse over any location and press F to create a special icon around the planet / location. This icon is visible at all times and allows you to navigate to it during Jumps.
In the planet view, planets will have a diamond marker.
- If a checkmark exists, you have discovered everything in the system.
- If it is blue you have marked this on the mission tab
- If it has a blue diamond next to it, this planet is part of a mission. If you mouse over it, it will show the mission tied to it.
While a map may look like this later in the game:
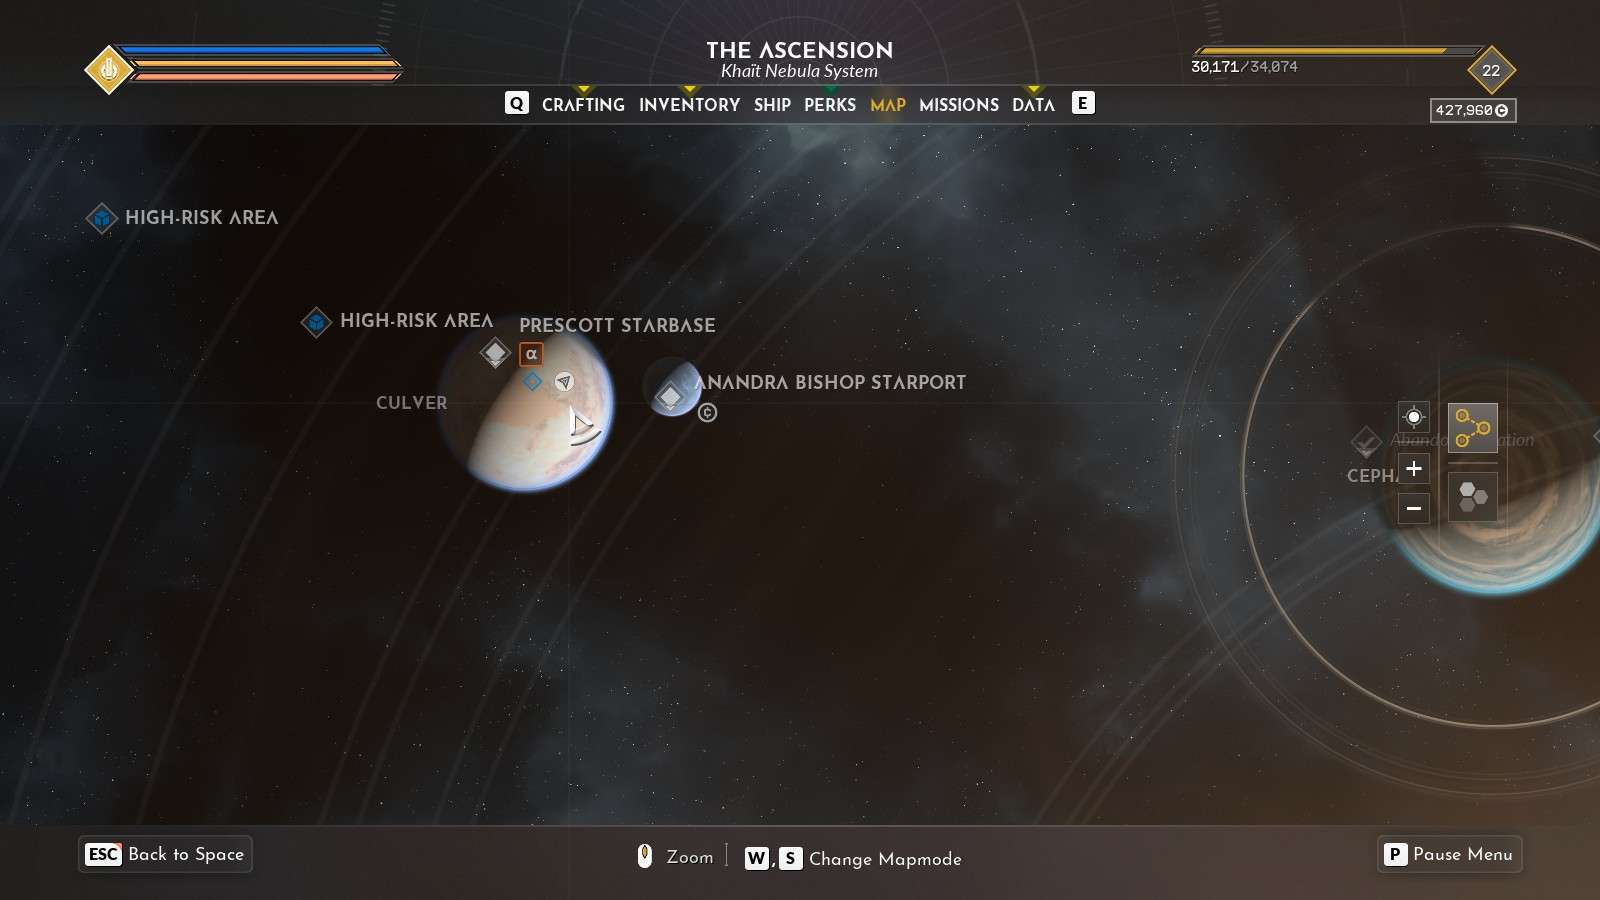
You can visit any area you want. Please read the navigation section for how to navigate to any point on the map!
This is probably the most confusing thing about Everspace 2 to the beginner pilot.
BOOST (press and HOLD the LEFT SHIFT key) will give you a temporary boost in speed. The LEFT side of your reticle shows you the meter and once it’s empty, you can quit pressing it and let it recharge.
Special Note: Some shields only regenerate if you are boosting. Check the definition on your shields!
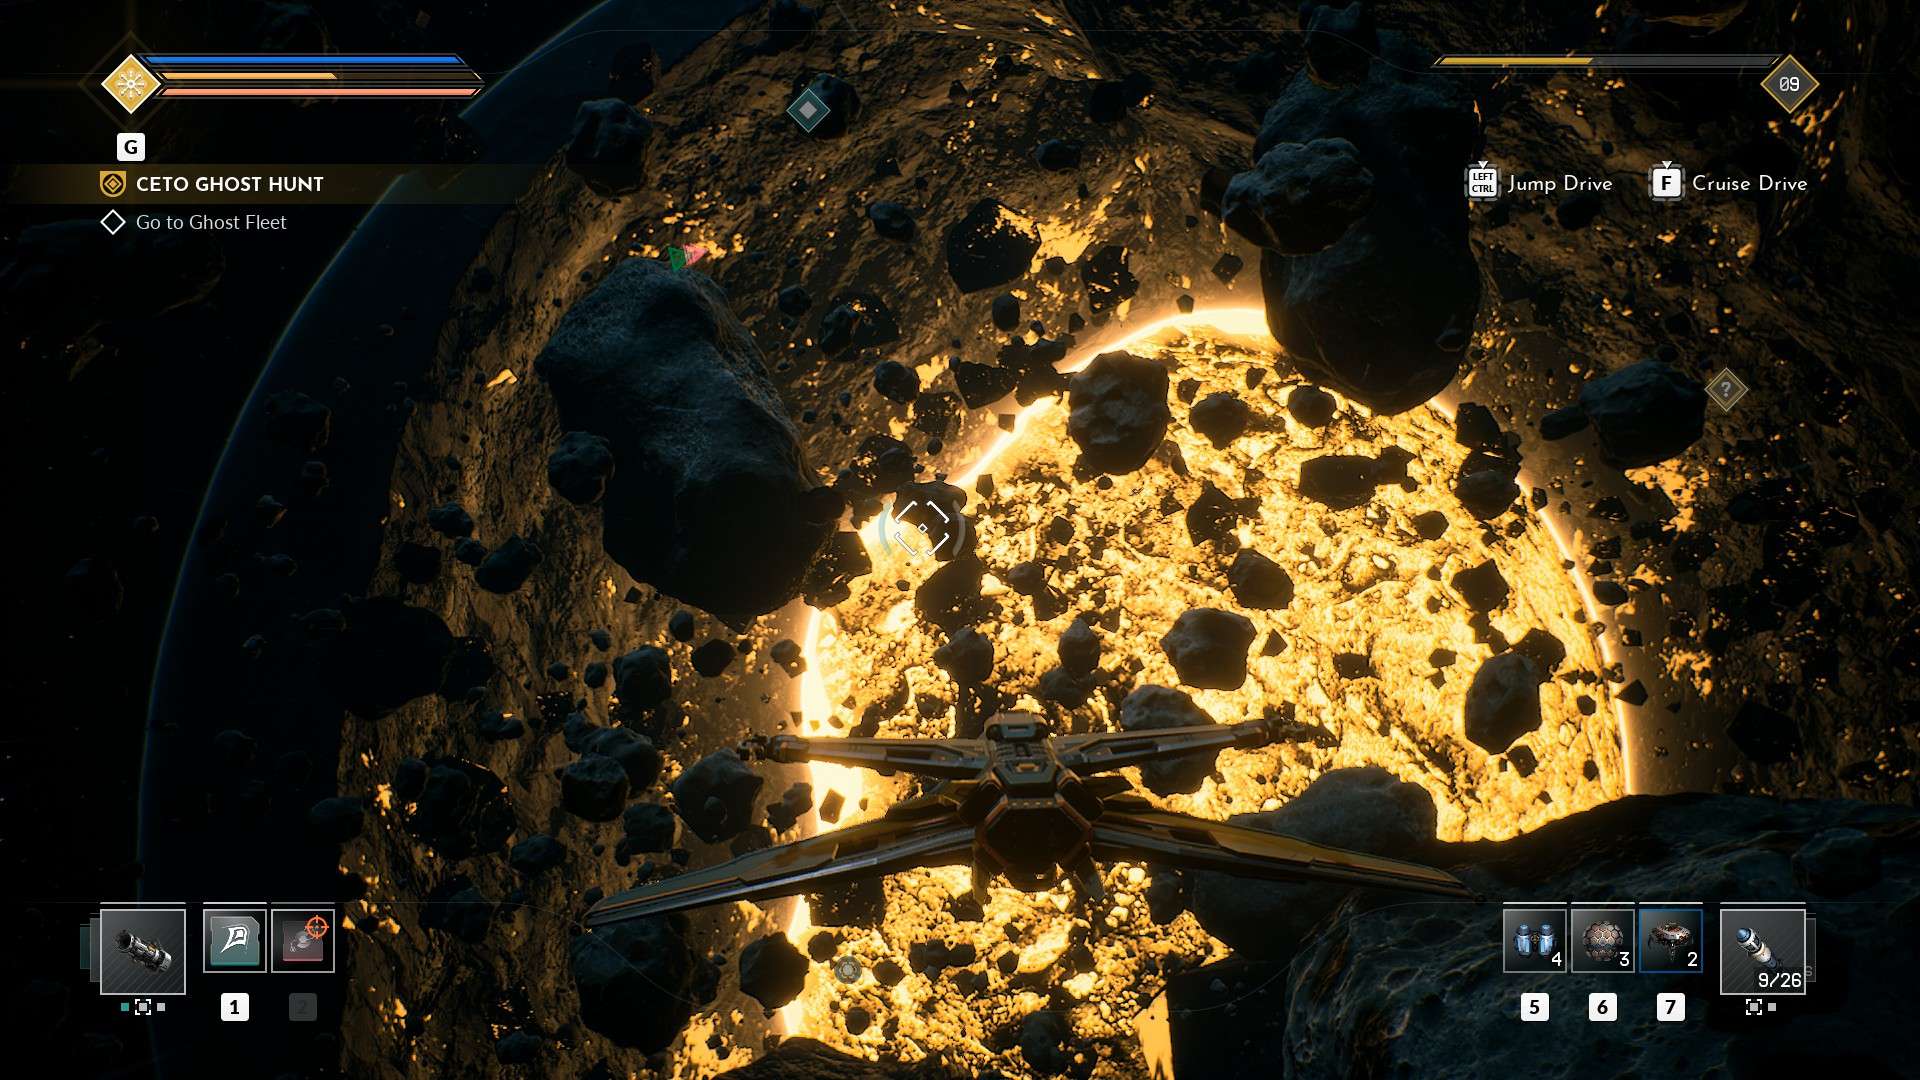
CRUISE (press and HOLD the “F” key and watch the circle in the middle of your HUD fill up ) will give you significant speed when travelling IN THE SYTEM YOU ARE IN,and it will give you sustained speed, with very little maneuverability, to get from where you are to where you want to go. It will automatically disengage if you are close to something big.
Note: Cruise will NOT work in battle or if there are enemies nearby.
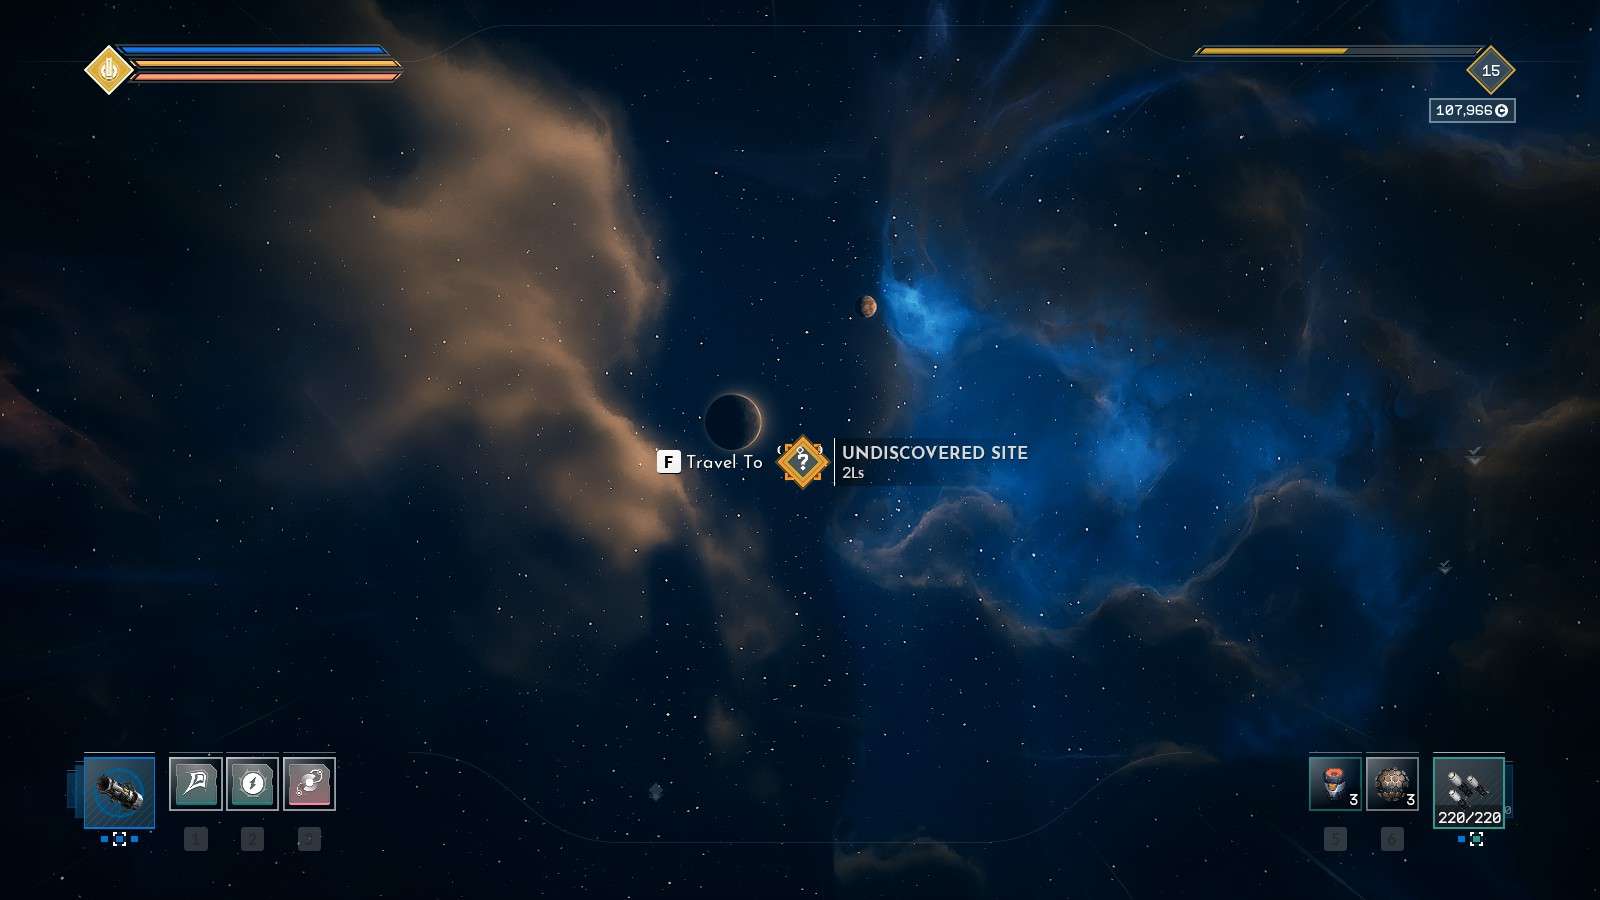
HYPERSPACE JUMP (press and hold the CNTRL KEY (provided you’ve remapped it from C as mentioned in the controls) and this will jump you “out” of the system you are in and into space where you can select where you want to go by pressing the F key while the reticle is over the target – you will get a prompt to press F.
Important: Do not under any circumstances press the f key to get out of auto pilot or you will skip by your destination. the only way to get to your destination is to be locked into the destination. ignore the planets / suns / asteroids and just let the ship auto-navigate. it will get you there.
Note: You can aim wherever you want to get into hyperspace. While you can aim at a location symbol while enabling, it just orients you better and is not required.
While in Hyperspace, you can put it on auto-pilot with the F key. While you are travelling, it is common for other events to pop up (Unknown signal and Distress Call) and you can press F to disengage and re-orient yourself to the event and press F again to get the new event.
Exploring
This is probably my favorite part of Everspace 2.
This is such a cool game with so many unique areas that I just get lost investigating every nook and cranny.
It doesn’t matter what kind of mission you are doing, or if you’re just doing a dynamic event: Once the mission / event is over, the area typically has a lot more resources, containers and puzzles to solve and they are not always evident.
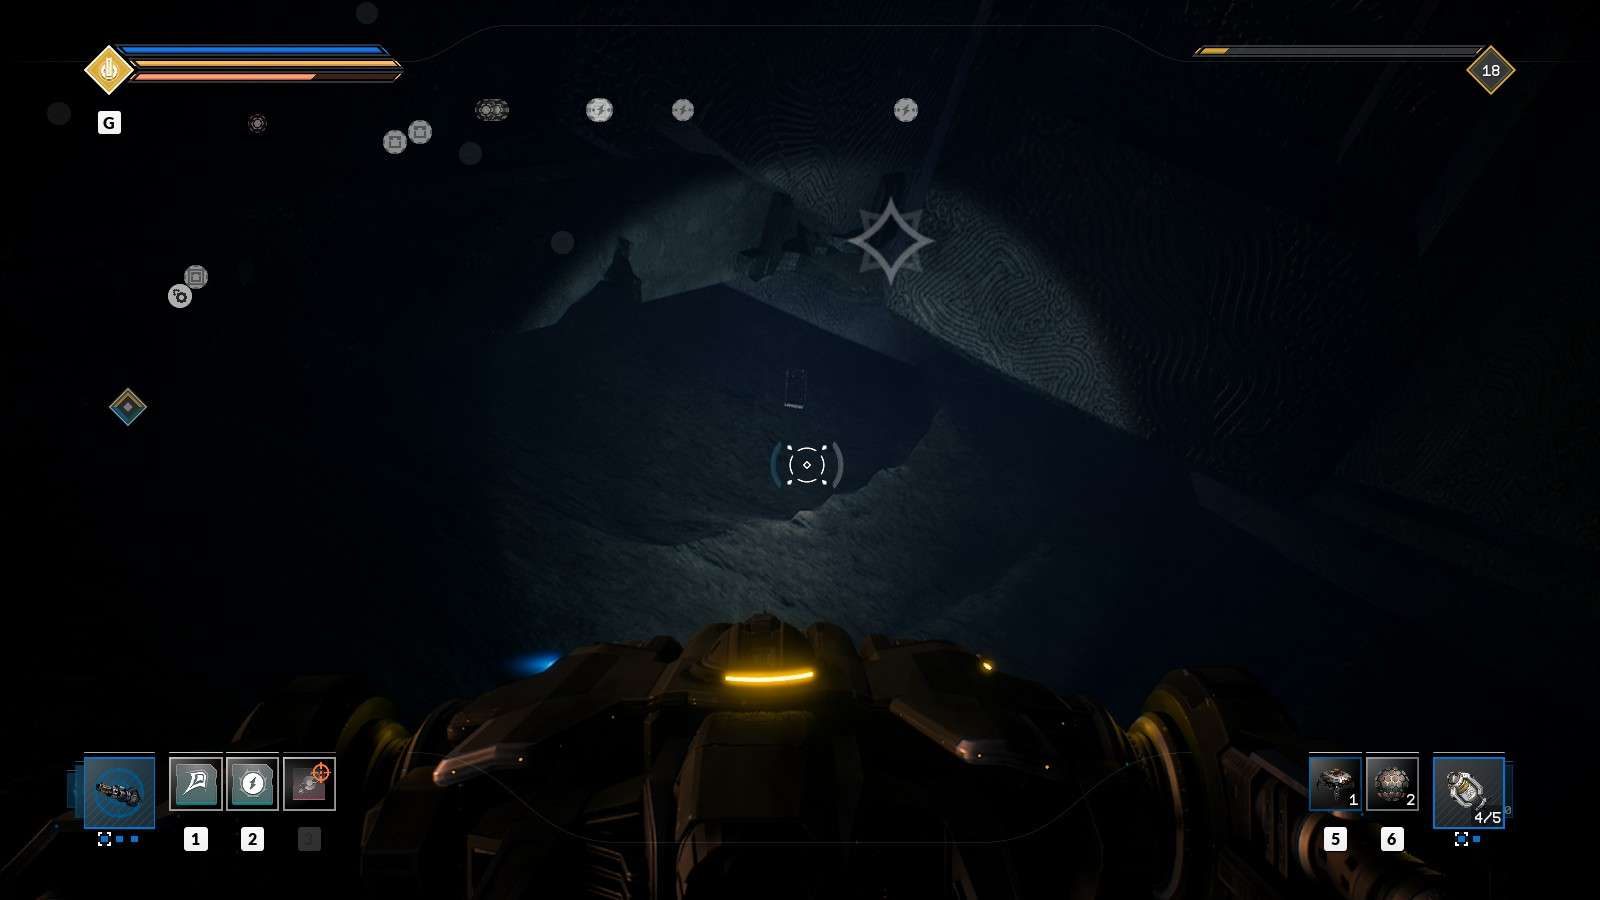
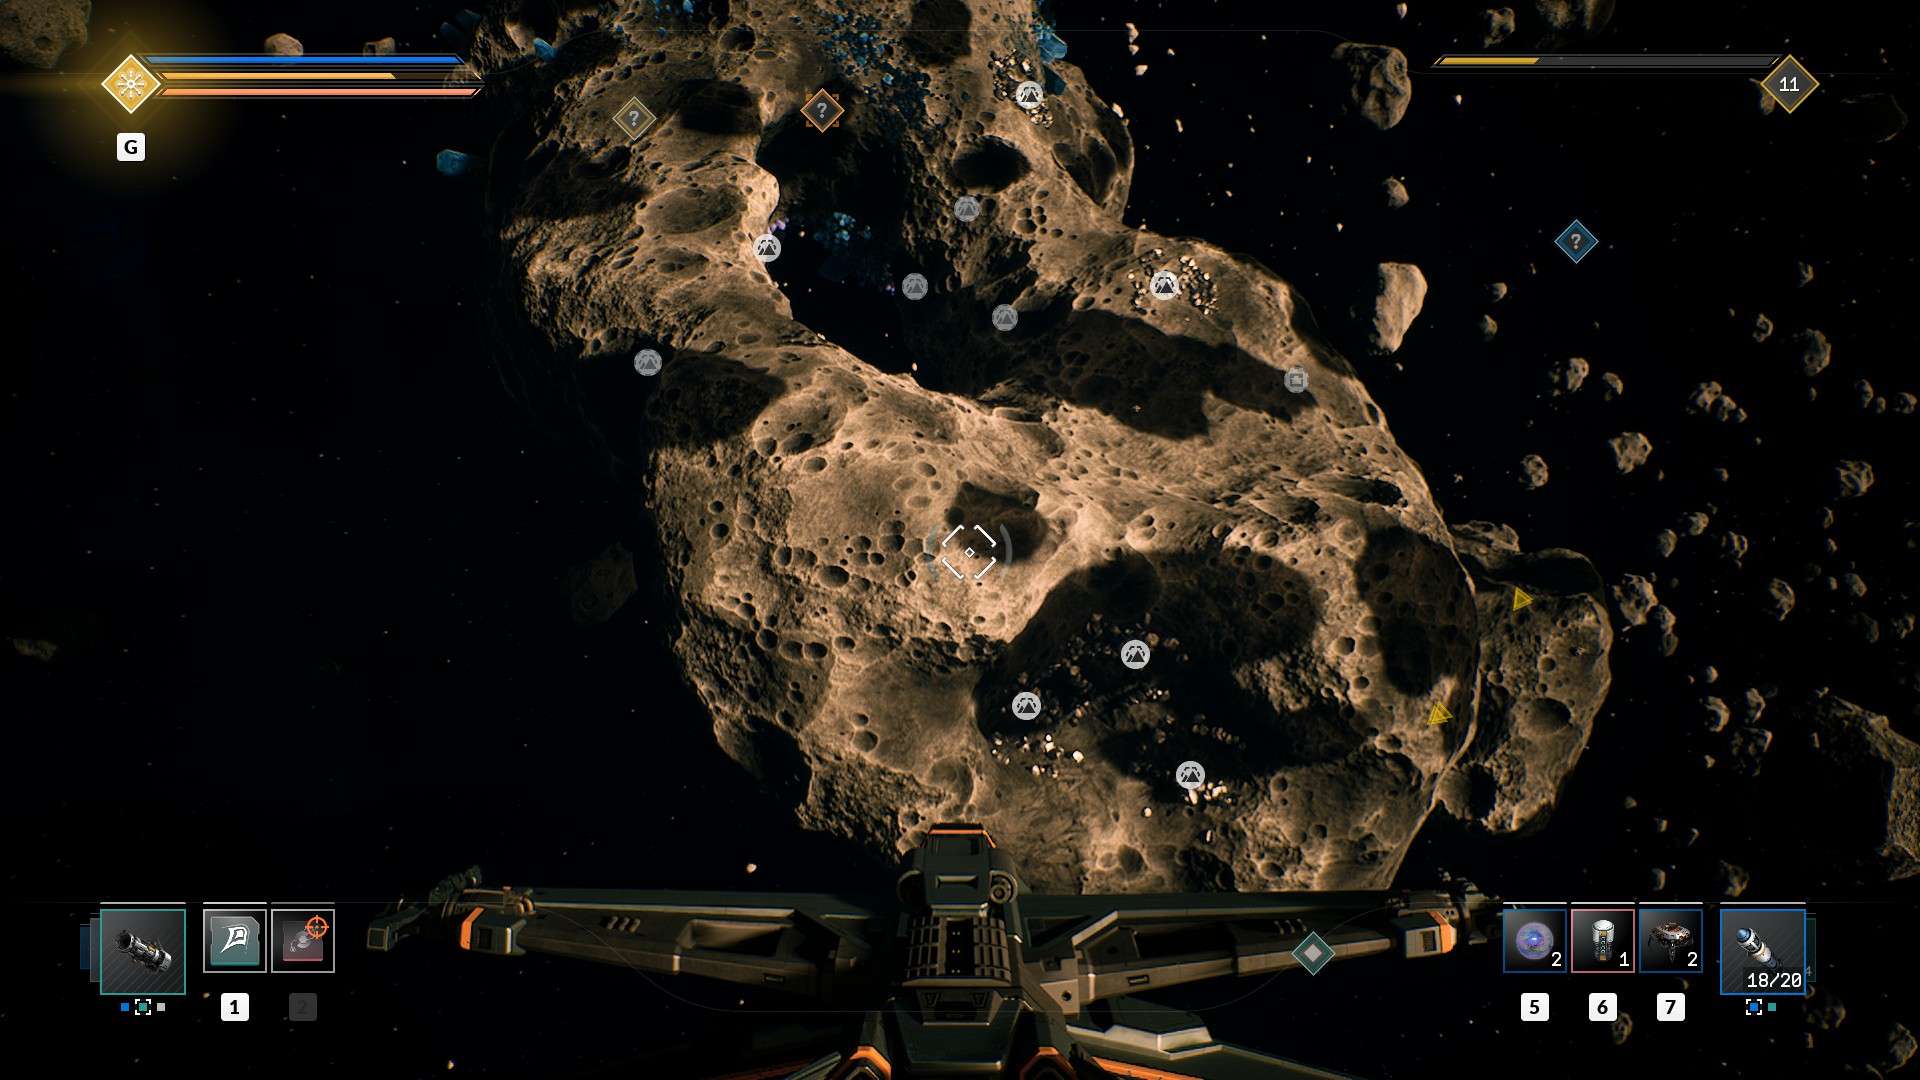
If you’re in a resource rich area, look for the larger asteroids. Some will have caves, many of the larger asteroids will have resources. Ignore the small ones.
Look around in 360 degrees to find any interesting wrecks. You may find containers or damaged ships to loot from once you get closer.
Sometimes, particularly on planets or foggy areas, you may need to just venture out and see what is there. The locations are well defined and it’s pretty easy to use CRUISE to kind of float around an area to check it out and see if any icons pop up on your HUD (provided you have a good sensor equipped)
TIP: An icon for Scrap parts or a container that is outside your scanner range is typically a clue that something else might be in the area. Many times when you get close, other icons will appear. Fly around the area to see if anything else might be there.
Markers
You have 3 markers which you can deploy while in a system. They are invoked / placed with the numeric + on the keypad.
When you press +, a symbol (alpha / betta / gamma) will appear on your screen right where your ship was at.
These are very helpful in navigating or remembering something you want to return to.
I have used these a lot in complicated areas if I”m searching many different wrecks / asteriods / etc, I want to have a fixed point I can orient myself on to remind me where I started if I”m doing a clockwise search for example (hard in a 3D environment sometimes to remember where you started at).
You can remove them at any time by pressing and holding the F key while looking at a marker. You can be ANY distance from the marker to remove it.
Mainframe Components
Mainframe components are super important and once you have 3 of them, you can combine them to create a mainframe expansion.
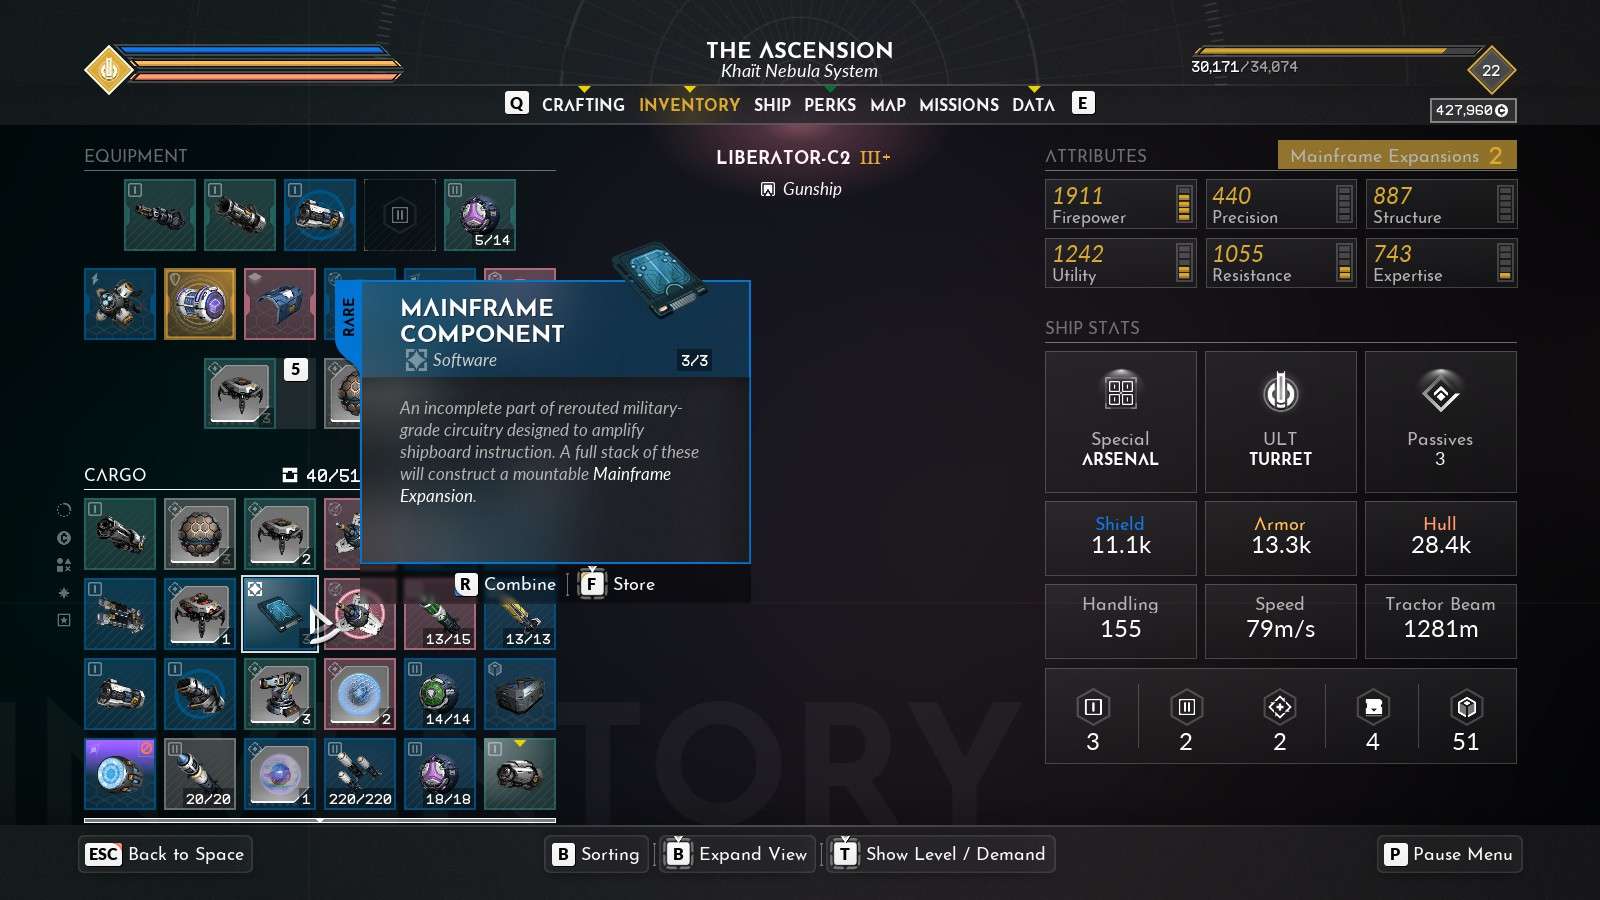
With these Mainframe Expansions (you combine 3 of these on your inventory tab), you can have significant upgrades to your ship. These upgrades are managed on the SHIP tab.
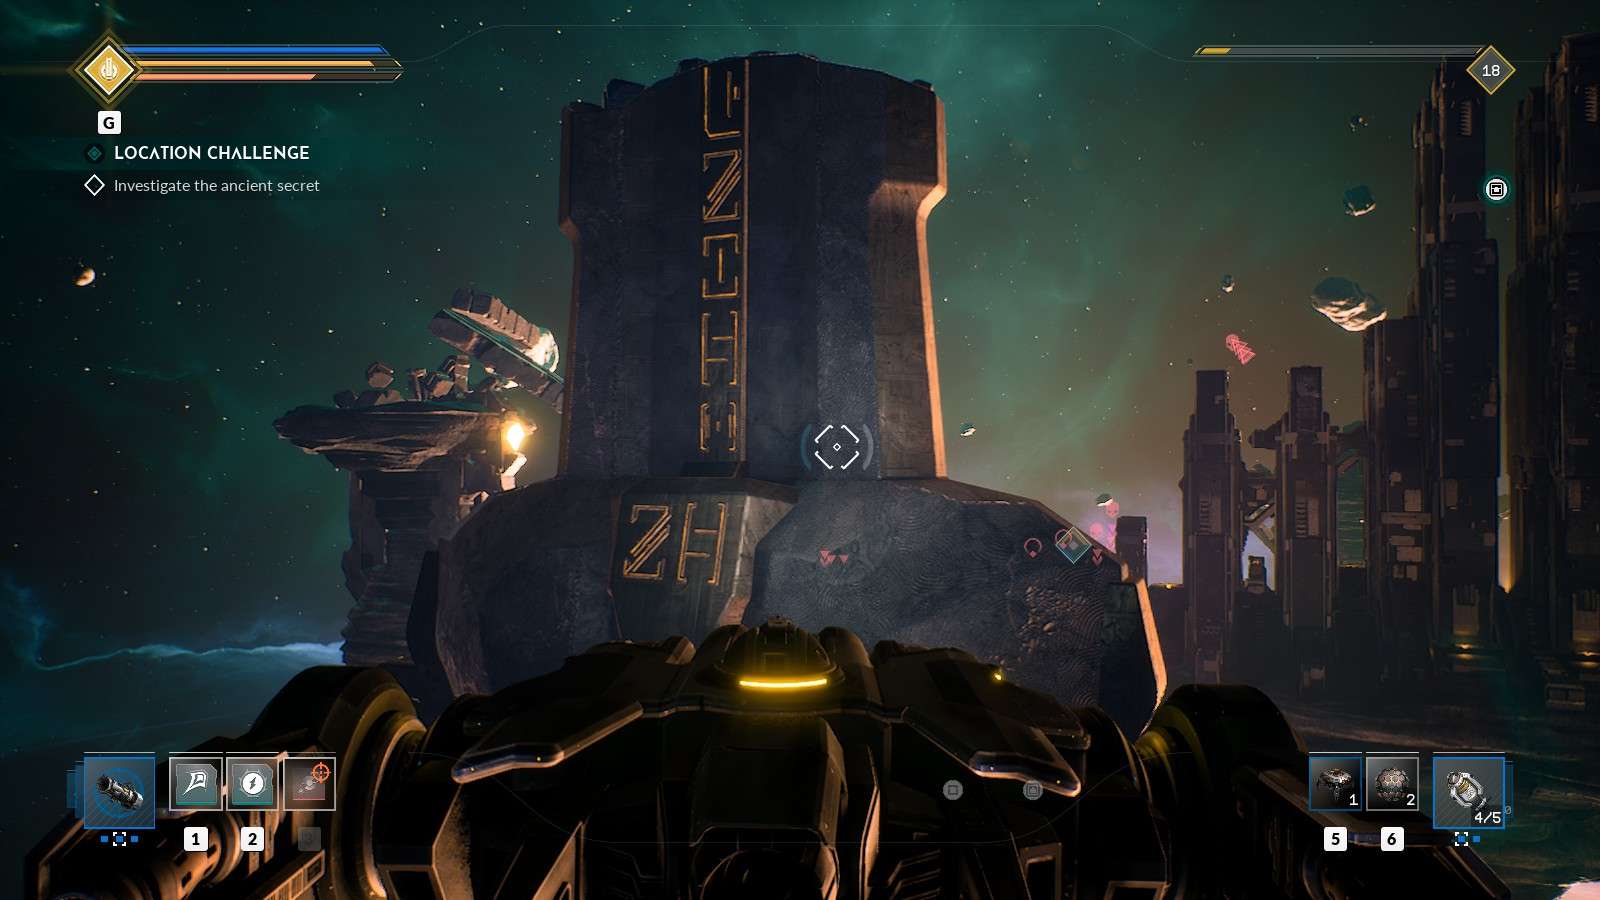
You are guaranteed a mainframe component by solving any Challenges for a particular system. When you get into a system, in the upper left corner, it will give you the Location Challenge for that area. If you solve this, you get a mainframe component.
You can get mainframe components in certain puzzles and in random containers or old ships.
Perks
Perks are things that come with people. Over the course of the game, you will get more and more people to join your cause. With each person that comes to your base (well except of one), you get new perks that you can invest in.
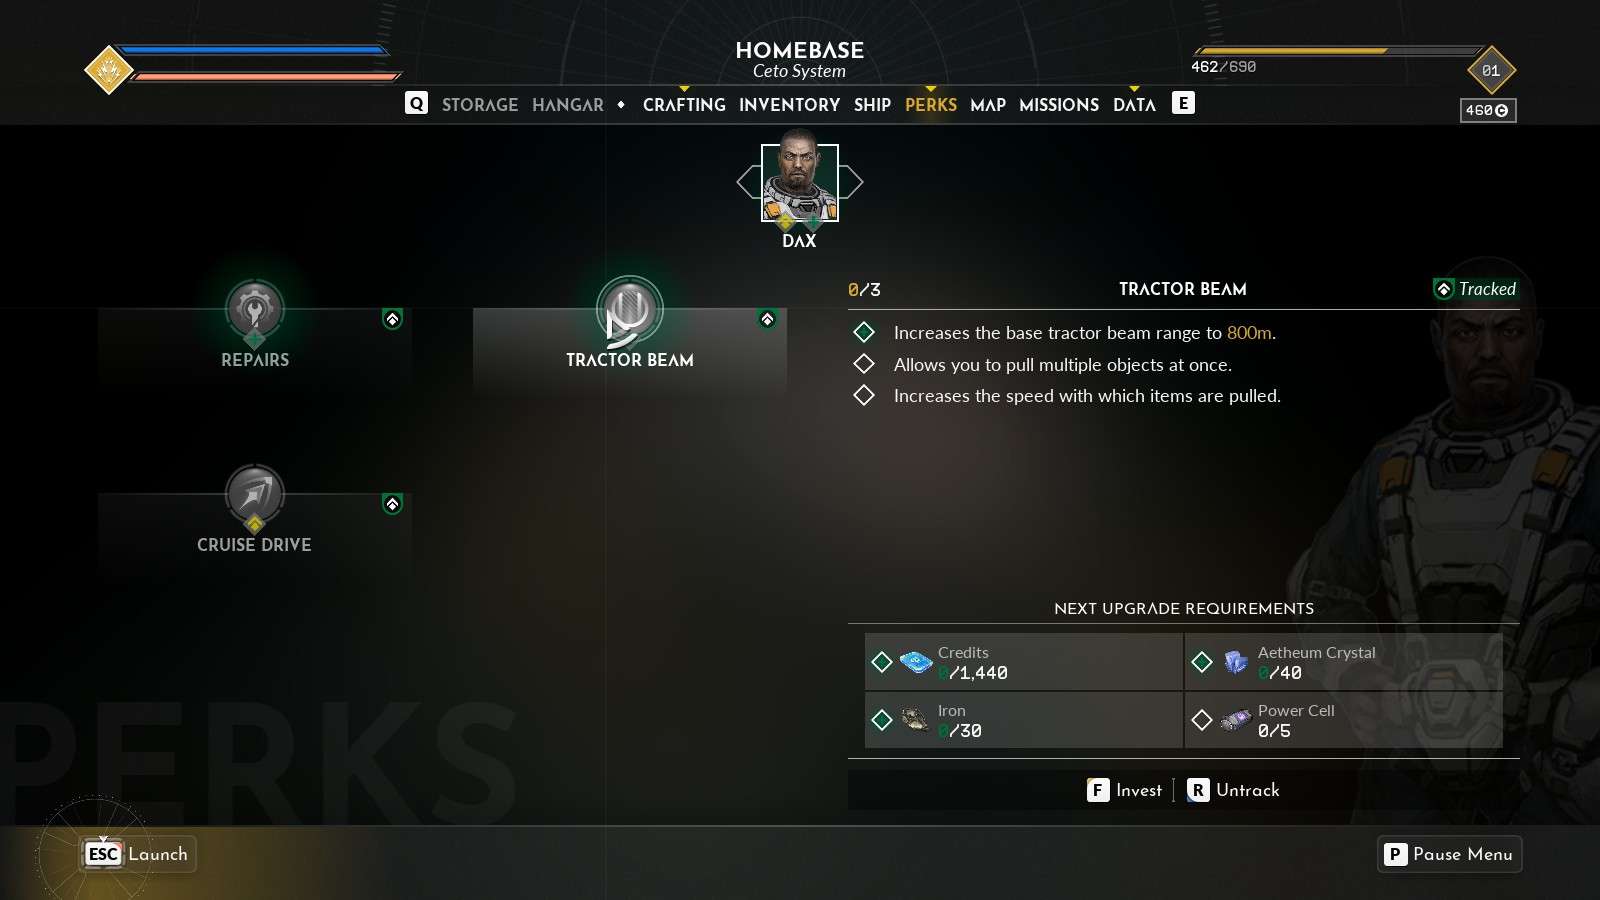
Each perk has several different levels and can be progressively upgraded to more and better things.
In the beginning area, I would focus on the upgrades to your tractor beam as it’s a Quality of Life improvement that is really helpful and will save you a lot of time.
You can pick / choose the other ones you would like. Just remember, if you are missing an ingredient for a perk, check the crafting menu to see if you can craft it!
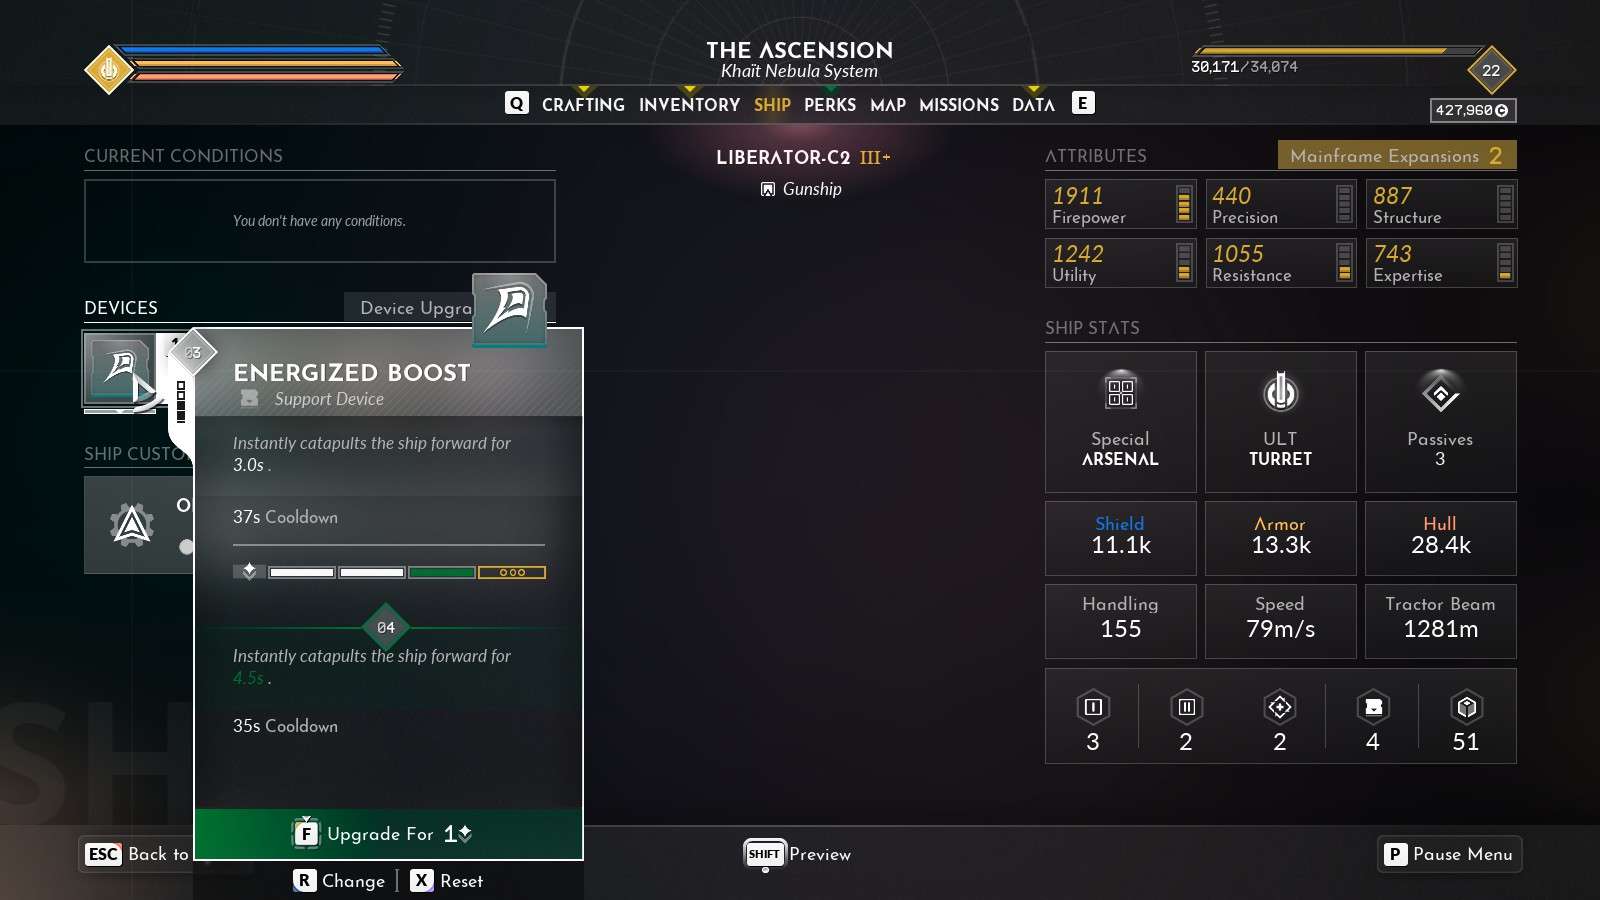
Devices and Your ULT
Devices
Devices are things you can equip on the SHIP tab. These can be upgraded to be more powerful and can be interchanged between ships. They typically have a cool-down period after using, so choose wisely when to use them. You get a device upgrades every time you level up. You can apply it to a device and get it back later if you want to try it on another device with no penalty. So don’t be stingy on the device upgrades!
You start out with two great devices:
- EMP: disables any enemy ship within 500m. This is great to stop them in their tracks so you can kill them.
- Boost: Go forward (to whereever you are pointing) for 2 seconds at high boost speed. Great for when your shields go down.
You will find many other devices. Like guns, you should play around with them and see which ones suit your playstyle.

Upgrading Devices
Each upgrade give an improvement, but once you fully upgrade it, you get an additional benefit that you can choose.
Ultimates
These are HULL specific. Each ship type has a specific set of Active (ULT) and Passive abilities that you can use in battle. Ultimate require charging up by hitting enemies. Once it is charged up, the letter “G” will show in the upper left part of your screen. Press G to fire it.
Let’s Talk Sensors
You have to fly around so your sensors pick things up.
Things that are visibile on your HUD when you first get into the system are there to lead you to something better. Most things will not “pop” until you get close enough to them.
Sensors won’t pick up things that are behind debris. Debris are pieces of metal typically that you can grab and move / throw away from you.
Sensors have 3 distance attributes:
- Enemies
- Loot
- Resources
It’s vitally important you maintain at least 2 sensors, one for loot and one for resources, because you aren’t going to get a sensor that does both. Swap them out depending upon what you are looking for.
Loot covers containers and puzzle items such as sockets / batteries / etc.
Resources are MINEABLE things. Nothing is more frustrating than having a great sensor that does horrible on resources because the distances can get so bad you’ll never find any (eg icons won’t pop), so equip this when you’re just flying around rocks looking for resources.
Inventory Control
There is never enough inventory but the game is built around dismantling inventory you don’t need to get parts to craft. Think of Crafting and Inventory as two very symbiotic things and your frustration over inventory will be reduced.
To reinforce this – All the minerals / small crafting items you get in battle / components you craft you make DO NOT SHOW IN YOUR INVENTORY. They are only visible in the crafting menu.
Once you get to a base and power it up, there is storage there for things that you may want to keep for a bit. It’s also not a bad idea to store a few things for later, in particular:
- Save 10 liquor for a perk you will need later
- If you get a gun drop called “Equaliizer” save it for a perk later
- Save 12 solar panels for a perk you will need later
It’s a good idea to keep a few extra devices and missiles or mines in your inventory at all times because you never know when you will run out in battle and it’s great to have an extra set of missiles you can swap in.
It’s a good idea to have a tight focused weapon to shoot through gaps and kill generators. Think Coil or Rail Gun.
Never Sell Rare Equipment (blue). Always dismantle it for the parts.
Weapons and Weapon Cycling
There are a ton of weapons in this game. It’s hard to say which weapons are best. Your ability to aim tightly, whether you want to dogfight or stay at a distance, etc will dictate what weapons you should equip. Saying that, it’s always a good idea to have a few on hand for different situations.
You can TAB and swap out weapons at any time, including in the middle of battle with no penalty. So be liberal in your testing. Get a new weapon? Try it out!
When looking at a weapon, pay particular attention to:
- Distance – how far it will shoot
- Energy consumption
- The damage it does to Energy (Shields) or Hull (Kinetic)
- The overall large DPS numbers give you the relative damage it will do but is not always a great indicator because of the warm up speed, the difficulty of maintaining the reticle on the enemy, etc.
Now onto important stuff:
Enemies have Shields, Armor and Hull you need to get through.
You notice on your ship you have multiple slots for primary and secondary weapons.
You cycle through these by using the mouse wheel for Primary and the R key for Secondary.
This needs to become a habit because it will help you tremendously.
Put primary weapons that do a lot of energy damage in the first position.
Put primary weapons that do kinetic damage in the 2nd position. This way, you kill their shields and then kill the hull.
Do not have two energy intensive primary weapons. You have a limited energy supply (the right side of your reticle). Typically your kinetic weapons are lower in energy consumption.
Important: When your guns stops firing, it means you’ve run out energy. Swap to a less intensive energy weapon (in your 2nd slot), shoot secondaries, or dodge and let it recharge.
Tip: There are certain weapons that are named and having components that match grant some pretty incredible bonuses. In the starting area, you will start to see “Bloodstar” branded items. If you equip 3 of these, you can do 25% more damage while boosting (and you’re frequently boosting to chase after something). This is a significant amount of damage increase.
Tip: Once out of the starting area, look for the Eclipse set of primary weapons.
Surviving Battles
In the first few missions, before you reach level 4, it’s not too bad, but can be chaotic trying to chase the enemies because they are maneuvering so tightly around you.
Important: If you die, you can choose to respawn at a checkpoint or load a previous save. The checkpoints are pretty generous, so try those before trying to reload from a previous save.
Also: Save often!
You have a lot of things to help you defeat them:
- 0) First and foremost – when you are approaching battle, mouse over the icons of the outlaws and see what you’re getting yourself into. What level are they? What type of ship are they? Knowing this & developing a plan in your head is half the battle.
- 1) EMP device. This will “stun” enemies for 5 seconds. This is just enough for you to kill at least one of them, or allow you to get some distance between you and them.
- 2) Energized Boost. Go straight for 2 Seconds. This is your “get the hell out of here” button and will give you some breathing room so your shields can recharge and you can regroup and come back and clean them up.
- 3) You start with homing missiles. Use them. They will really help you in the beginning. Make sure to mark an enemy (middle mouse wheel click) before you launch so the missile targets them.
- 4) Play hide and seek behind asteroids, peaking out to shoot and getting back behind them to avoid their shots (it’s very difficult to dodge their shots in the open)
- 5) Turn OFF your Energy Dampener so you have inertial (You’ve remapped this to your Mouse 4 key right?) This is the absolute best thing to learn and take advantage of. Since it’s so hard to track these mofo’s as they are turning circles around you, head away from them, and then turn 180 and shoot back at them as they chase you.
- 6) When you get a Thermo gun, the name is misleading. While on paper it doesn’t look too powerful, this energy weapon will home onto enemies. You can shoot around corners, and just keep shooting it while in battle and these little arcs of flame will find an enemy ship.
- 7) Prioritise Snipers. These guys hit hard.
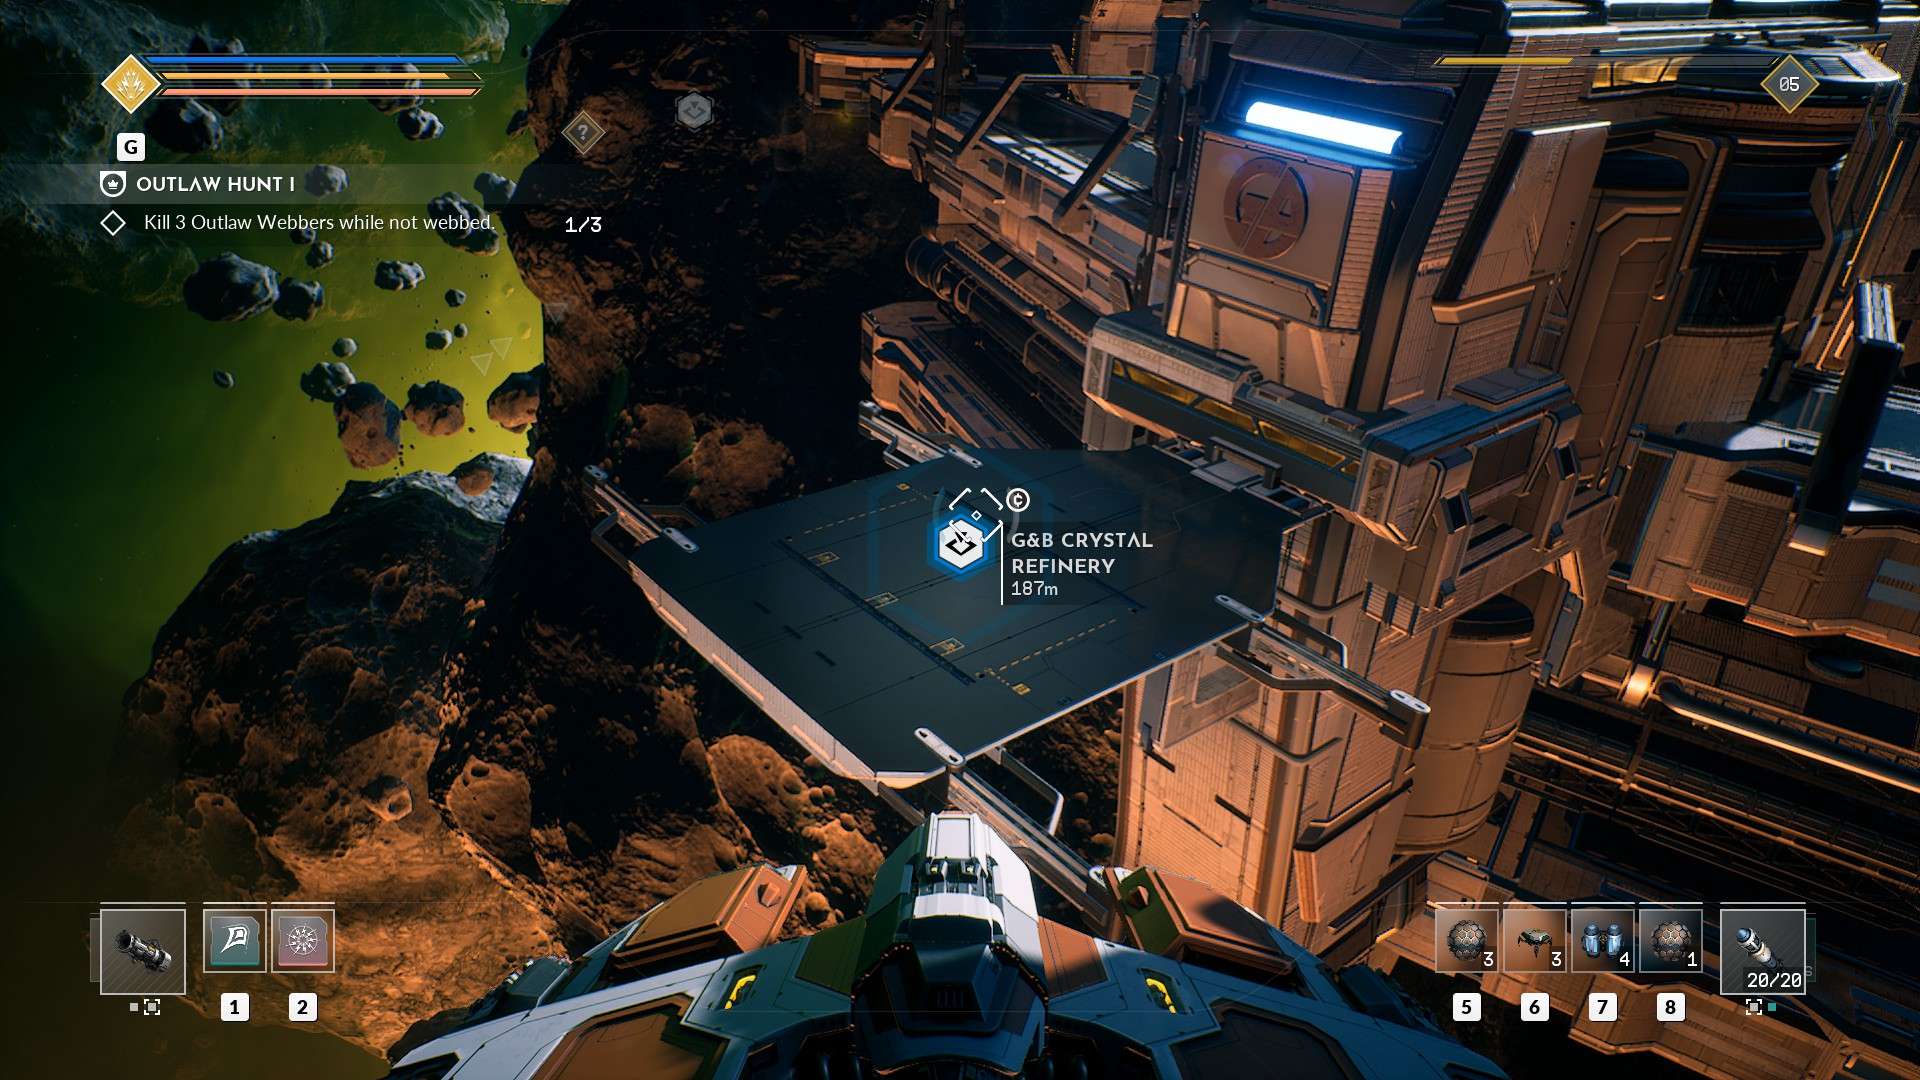
Taking Out Bases
This is a very common mission/job and also procs a lot for the “Unknown Signal” or “Undiscovered Location” so it’s good to get a solid pattern down on how to approach these.
While these bases will continue to spawn enemies periodically throughout the battle, it’s best to clean out the neighborhood of outlaws before you approach these. It really sucks if you get low on health and in trying to leave, you run into a group that is converging on the location.
In the upper left corner, you will have a list of things to destroy on the base. Most are brightly colored and hard to miss. Sometimes you might need to look under the first floor as it’s an open floor plan and fuel tanks are sometimes in that protected area. If there is a shield, look for the generator and destroy it so you can attack what is behind the shield.
Missile launchers are going to do a lot of damage, so prioritize these. The missiles track you and will do a decent amount of damage (you can destroy the missiles in flight).
Bomb Launchers are your next priority: You need a good energy weapon to take them down because their shields regenerate so quickly. OR you can catch the bombs they throw (press the F key to catch them as they exit) and throw them back at them and then take them out with a primary or secondary weapon.
Turrets are your next priority. There are typically several around the base shooting at you. Their damage is rather small, but in numbers can take you out quickly.
Once these are all down, you can take the rest of the base out, then one of two things will happen depending upon the type of the base:
- A Central core will be exposed in the dome that you need to destroy
- A boss will appear that you need to kill. This is far more common and they sometimes have healing drones, so kill their drones first.
Puzzles
Everspace 2 is FILLED with puzzles. These are kind of strange at first, but once you get them a few times, you’ll become familiar with them. Most are protecting a container that can only be opened by solving the puzzle, very few control doors that will open somewhere else.
You have to fly around and look and carefully listen in some cases to find the matching piece of the puzzle. Sometimes the other piece will pop up as an icon on your HUD, but if it’s hidden behind a peice of debris or a targetted door, you’ll need to visually find it while flying.
These are OPTIONAL but this is a key way of getting mainframe components, so it’s best to do these.
Triggered Explosives: These will have a few explosives on them around (most are small asteroids) and you need to press EVERY one to get it to explode. When you press one, the timer will RESET to whatever grace period that particular asteroid has, and you have that many seconds to find the next one.
Tip: Press one and it will say “1/5” so you know how many there are, then spend a minute flying around and planning your route. It will go a LOT easier if you spend that minute.
Energy Sphere Sockets: These require you to fill the socket with an energy sphere. There is at least one energy sphere creator machine within a reasonable distance, but can be further away than you expect (up to 5km away!) You need to create an energy sphere and grab it, and then go to the socket and it will pop into the socket once you are close enough.
Notes: Man, these can get super complicated because they disappear after about seconds. Look at the white numbers counting down at the top center of your screen (changes with difficulty) So you can “recharge” them with a electrical anomaly, you can throw them down tubes so they reach their destination, or you can simply throw them if the ship is unable to maneuver the tight quarters.
Tip: It’s sometimes a good idea to place markers on both so in the heat of the moment you know where you have to navigate to. It’s easier to see the marker with that glowing orb blocking a lot of your vision.
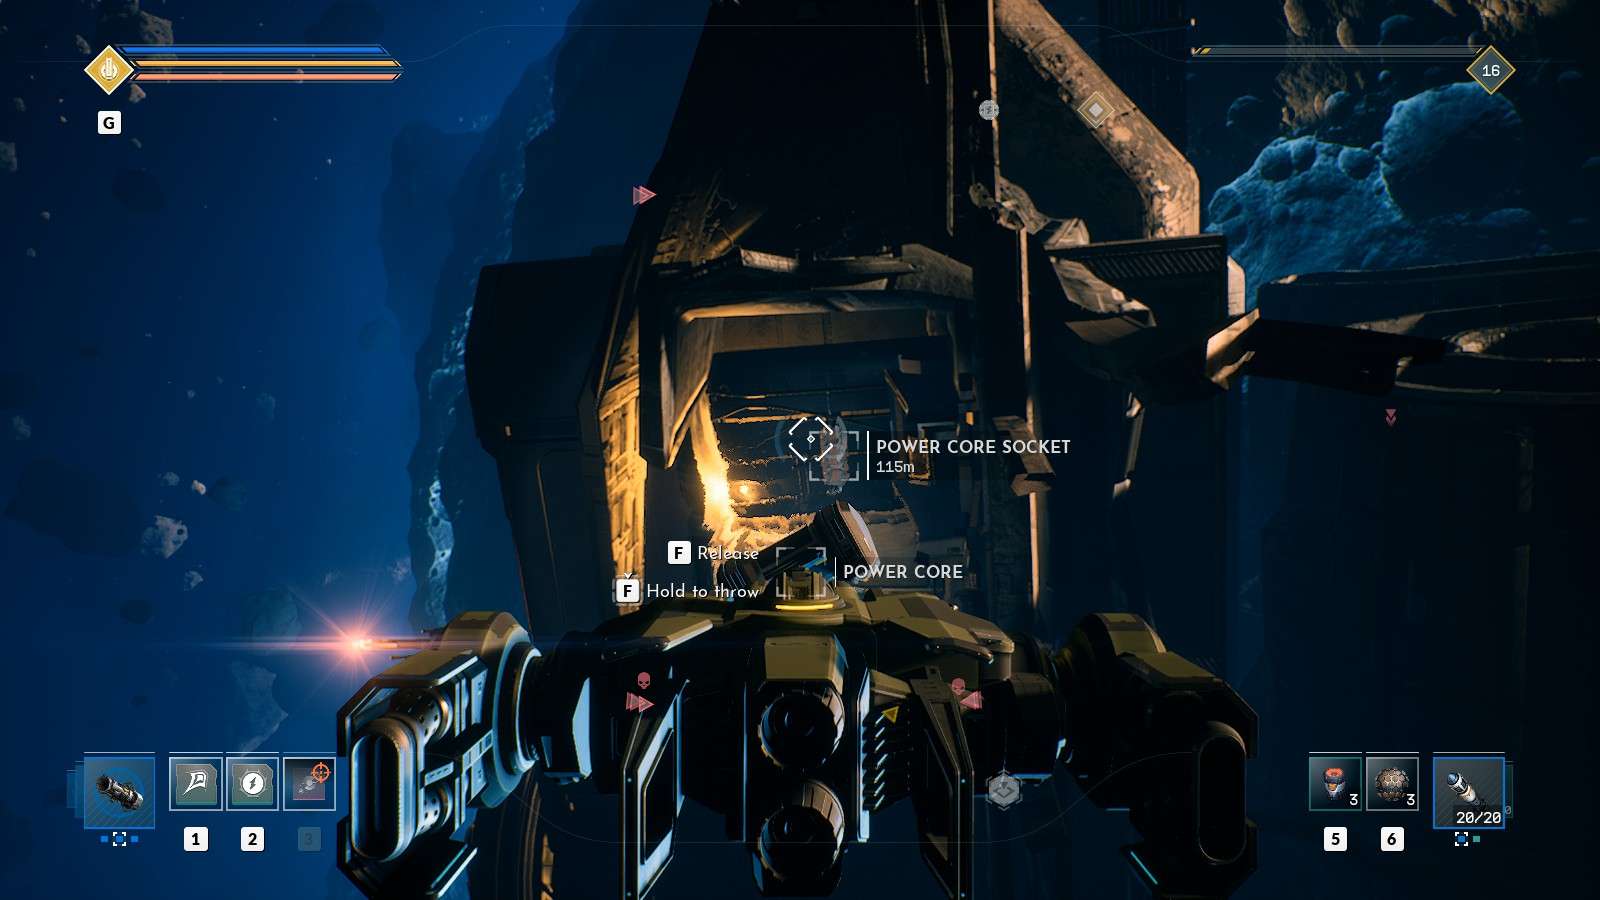
Power Core Sockets: These require physical electrical Power Core that plug into them. The power cores are typically hidden behind panels, or in nook and crannies for you to find and transport back to the socket.
Shields / Doors that you can’t penetrate: These are call controlled by a generator that you have to find and destroy by shooting. Some of them are only barely visible and you might have to shoot through a very tiny opening to get them destroyed.
Generators: These are like the power sockets, but instead you have to find batteries and place them into the generator.
Buttons: These are glowing green buttons that you have to hit in sequence (I run with color blind mode so these may be red that turn green). Sometimes there is just one button, so sequence doesn’t matter, but when you shoot them, it will go dull if it’s the right order. If you shoot them out of order, they will all turn bright green again and you have to start over.

Cloaked Containers: These are mostly invisible containers that emit a “PING” that gets louder the closer you are to it. There is also a visual indicator that appears / disappears that reinforces the location. Once you get VERY close, you will see the outline of the container and can open it.
Beam Reflectors These typically have a mining rig that you may have to enable and then grab a mirror to redirect the beam to the target. You grab the mirror and maneuver yourself till you see the beam start to redirect, then expand the mirror and use your movement keys (WASD) to adjust where the beam is going.
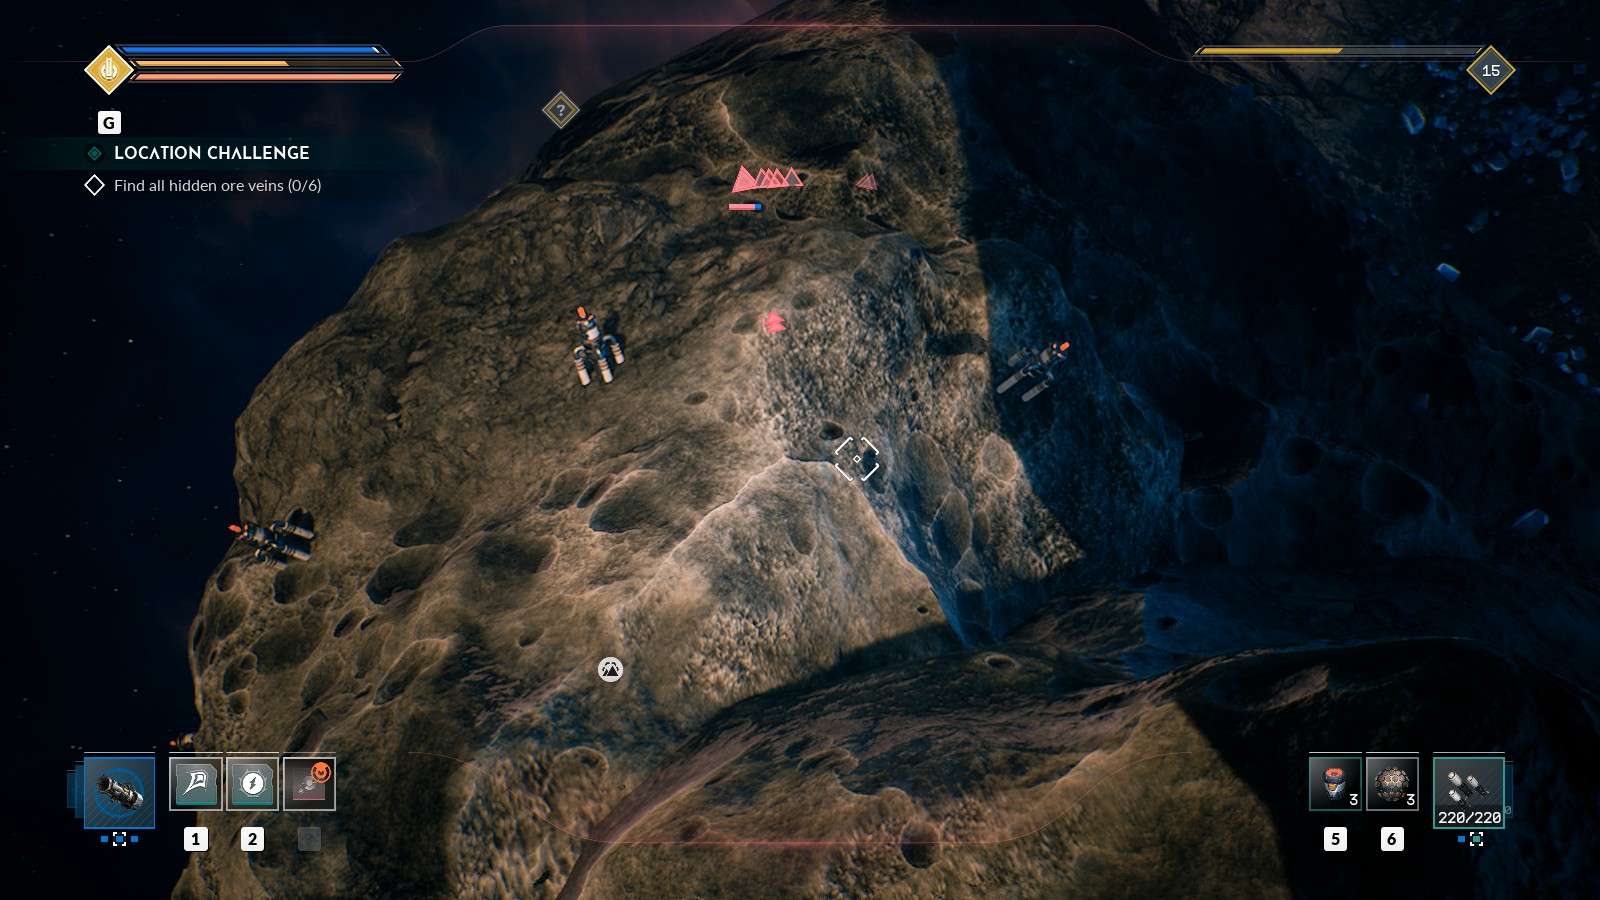
Mining
You want a fast pew-pew gun to mine with until you find a FLAK cannon. Once you get FLAK, you’ll never go back.
Pew-Pew guns (fast DPS) will allow you to mine material faster. Your starting primary weapon is a good example.
In the starter area, you can get crystals and iron. You will occasionally get other things, mostly as loot. To get other types of minerals, you need to venture out further in the map (which the enemies are higher level so just be aware).
Don’t ever buy minerals in the shops. You ‘ll get plenty flying around and mining.
TIP: When you get a Flak cannon, you can increase the amount of rare / flawless / pure minerals you get by modifying that weapon with a mining catalyst.
It’s important when looking for minerals you have a sensor that has decent range for “RESOURCES” and it’s a good idea to fly around with that sensor to pop all the mineral icons.
Here is an example of a “resource rich area” before and after scanning to give you an idea how important it is to have a sensor and fly around to find everything:

Ships
You know, I was super excited to get a new ship and for the beginning section, you really don’t need to worry about it. They are expensive and while they are really cool to experiment with to find one that matches your play style, I would recommend just sticking with the default ship and getting used to everything because new ships are EXPENSIVE.
To buy ships, look for a vendor that has a triangle next to the planet. There is only one of these in the beginner system.
Ships are spawned randomly and they change frequently. One time, in the beginning area, the vendor only had a single level 1 ship. The rest were level 2’s and were SO EXPENSIVE I about had a heart attack.
You’ll exit the beginner area around level 9 or so, and you’ll have 20 more levels to try different ships and the money will be flowing so much more outside of the starting area that 100,000 or 200,000 credits won’t seem like a lot.
All the devices / weapons / shields / etc are interchangeable between ships. So you are not losing out on anything.
In the beginning, focus on learning the game, getting used to how to fly and do battles and puzzles and crafting and perks and using devices and then you can go get a new ship.
This is the beginning guide after all!
Note: As with weapons, ships differ quite a bit and finding one that matches your playstyle may take a few tries in finding just that right ship that you prefer.
Crafting
Crafting is a good part of the game to craft necessary components and catalysts.
You can craft weapons and modules, but you must have a blueprint first. To attain blueprints, they will either drop in battle, or you need do dismantle that component 3 times and the blueprint will be unlocked.
I recommend for the starting area to just dismantle things and get the necessary blueprints for later. Weapons and modules should drop with regularity during battles and you’ll be leveling up so fast that it’s better to save the crafting things for when you really can use an upgrade.
Also – crafting is indispensable for making the components you’ll need for perks.
Shops
There are four types of Shops:
- A) Normal shops that are always in the same place
- B) Same as A) but also sell Ships
- C) Same as A or B but also have Jobs available
- D) There is one special shop that moves around. You call it by pressing a beacon in an area.
- E) Repair and refurbish only shops. Your base is an example of this.

When you look at your map, shops have a C$ if they buy/sell things and/or a triangle if they sell ships.
When you are in system, the shops will have a landing pad.
If a shop has a blue border, they have a job for you as well.
In order of importance, Shops:
- Repair your ship
- Reload your secondary weapons
- Sell everything you can to make $$
- Buy hardly anything.
Don’t try to play the market to make money. It’s a losing proposition.
Basically it’s because ALL the shops in an area have similar prices and until you open up other areas, it’s not economical to do so.
My advice is to only buy RARE things that are a HUGE upgrade to what you have or to complete the Bloodstar Set. Most of the time, you’re going to get drops from battles and crates that are more than sufficient.
Important: If you EVER see an equalizer, buy/save it. You’ll need it later for a special perk. It’s a rare drop but doesn’t look that important.

what a job, thank you! just bough tit (im a wing commander/starlancer/freelancer vet) and this is a perfect intro read it whiel it downloads 🙂
hurry up internet! 😛
I tried same mining places with both weapons adn flak always was better. Save before shoting – shot flak – 8/2 – load back – shot with beam – 7/2.
Great guide!
I think beam laser is better for mining tho. It’s slower but has better mining bonuses.
I did some qualitative testing (25 mining per setup) and I didn’t find any improvement due to mining with lasers.