
What do all the numbers mean? Why does it feel like you can steamroll some battles but get trampled over on others? This guide will probably help! Probably.
Guide to Combat
Intro
Just like every other Project Moon game, Limbus Company is mechanic dense and explanation sparse. Now, granted, I don’t have all the information myself, but the information in the guide (especially the last section) should be enough to get a better understanding of the game. And with that, you can comment corrections later! A full-proof plan, if I say so myself.
Note that this guide won’t go over other, non-combat mechanics like sinner growth or progression.
Before Combat (Speed, Sanity)
Speed
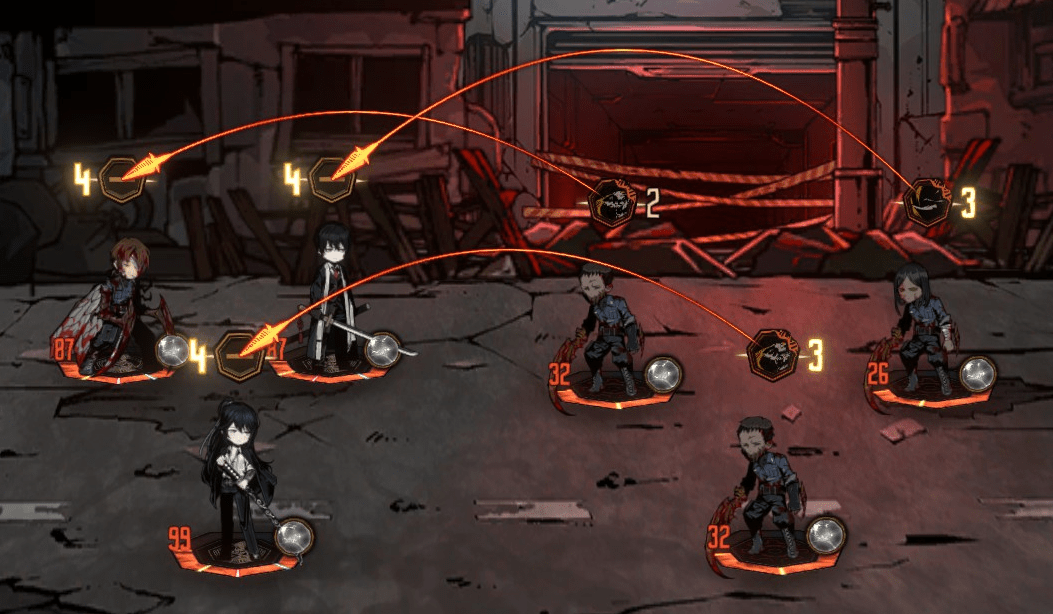
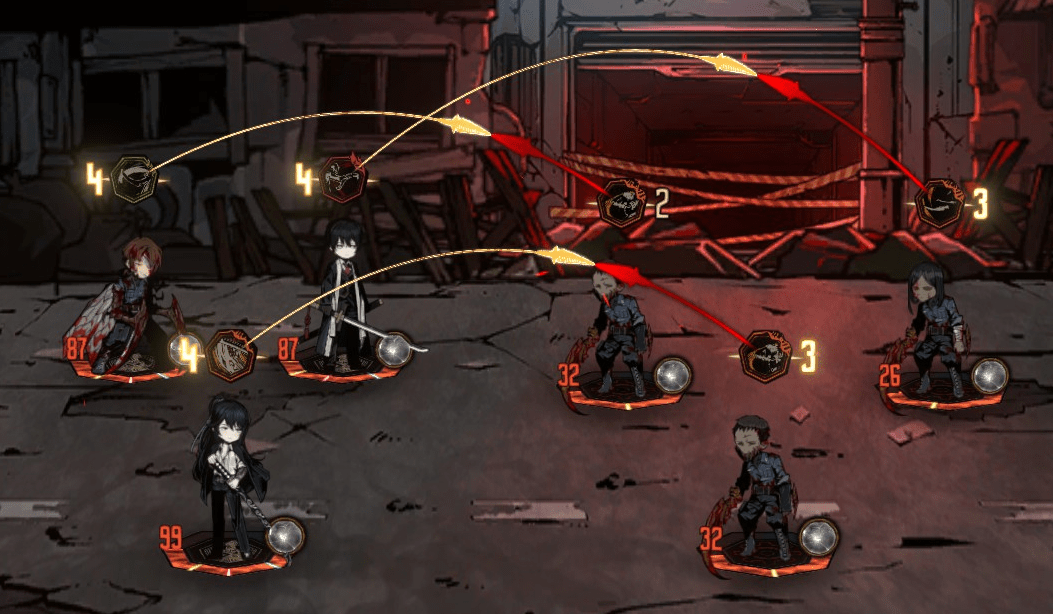
Before actual combat begins, sinners and enemies are positioned relative to their speed. The faster the character’s speed, the further back from the center they’re placed. This positioning also determines their attack skill positioning, possibly allowing or disallowing resonances.
For anomaly battles, speed functions similarly to Library of Ruina. That is to say, characters with faster (and only faster, not equal) speed can intercept attacks from slower speed enemies.
The oddity is with human battles: characters automatically target based on both their speed, and the enemy’s speed. The fastest sinners will target the slowest enemies, and continue targeting from left-to-right down the field. Similarly, enemies will target such that the slowest enemies will target the fastest sinners, once again, left-to-right.
This is relatively straightforward assuming an equal number of attacks and enemies. However, in the event of more attacks, attacks will ‘rollover’ and will begin targeting left-to-right once more. Similarly, if a character is performing more than one attack, characters will prioritize clashing with all of those attacks before continuing to target further characters.
This results in rather curious targeting: the fastest sinners will usually be targeted the most, whereas the fastest enemies will usually be out of reach. The slowest sinners are weirdly safe due to both enemy targeting and usually getting one-sided attacks, whereas the slowest enemies usually get piled on.
Sanity
Sanity is on a range from -45 to 45, is gained from defeating enemies, lost from losing allies, and gained or lost depending on certain skills.
Sanity has two main uses: the first is as a resource to be spent on non-Zayin EGOs.
The second is influencing luck; the higher your sanity, the more likely your attack coins will land heads. Note that this isn’t necessarily a good thing; a coin landing on heads is what modifies the attack’s damage number regardless if it’s a positive or negative, meaning that certain enemy attacks that lose damage on heads are actually stronger at low sanity.
The color-orb next to a character’s health is an easy way to check sanity at a glance, with blue being positive and red being negative, but the exact number can be found by clicking on the character in question and checking the character sheet. Abnormalities have no sanity.
Combat Numbers
Alright let’s take a look at a basic combat breakdown.
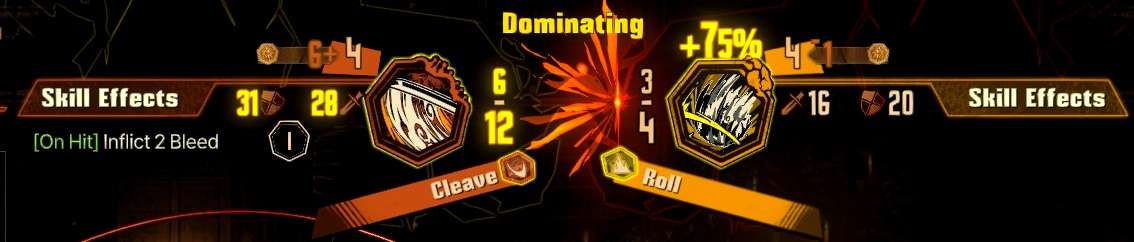
Incomprehensible! Lovely. However we can break this down into the parts that matter.
Damage Numbers
These are the most important part of the whole shebang, with the top number being the minimum damage an attack does, and the bottom being the maximum. A greater number means an attack wins out over the opposing attack. When the fraction glows yellow, it means it’s getting a bonus due to the attack/defense stat.

One notable takeaway: if one attack’s upper number is greater than the other’s lower number, the prior attack can’t lose.
Combat Stats
Each character has a defense stat, and each attack has its own attack stat. If an attack stat is greater than the defense stat, it grants bonuses, including dealing an additional damage multiplier (I think) and having a higher raw attack damage, allowing the attack to win clashes easier.
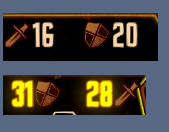
The actual amount you’d need to get the bonuses I’m not sure on, but it seems that roughly five attack over defense gives the attack a +1 bonus strength, making clashes easier.
Base Damage and Attack Coins
The large number in white represents the base damage of the attack, i.e, the damage the attack will do if all attack coins land on tails.
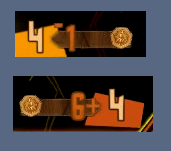
The smaller number represents how much damage that each coin that lands on heads will either add or remove from the attack, noted by the small – or +.
Damage Multiplier
This reflects either the bonus or malus the attack will do if it wins the clash. This bonus is dependent on damage resistances and stagger, covered in the next section.

Clashes, Coin Flips, Damage Calculation
Clashing is relatively straight forward. Both characters flip their attack coins associated with their attack, then check the final number. Whichever number is greater destroys an opposing attack coin, and if there are still coins left, continue until one side is out of coins.
Still, there are a few things to note, namely that multi-hit attacks will gradually get weaker as they lose clashes, but have more ‘chances’ compared to single-hit attacks. As attack coins are used for damage calculation, this also means that a single-hit attack, while not necessarily able to win a clash, might be able to blunt the incoming damage.
Once the clashing is over, combat moves to the damage phase. At this point, the attack coin is flipped, and if it’s heads, adds it’s damage modifier to the attack’s damage. If there are attack coins left, continue flipping. Notably, the modifier does not revert after a flip. This means that multi-hit attacks can really stack on the damage if they hit all their heads.
Finally, the attack goes through a damage modifier, which is largely based off of resistances.
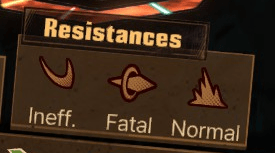
There are three attack types: pierce, blunt, and slash. Your sinners are always resistant to one, weak to another, and neutral to a third. Weaknesses double an attack’s damage (+100%), while resistance halves it (-50%). Being staggered lowers all resistances to weak, meaning double damage from all attacks.
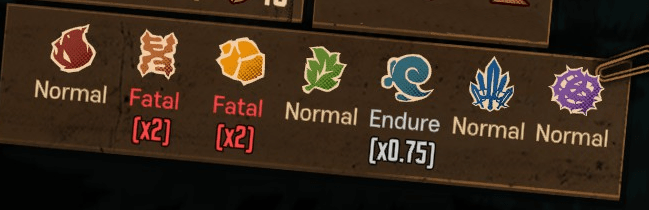
There are also seven sins that are elements, determined by the EGO your character wears. The base Zayin ego is strong to one sin, and weak to two. Notably, most human enemies tend not to have any resistances or weaknesses to sin. Unfortunately, your sinners do.
Furthermore, the base defense stat is also taken into account, in which having a greater defensive stat reduces the multiplier by 25%. Finally, the number of clashes done before combat is taken into account, though the modifier on this is… unclear. Seems to be ~25% damage bonus, however.
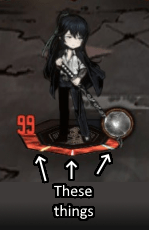
Stagger
Unlike in Ruina, stagger is a function of health instead of its own resource. Most characters have certain segments on their health bar in regular intervals. As soon as they cross this bar, they get staggered.
Staggered characters are unable to act, and vulnerable to all attack types (+100%) damage. If they take enough damage such that they cross another stagger threshold, they take additional damage multiplier (+33% for each further threshold passed).
Furthermore, staggered characters’ speed is set to 0, meaning that in non-abnormality battles, staggered enemies will always be targeted first, and staggered sinners will generally be targeted by the fastest, usually most dangerous, enemy.
You can probably see how easily this can snowball, and its this mechanic that influences a large part of the takeaway section.
EGO Attacks
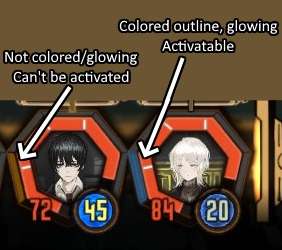
Each sinner has access to EGO. Accessing it requires a certain amount of sin resources. You get these resources with your regular skills, gaining 1 resource of the sin type the attack represents. There’s a small indicator by the characters’ attacks that show whether or not their EGO can be activated.
EGO attacks clash as usual, but they usually have high enough numbers to win most clashes.
Before the actual battle, you can check an estimate of your EGO resource economy. Numbers on the left side of the fraction represent the general income of the EGO resource, a summation of all the skills the sinners in your party have of that particular sin type. The right side is total consumption, or effectively, the cost it’d take to activate all your EGOs once in a fight. Numbers that aren’t fractions are resources gained that you effectively can’t use.
You should try an avoid any 0/X fractions, as that effectively means that someone’s EGO can’t be activated. EGO is pretty important in later fights, as it gives you an attack large enough to negate other enemy attacks and stagger enemies, as well as usually carrying passives to help snowball your way to victory.
This also means that your base 0 sinners might have an advantage, as they get their 3rd uptying for free compared to 00 and 000 identities, which need thread to uptie to 3. This is important, as all three skills are usually aligned to a different sin, and thus having access to all three allows the greatest access to EGOs.

Takeaways (AKA The Important Parts to Remember)
With all this being said, the key to winning combat is as follows, with importance going from most to least.
- Attacking a weakness is effectively lethal
Attack a physical weakness brings a +100% damage bonus, effectively the same as staggering them. This is such a massive bonus that’s exacerbated by the fact that stagger is tied to health now, meaning that it’ll be even easier to kill them.
This applies to your own sinners as much as enemies. You can scroll over enemy attacks to see the damage bonus their attack would do assuming it isn’t intercepted by a faster-speed character. If a sinner gets staggered, they’re very likely to be dead, especially in non-abnormality battles where you can’t reliably intercept attacks. You can bring in sinners that resist the main enemy’s damage type to help, but you might not have the proper combination of weakness-dealing attack and defense-resistant type.
Also keep in mind the sinner’s weakness/strengths to the sin-type. Regular humans usually aren’t weak or resistant to sins, but their attacks are still aligned to a specific sin. Abnormalities, however, have a variety of sin strengths and weaknesses.
- Multi-hit attacks are almost always stronger than single hit attacks
For multiple reasons:
- Most single hit attacks have a relatively weak base attack and a strong bonus if they hit a heads. This means that multi-hit attacks can reliably defend against these feast-or-famine attacks, assuming the multi-hit attack’s minimum out damages the single-attack’s minimum. The single-attack needs to win every coin flip in order to succeed, the multi-hit only needs to wait for the attack to fail once.
- When dealing damage, multi-hit attacks stack damage very quickly. This is because each coin’s bonus is added to the rest of the attacks down the line. If a three-hit attack hits it’s first coin, that coin’s bonus is effectively applied three times. This means a multi-hit can easily deal double or triple it’s max listed damage.
- If a hit from a multi-hit attack staggers, the rest of its attacks benefit from stagger. Combined with the previous point, it’s very easy for multi-hit attacks to deal hundreds of damage and outright kill an enemy from full.
Let’s take an example to really showcase this, with Hong Lu’s Kurukumo Wakashu identity. His second skill is as follows, having a base 5 damage, gaining 4 with each heads, and having two attack coins to flip. Notably, his passive gives him bonus two coins on damage (not clash) if the enemy doesn’t have 4 bleed.

Assuming you hit every head (very likely on high sanity), this attack deals a total of 9+13+17+21 damage, or 60 damage outright, enough to stagger or at least kill most enemies.
This can be doubled by a slash weakness to 120 damage. Most mid-game bosses tend to have ~400 health, and Hong Liu can chunk off nearly a third with one attack.
Staggering only makes this skill better, as the later, heavier hitting attacks will benefit from the stagger bonus. If an enemy isn’t weak to slash but you stagger them after the first two attacks, you’re dealing 9+13+(17+21*2) or 98 damage.
Once again, this applies to your own sinners as well as enemies. Try not to let multi-hit attacks connect without at least trying to clash, and definitely don’t let a multi-hit attack connect when a sinner is weak to its elements.
- E.G.O attacks are the ace up your sleeve
Can’t redirect a multi-hit attack targeting a sinner with a weakness? Enemy abnormality using some ultimate attack with ♥♥♥♥-you levels of damage? Some enemy dealing four attacks but you only have a sinner that can reasonably clash with one?
Just EGO it! EGO skills, even from a character’s base Zayin EGO usually deal enough damage to outright win most clashes, and usually have some bonus effects to them as well. A fast character can also use EGO to deal enough damage to stagger an enemy, stopping the rest of their attacks and opening them up for follow up attacks as well.
Coincidentally, this also means that you should keep a note on your EGO resources. You don’t necessarily need to build around it, but ensuring that your sinners can at least access their Zayin level EGO should be something to keep in mind.
- Defensive skills… exist
Defensive skills usually aren’t the best, but they still have utility that’s worthwhile to remember.
- In non-abnormality battles, defensive skills can be used to ‘pass’ from faster sinners down to the slower ones. This is pretty useful to allow a sinner with a stronger attack to clash, or let a sinner with better resistances tank an attack.
- Also in non-abnormality battles, if a sinner has two actions available, they can use a defensive and offensive skill at the same time. If they fail the clash, or are subjected to a one-sided attack, the defensive skill will kick in.
- Counter has a sin-resonance, unlike defend and evade. Useful if the two attacks current available aren’t the sin you need for either an EGO resource or resonance bonus.


Thanks for the explanation on all the combat numbers, I haven’t been able to find that anywhere. Can you explain what the word in the center means? Dominating, Favored, Neutral, etc.
Dominating, Favored, Neutral, etc show your chance of success. Dominating either means you cant lose or you need to absolutely fail all coin flips and your opponent needs to succeed every single one in order to lose. favored means that you have a statistically better chance of winning that dice role than your opponent does. Neutral is a (literal) coin toss to who will win. Struggling, and Hopeless are the complete opposite of Favored and Dominating respectively. Its a quick way to tell you how the clash will go at a quick glance without needing to guess or look at the numbers of the attacks. They just state the most likely outcome and are not absolute, you can succeed a struggling match-up and lose a favored one. Nice if you just want to quickly attack without much thought.