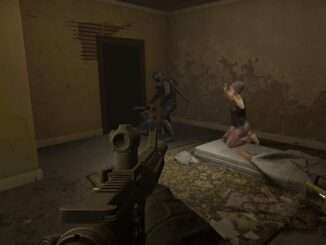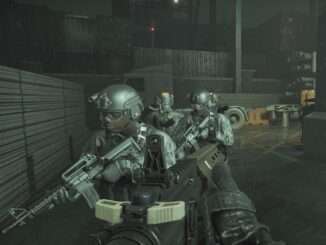
Tweaked and tested with randoms for immersive and realistic gameplay. Now a random team should be able to clear most missions (drug house, car dealership and gas station at least) with some solid teamwork (by random team standards).
AI Mod Configuration Guide
Content
I have been tweaking and testing with randoms for some time now. Most teams should now be able to clear most missions from my experience if they are not too sloppy and work as a team.
Now with the following configuration the suspects :
- Have a more reasonable health.
- Have average human reaction time.
- Are still deadly up close but their accuracy drops over distance.
- Are more likely to seek cover and run away when they see you.
- Are more likely to roam in the map instead of staying where they are like a dummy.
- Are more likely to hurt and suppress you instead of outright aimbot you with OHKs. (They still headshot you sometimes by chance as in real life).
There are also more of them now (compared to vanilla) to keep you busy (so watch your ammo).
You may see more variety in the behaviors of suspects and civilians over time (e.g. fake surrender, go back to do their own thing after a while if you forget to cuff them etc) but that’s not because I tweaked their behaviors. It’s simply due to the fact that you now spend less time instantly killed by the AIs.
Here is the ini. Only the host needs to have the AI mod for it to work.
Have fun!
[Global]
ASTimeBetweenTargetingCivilians = 3.0
ASTimeBeforeTargetingFirstCivilian = 35.0
BTTimeUntilBombExplodes = 720
BTMaxBombs = 2
BTMaxDistanceFromSelectedBombs = 2500.0
HRMaxDistanceFromSelectedSpawner = 1500.0
HRMaxRoamers=2

PolicePresenceDecayTime = 40.0

SuspectHealth=120.0
SwatHealth=250.0
CivilianHealth=80.0

UnalertedSightRange=3000
AlertedSightRange=6000
UnalertedPerceptionHalfAngle=90
AlertedPerceptionHalfAngle=160

MaxCivilians=6
MaxSuspects=20
MaxRoamers=3

SuspectAccuracy=5.0

SuspectDefaultFireRate=1.0

SuspectRifleFireRate=0.175
SuspectRifleFireRateDeviation=(X=-0.25,Y=0.5)
SuspectSMGFireRate=0.1
SuspectSMGFireRateDeviation=(X=0.0,Y=0.5)
SuspectPistolFireRate=0.2
SuspectPistolFireRateDeviation=(X=0.0,Y=2.0)
SuspectShotgunFireRate=0.5
SuspectShotgunFireRateDeviation=(X=0.0,Y=0.5)
SuspectAccuracyLostPerMeter=1.00
SuspectAccuracyLostPerMeterSecond = 1.3

SuspectTimeWithWeaponUpBeforeFiring=2.0 ; A value in seconds

SuspectCoverEvaluationCooldown=10.0

SuspectTrackLastKnownPositionTime = 30.0
RequiredTimeSpentOnTarget = 0.3

SuspectMoraleMediumReload=0.5 ;If morale goes below this use the medium reload speed
SuspectMoraleLowReload=0.3 ;If morale goes below this use te slow reload speed

AIStunDuration = 16.0
BeanbagStunDuration = 3.0

MinMorale=0.30 ; A value from 0.0 to 1.0
MaxMorale=1.0 ; A value from 0.0 to 1.0

KickDoorMorale=0.25
KillEnemyMorale=-0.75
GrenadeDetonateMorale=-0.5
BeanbagShotgunMorale=-0.5
PepperballMorale=-0.5
TaserMorale =-1.0
BashMorale = -0.5
C2Morale = -0.75

StunHealth = 100
GrenadeStunDamage = 100
BeanbagShotgunStunDamage = 100
PepperballStunDamage = 25
TaserStunDamage = 100

MinFlees=-1
MaxFlees=2

MaxTraps=3
TrapType=Flashbang

MaxLockedDoorsPercentage = 0.225
MaxOpenDoorsPercentage = 0.075

NoExitChanceToSurrender=0.50
NoExitChanceToFakeSurrender=0.25
NoExitChanceToGoArmedAndDangerous=0.2

NoExitTimeToHesitateSuspectArmed=1.0
NoExitTimeToHesitateSuspectUnarmed=5.0
NoExitTimeToHesitateUnarmed=10.0

SuspectChanceToSpawnWithNoWeapon=0.2

TimeToFireAtDoorAfterKick=5.0

SwatAccuracy=1.0
SwatTimeWithWeaponUpBeforeFiring=0.1 ; A value in seconds

SwatRifleFireRate=0.175
SwatRifleFireRateDeviation=(X=-0.25,Y=0.5)
SwatSMGFireRate=0.1
SwatSMGFireRateDeviation=(X=0.0,Y=0.5)
SwatPistolFireRate=0.2
SwatPistolFireRateDeviation=(X=0.0,Y=2.0)
SwatShotgunFireRate=0.5
SwatShotgunFireRateDeviation=(X=0.0,Y=0.5)
SwatLessLethalFireRate=1.0
SwatLessLethalFireRateDeviation=(X=0.0,Y=0.5)
SwatAccuracyLostPerMeter=0.0

SwatCoverEvaluationCooldown=2.0
SwatTrackLastKnownPositionTime = 5.0

SwatDoorLockpickDistance=70.0
SwatDoorKickDistance=50.0
SwatDoorShotgunDistance=50.0
SwatDoorC2PlaceDistance=80.0
SwatDoorTrapDisarmDistance=70.0
SwatDoorMirrorDistance=70.0
SwatDoorWedgeDistance=50.0
SwatDoorOpenDistance=25.0 ; For Open/Close Door command

MaxDoorInteractionDistance=1000.0

[Lobby_V2]
NoExitChanceToSurrender=0.0
NoExitChanceToFakeSurrender=0.0
NoExitChanceToGoArmedAndDangerous=0.0
MaxMorale=0.0

[ron_wb_combat_01a_BarricadedSuspects]
MinMorale=0.7

[RoN_Meth_Core_BarricadedSuspects]
MaxTraps = 0

[RoN_Dealer_Core_BarricadedSuspects]

[RoN_Gas_Core_BombThreat]

[RoN_Gas_Core_ActiveShooter]

[RoN_Gas_Core_HostageRescue]

[RoN_Gas_Core_BarricadedSuspects]
MaxTraps = 0

[RoN_Gas_Core_Raid]

[RoN_Port_Core_HostageRescue]

[RoN_Farm_Core_BarricadedSuspects]


Be the first to comment