
Many players seem to be experiencing issues with anomalies, primarily due to the difficulty (in terms of annoyance) of puzzles in many of the encounters. Therefore, I’ll explain how to defeat them here.
Guide to Anomaly Puzzles
Basics
Nothing is really hard in Standard with only Deathpall and Sightealer being gimmicks.
Void Monolith (F): Doesn’t do anything. Just study it.
Harbinger Tree (F): Eats corpses. Slowly. Can be cut for Twisted Meat and Wood. Otherwise, doesn’t do anything.
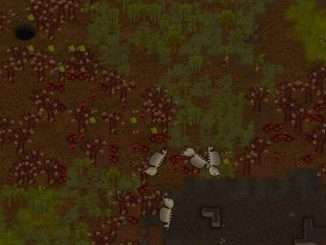
Fleshbeast (C~F): There are four Flesh Beasts. Small Dude, 3 Small Dudes in 1, Bigged Dude and Big Dude that Explodes into many other dudes. It’s quite straight forward and they don’t deal much damage.
Sightstealer (E): Oddly enough, not hard. It’s very weak and usually only comes alone. It’s invisible until it gets close enough.
Shambler (B~F): Animals and Humans can become Shambler. Yes, all Animals. This include Thrumbos. Nothing more fun than 5 Shambler Thrumbos gunning for your base.
Ghoul (E): Ghouls are quite strong, but not that big of a deal.
Gorehulk (C): Gorehulks are ranged… Yep, they are ranged. They keep running from you. They don’t really deal all that much damage, but they are annoying.
Deathpall (B~F): Anything dead on your map? Well, it’s coming back to life… Again and again. Forgot to stock on Meat for your Ghouls? Well, you are really going to hate your life when everything you kill comes back to life as rotten and they won’t eat it.
Advanced
Here lies the puzzles and the insanely annoying ones.
Pit Gate + Dreadmeld (C): This isn’t really all that dangerous. It’s mostly a good way to get Shards and some good loot. Once the Pit Gate spawns, some Fleshbeasts will spawn with it. Kill them and go down. Now you have to destroy Fleshwalls to find the Dreadmeld. There are some valuable loots around here, so it’s worth exploring. The Dreadmeld is annoying. As you damage it, it releases Fleshbeasts. Easiest way to deal with it is just letting it bleed to death while you explore.
Once dead, it will spawn a big Fleshbeast, which will spawn more Fleshbeast once killed. Also, you will have X hours to leave before the cave is destroyed.
Fleshmass Heart (B): Quite annoying. When it spawns, it will spawn with a Mouth and a Liver. It’s invulnerable, so you need to do the Puzzle. Easiest way is just to send your ghouls to kill the Mouth and then destroy the Liver. The Liver drops an item that can be studied… You need to do this 3 times. And, guess what? Only one Liver spawns at a time. To make more spawn, you need to destroy the Fleshwalls until it reacts and then wait. Once you studied 3 items, you can interact with the Heart and it will die. It will drop a Fleshmass Nucleus that can be contained and it will give you Twisted Flesh when suppressed. If you allow it to reach 100%, it will become a Heart again.
Fleshmass Nucleus (F): Drops from the Fleshmass Heart.
Chimera (C): Basically powerful animals. They are stupid and Melee, this means they can easily be dealt with a Killbox. Fighting them directly isn’t a good idea. They are very powerful and tanky.
Devourer (B): Welcome to 1 shot central! They will jump on whatever is in front of them and “Devour” them. After 20 seconds, whatever they ate died. They need to either be killed, knocked down or disrupted. Best way to disrupt them? Fire. Burn them and they release what they ate. They have 200 HP, so they are very tanky. Basic tactic is just to send your Ghouls to be eaten and have your colonist fry them.
Noctolith + Noctol (C): Honestly not that bad. Send the Ghouls to kill the Noctolith. The Noctol are very weak. Meanwhile, restrict your colonist to the light. If they stand in the dark for X seconds, they start taking damage.
Revenant (A): Annoying son of a gun. It will target a Colonist to Hypnotize, which will knock them down until the Revenant is killed. The Revenant is very tanky and will run after Hypnotizing someone. Going into “Hibernation” for a some time before attacking again. Once it finishes attacking, it will drop a part of it, that can be studied. The first one shows you it’s marks on the ground. The second one gives you a warning when you are close to it. Best way to deal with it? EMP Grenades. It perma stuns them and your ghouls can finish it off. Fire sucks for it. Once dead, it drops it’s spine and can be contained.
Metalhorror (S~F): This is annoying and fun at the same time. The most common way this event starts is that someone wants to join your colony and they are infected. Once they start interacting with people, they will sometimes infect the food stack, which infects other members. They will sometimes start fights and infect through wounds.
How do you find out? You need a doctor to investigate them. If the Doctor is infected, they will lie. If they infect your whole colony? Once they grow into full form, they will leave the hosts body, leaving them full of wounds and bleeding. If this happens to your whole colony, then you get what happens.
There are two tricks. One is to use a Paramedic Robot. It can’t be infected, so it never lies. This is a Legit strategy.
Trick number two is cheese and easy mode. Save and kill people. Once dead, they spawn the Metalhorror. Load and now you know.
Nociosphere (C): Love this badboy. It won’t do anything until it activates, but once it does, it becomes a killing machine that will destroy your base. Capture it and Study it. Now you can Activate it yourself! And teleport it! Once it’s activated, it will last 120 seconds. It will kill ANYTHING in it’s sight and will go towards you if there isn’t anything for it to kill. It’s very powerful and can easily deal with late game raids. Once the 120 seconds are up, it teleports back to it’s containment facility and can be captured again.
After X amount of time, it goes into Doomsday Mode and you have 10 days until it can no longer be suppressed. If you activate it during it’s Doomsday Mode, it will simply disappear after the 120 seconds are up instead of returning to you.
Want to have some fun? Wait until the powerful Tributary shows and spawn it on top of their head! Free loot! Works also on Caravans. Since it’s an Enemy, it won’t cost you any goodwill!
Blood Rain (B): Annoying. Makes animals go on a man-hunt and your colonists go into a violent mental breakdown. Keep everyone inside while it rains.
Twisted Obelisk (C): Spawns somewhere on the map. It can be studied and needs to be suppressed (it will transform the animals in your map into Fleshbeasts). It will gives your colonist Fleshmass mutations at random or, once studied, you can choose who receives it on a 5 day cooldown. These are:
Flesh Tentacle (arm): 120% Part Efficiency, -1 Beauty, 27 HP
Flesh Whip (arm): Melee Weapon
Fleshmass Lung (lung): +6% Pain, +30% Toxic Environment Resistance, Immunity to Lung Rot and Asthma.
Fleshmass Stomach (stomach): +8% Pain, 0% Food Poisoning chance Factor.
It will also sometimes corrupt a tree.
Corrupted Obelisk (C): This one is fun! Needs to be studied and suppressed (it will create clones of your characters that will attack you). Whoever interacts with it has a chance to be Duplicated! They will have the exact same things with the exception of gear + artificial bodyparts (except fleshmass). Once fully studied, you can choose who gets duplicated (30 days CD). There are four things that can happen:
Hostile Duplicate:
The duplicate is hostile and will immediately attack. The Stronger your colonist the stronger your foe.
Can be Captured and recruited!
Multiple Organ Decay:
- Has decayed organs that need to be replaced.
- Known Cure: Replace Organs.
Lower Consciousness:
- Both the original and the duplicate suffer from lowered consciousness, Gets worse over the course of a few days.
- Known Cure: Terminate one of the two.
- Crumbling Mind: The duplicate will begin losing all their skills and have a locked consciousness of 60%, After 2-3 days becomes permanent and incurable.
- Known Cure: Healer mech Serum.
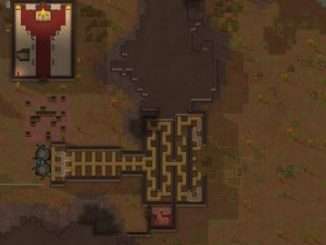
Warped Obelisk (C): This one is basically just loot. Needs to be studied and suppressed (will teleport random people into the maze). Once fully studied, you can teleport one of your colonist into a maze that has a lot of loot. It’s quite large and has a lot of doors that needs to be forced open. You need to reach the Warped Obelisk and interact with it for it to end. All the loot that was on the floor inside is then transported into your colony. Once you finish it, the Warped Obelisk disappears.
Golden Cube (A): The way the cube works is very simple. Out of nowhere the Cube will appear on your map. You need to study it ASAP. It will slowly compel your colonists. The more it compels, the worse your situation becomes. Once you finish studying it, you can destroy it… But the Colonists that were compelled are going to go into a fit of rage. Easiest way to deal with this is to simply arrest them before you destroy the cube.
Unnatural corpse (F): A corpse shows up and it’s linked to a colonist. Study it in order to safely destroy it. If the corpse is destroyed, it harms the colonist it’s linked to… So… Just don’t destroy it.

Be the first to comment