
Guide to Clash Defense
By Morav.
At the time of creation, the two main strategies for Clash defense are Bridge and Turtle.
Bridge involves placing your units as far forward as possible to force the attacker to engage your units. Usually this is done with multiples flags buffing and/or a debuff tower or two behind your units and the goal is to have a fast paced, “fair” duel.
Turtle involves one of two main methods, but both control your units to stay within your starting area in range of your buffing towers and protecting your debuff towers to ensure they stay up as long as possible. The goal of this strategy is to run down the clock and force the enemy to lose because they take to long.
- Method one involves blocking off all access points to the enemy with barricades so that your own units won’t leave the initial area until the enemy breaches the barricades.
- Method two involves the use of the Assembly Beacon unlocked at stronghold level 3. This structure locks your units in place, but gives ranged abilities an extra 3 tiles of range (this should also apply to AOE abilities that are cast on an enemy or tile at a distance from the caster – I’ve not personally tested this though yet so this may be incorrect)
Following will be some visual examples of each strategies general placement and possible units for both.
Bridge Strategy Overview and Visuals
Bridge uses units that work well in confined spaces such as units that have AOE Damage, Utility, and Healing. Many units fit two or even 3 of these categories so your goal is to build a team that has lots of passive bonuses and AOE buffs/debuffs, then adding in one AOE damage dealer and 2 more damage dealers with a mix of single target and aoe.
- Damage unit examples – Papal Ice Priest, Might, Lightning, Dantalion (rank 7 ideally), Beryl, etc.
- Utility (buffs/debuffs) – Papal Ice Priest, Nightingale, Lash, Enforcer, Abyss, Maitha, Gloria, Magnus, etc.
- Healing – Angel, K.A. Light Conjurer, Butterfly, Samantha, Inanna, Maitha, etc.
To help even out the fight (AI vs human), Bridge uses flags for defensive structures – my recommendation is you either use 2 or 3 (the cap) at all times. What other structures will depend on your goals/weaknesses you’re okay with having.
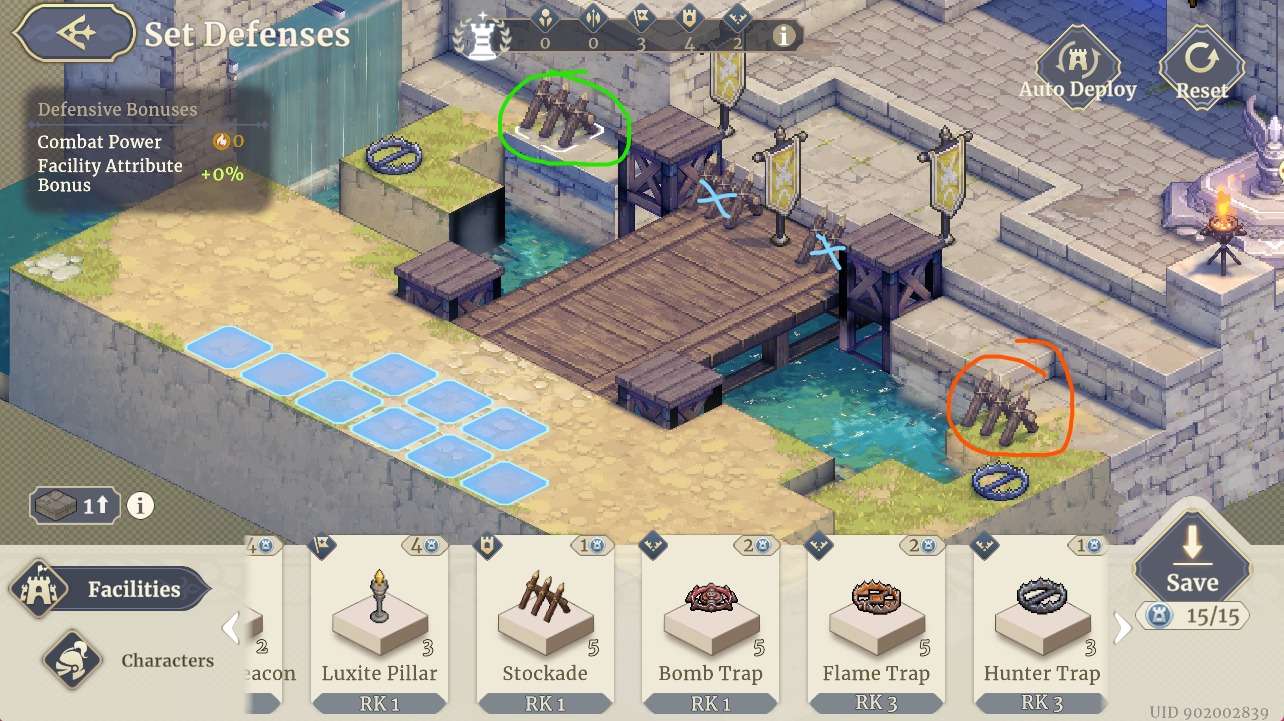
To give a couple example layouts please see the following images respectively:
- The green circled barricade placement is to delay seekers with jump from having an easy access point to your main area. The orange circled barricade is there for the same reason. The Hunter traps generally (depending on unit starting position/movement) will cancel the 2nd or 3rd turn of the enemy seeker buying you main team more time to kill the enemy team. The blue x’s are to prevent a gloria flag toss from destroying more than 1 banner of yours as well as to prevent your own units from moving back into your main area as your units will be placed in front of the barricades on the bridge, hence why this is the Bridge Strategy.
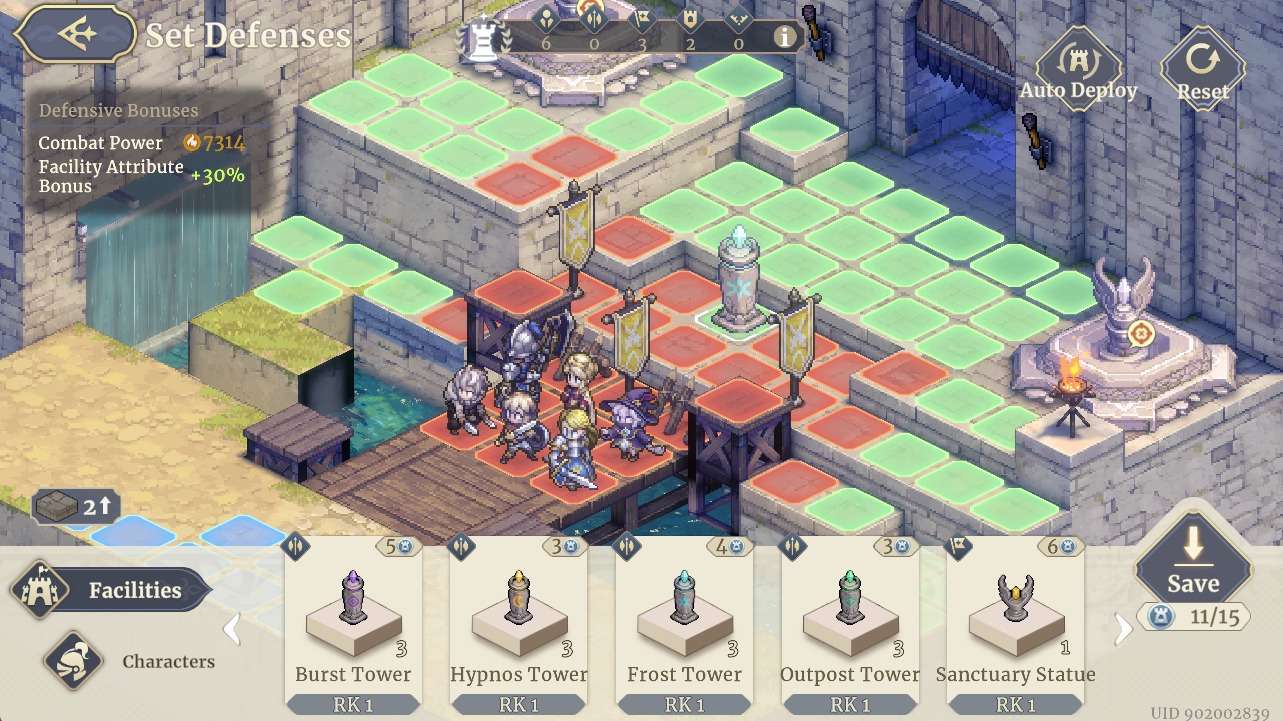
- This variation drops the side defense for the addition of a frost tower which covers the entire main area of your base as well as a bit of the bridge itself in its range to slow Seeker units, debuff/slow enemies attacking your main force, and be just a general nuisance. 4 free structure points so have fun with them.
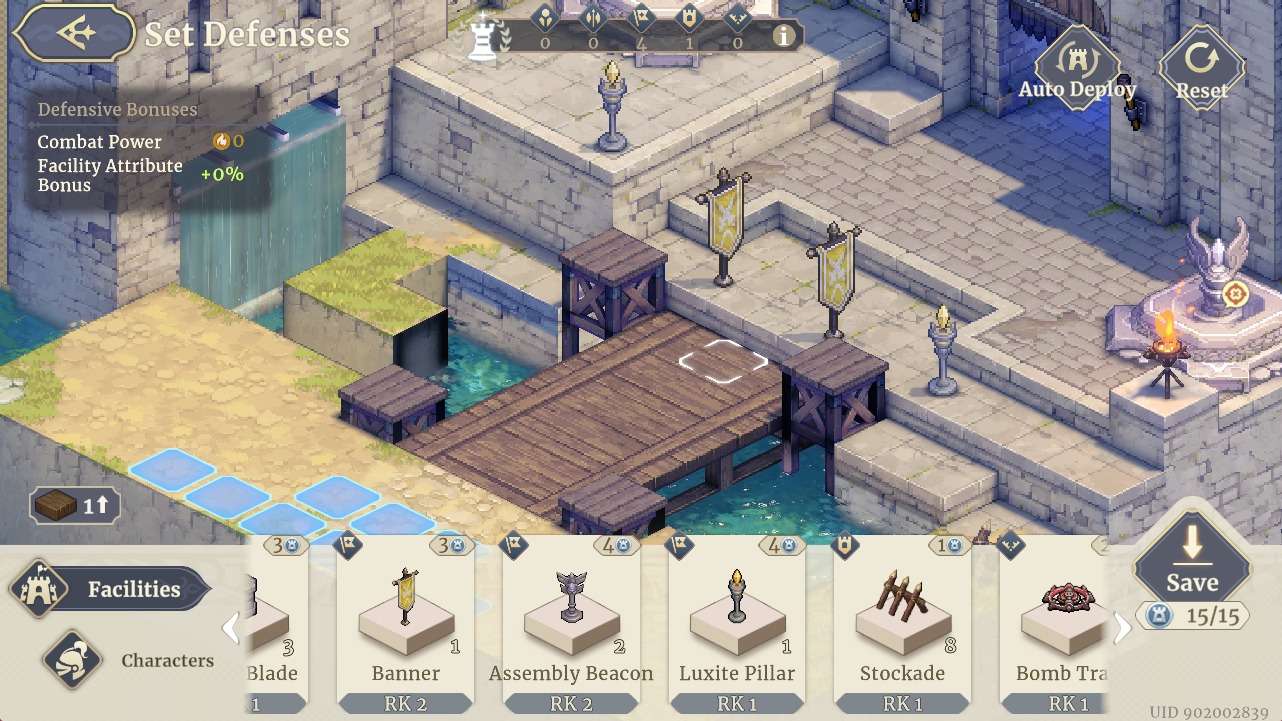
The following is two non-standard Bridge layouts I’ve run into:
- This is a pure buffing array, if the enemy does not bring healing reduction or healing block debuffs and you bring Maitha and another good AOE healer (Angel for example) your team is semi-immortal unless you get instantly killed by a Beryl-Inanna combo or the like. If bringing this be aware that if the enemy is willing to sacrifice Gloria or brings the teleport Tactical Order they can destroy both of your banners immediately which hurts your survivability and damage a lot. To counter this, you have ONE free building point for a barricade or hunter trap – you can place a barricade between both the banners and a slow moving unit where the cursor is currently located so that she can’t throw a flag in either of the two spots that would break your banners. (In this example, the barricade is at the bottom right of the screen blocking the one-tile walkway to stop enemies from considering that route as easily).
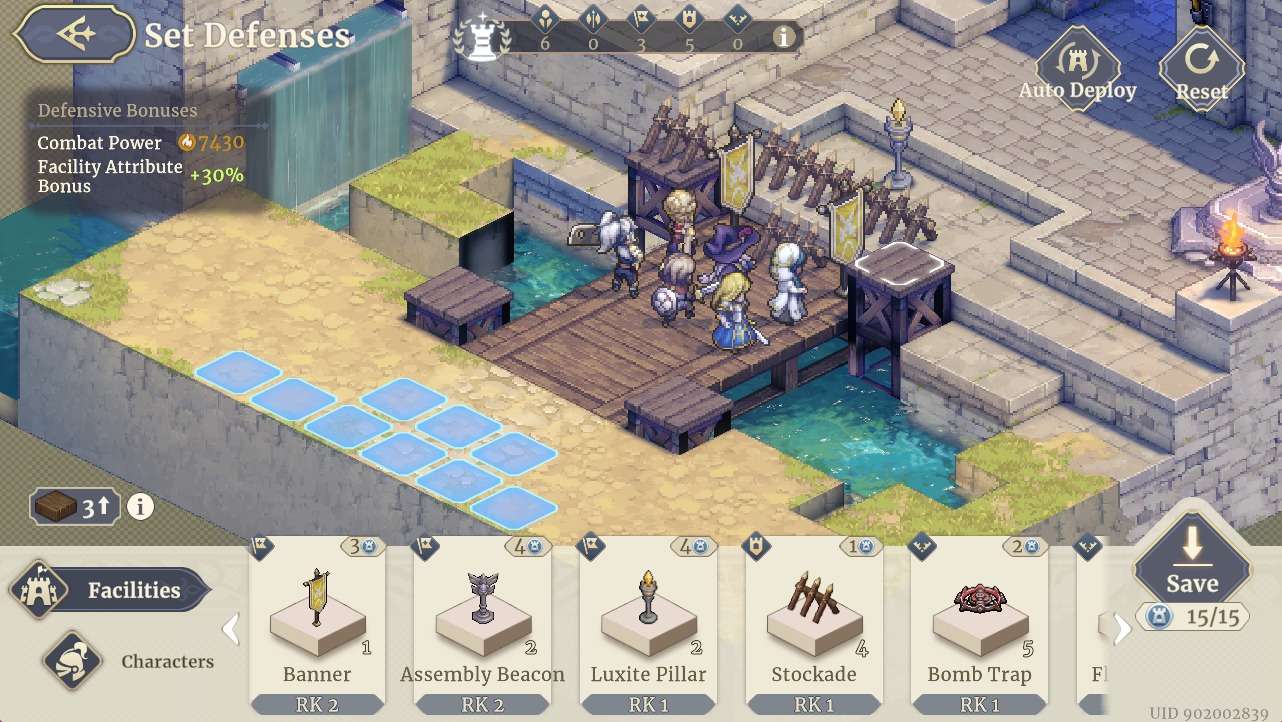
- This is more of a standard comp but with a meme twist. Using the standard two banner placement, combined with a distant Luxite (healing) pillar that the enemy can’t touch easily, you turn all your units to face away from the enemy to make them think its bugged in some way lol. Has a tendency to bait folks in thinking you messed something up, but in reality its just a straightforward bridge comp. This variation has a free barricade you can place anywhere, currently on the top most wooden platform, but can also be placed on the bottom of the screen to block the walkway by the water tile.
Turtle Strategy Overview and Visuals
Turtle uses units that work well when dealing with AOE and ranged damage as well as having high range and good AOE damage themselves. To paraphrase the intro, the name of the game is delay, delay, delay.
The two major variations of Turtle (with and without the Assembly Beacon) have rather different unit recommendations so a general rundown will be given for both but specifics will largely not be given.
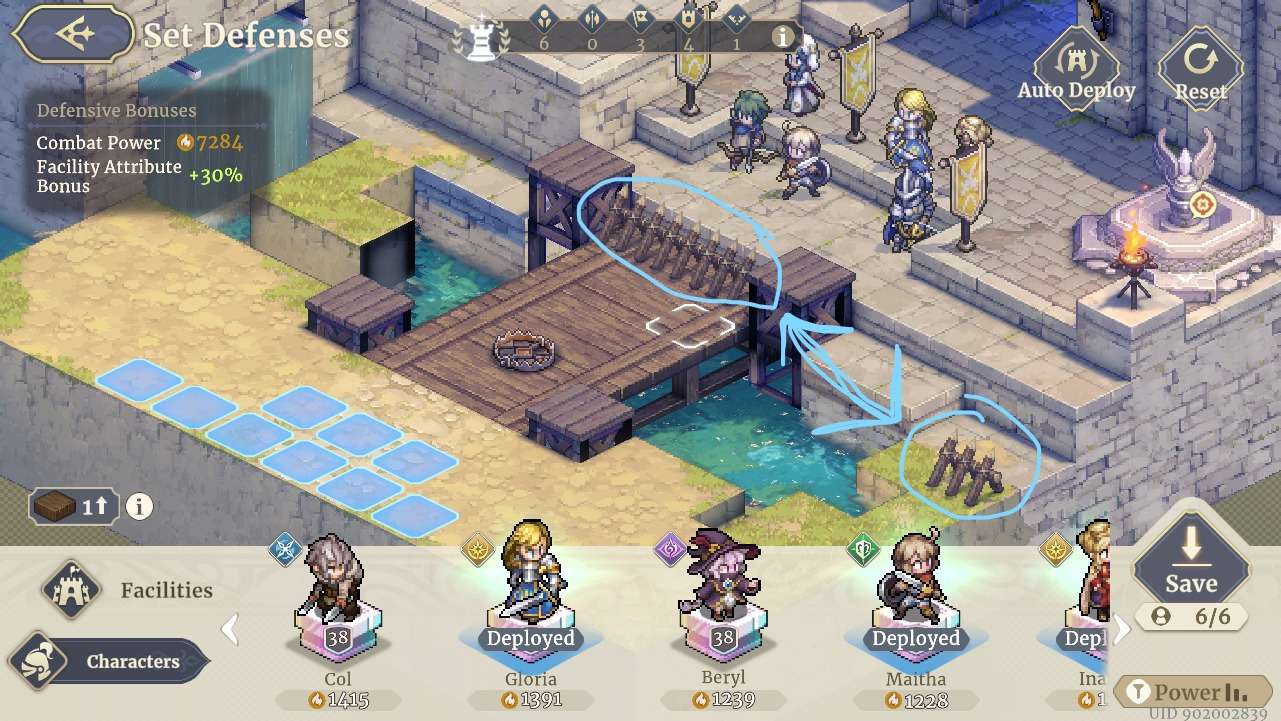
- Standard Variation (see left image below) basically inverts the bridge comp by locking your units into your main area and then forcing the enemy to come to you. Ranged AOE attacks/debuffs are very helpful for this as it allows the enemy who will most likely focus the bridge to be bombarded repeatedly and have to deal with general AOE nuisance. Combine this with some strong aoe heals/buffing units and at least 1-2 tanks to fill the inevitable broken barricade spot and you’ve got a strong general run at this strategy. You must use barricades to block off your own bridge and the small path at the bottom of the screen (see blue circles below) and do not use units that have Jump.
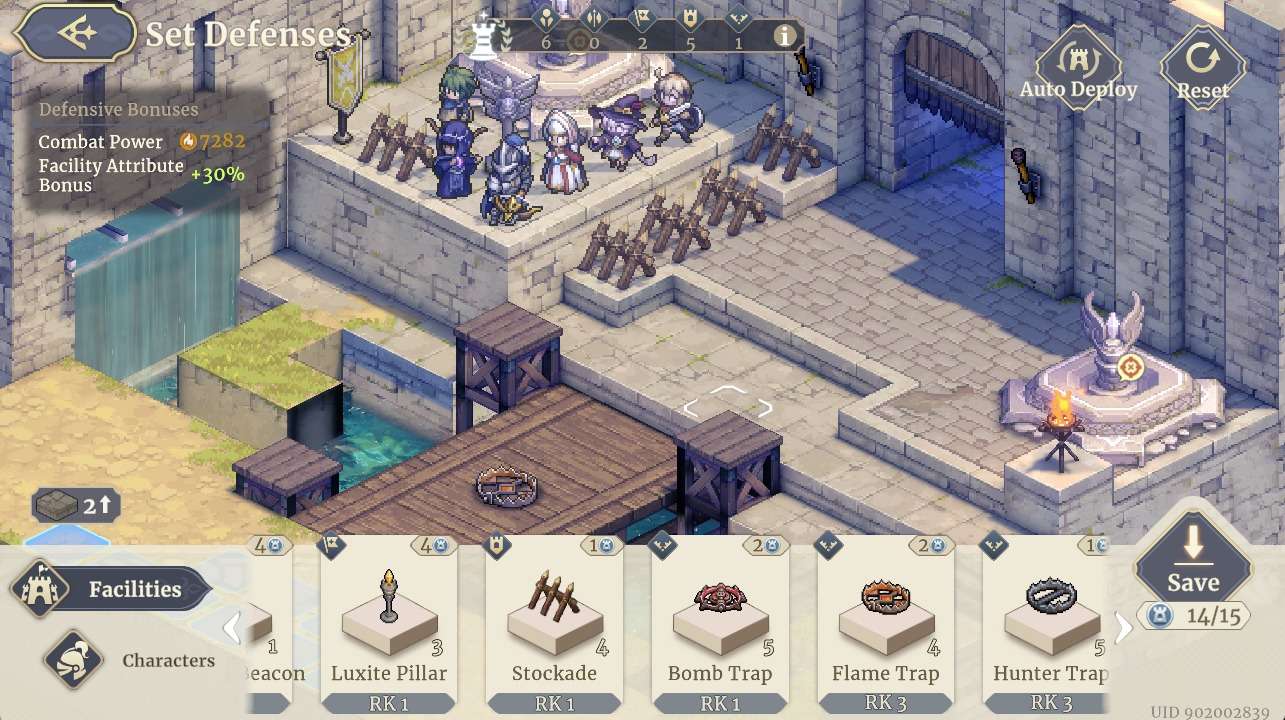
- Assembly Beacon Variation (aka Artillery encampment, see right image below) makes use of the Assembly Beacon which has the previously stated affect (conditional +3 range) while locking your units in place. Once leveled up the assembly beacon also gives very strong protection against AoE DMG and Ranged DMG. This variation requires the use of units with long base range attacks/spells (3 at a minimum, ideally 4 or 5 base range) as they can then cover your entire main area as well as parts of the bridge depending on which location you place them. As shown in the image there is also an additional 1 structure point available that you can use to place a barricade somewhere. I personally do not recommend this variation unless you have either Nungal, LilyWill, or other similar extreme range unit.



Be the first to comment