
Ranger Class
As the most popular class in the closed beta version, the Ranger has won the favor of many players thanks to its simple operations, relatively safe output environment (ranged), and high damage rankings. This guide will provide a detailed walkthrough of the Ranger class, the most suitable class for beginners. Corrections are welcome if there are any mistakes.
First, the Ranger has two specialization skills, which means two different playstyles: “Tamed Beast” and “Hunting.” Tamed Beast focuses on summoning two pets (a tiger and a hunting dog) to fight alongside you. This allows for attacking while moving, making it suitable for scenarios requiring mobile DPS.
Hunting, on the other hand, does not involve pets and relies entirely on the character’s own damage. Hunting provides higher damage but requires a fixed position for DPS. Frequent movement will lower stability, leading to a loss in damage, so it’s only suitable for stationary scenarios.
In high-difficulty dungeons where frequent movement is necessary to dodge boss skills, the damage from “Tamed Beast” can surpass that of “Hunting.”
Tamed Beast
Rotation:
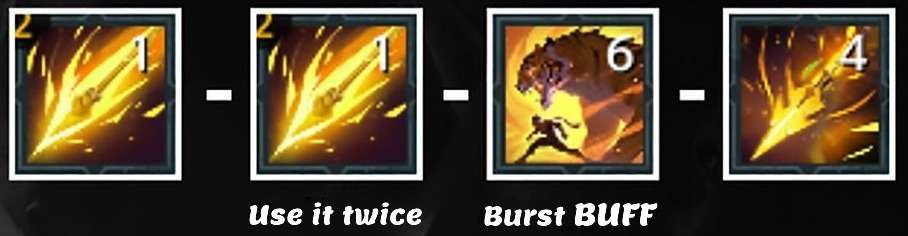
First Rotation for Buff+Setup:
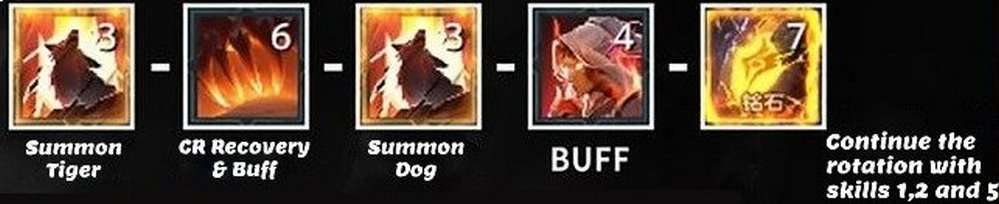
When Wild Union is on cooldown, first build up Collaboration Rating, then:

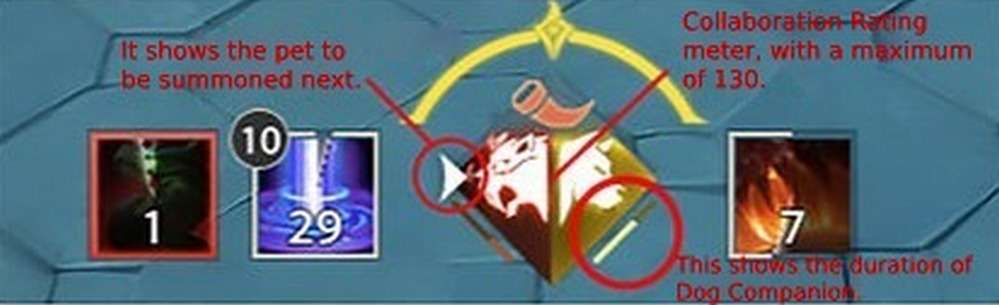
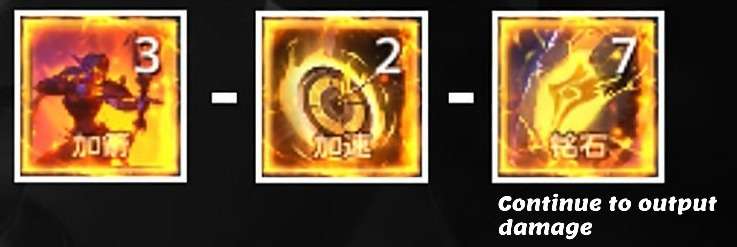
The core of Tamed Beast is to ensure both pets (Tiger and Hunting Dog) are on the field simultaneously. The Tiger has higher damage output, while the Hunting Dog can increase the attack power of the character and the Tiger. Having both on the field maximizes DPS efficiency.
Pay attention to the duration of your summons. Only re-summon when it’s about to run out, to avoid unnecessary resource waste.
Skill 5 is an AOE, consuming 10 Collaboration Rating, so its best use is during group mob fights. Avoid using it constantly during your boss fight rotations as it could drastically decrease your overall DPS.

Prioritize your CR for the summoning cycle and only use Skill 5 if there’s extra CR to spare, without compromising your summons’ uptime.
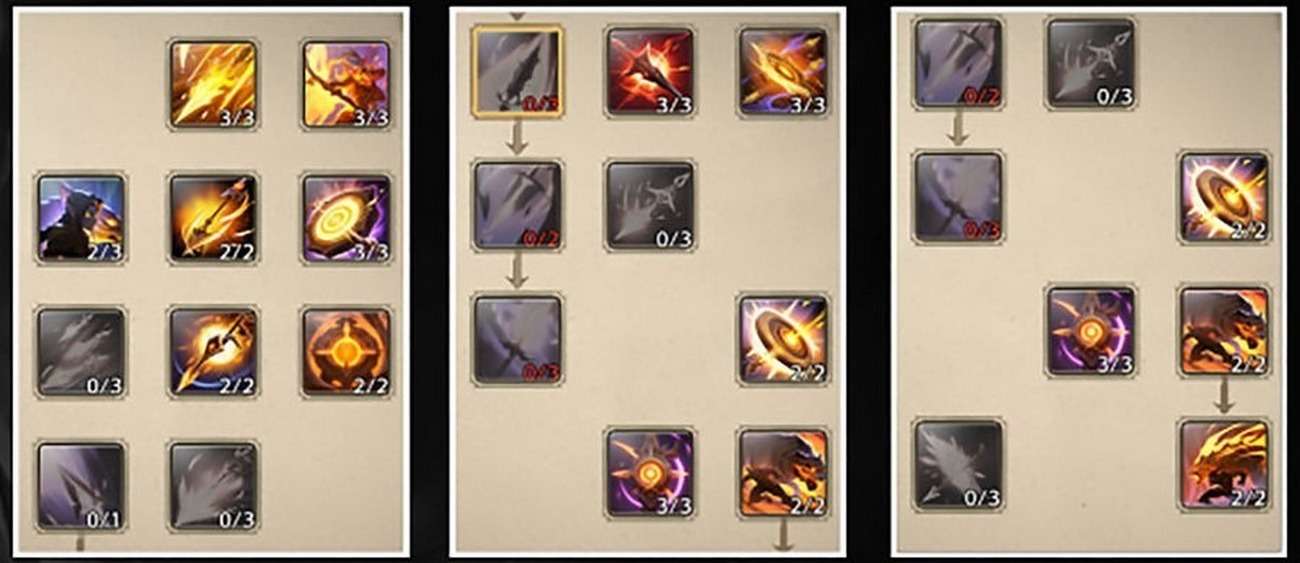
Talents:
Recommended build:
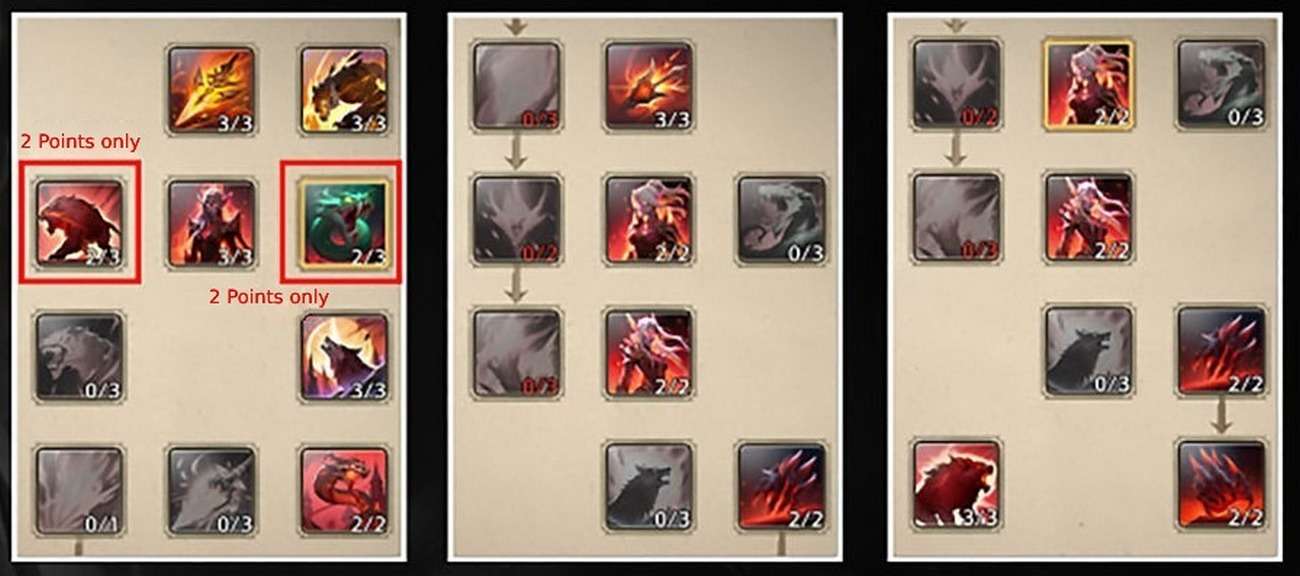
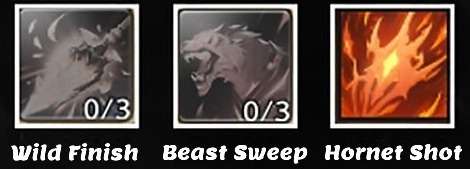
For single Boss battles/early game stages, you can consider maxing out “Wild Finish” when the monster’s HP is low and the damage of Wild Shot is higher than your pet’s. For group mob fights, you can consider maxing out “Beast Sweep” (You can choose to discard the talents in the first two rows or the “Wild Spirit” in the last row). It is not recommended to max out “Hornet Shot” because it needs to be stacked 3 times to maximize the damage output, the rotation flow is harder, and in terms of Collaboration Rating Recovery, it’s not as good as “Viper Shot”.
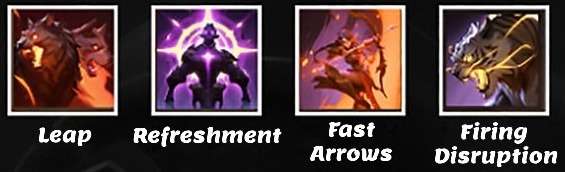
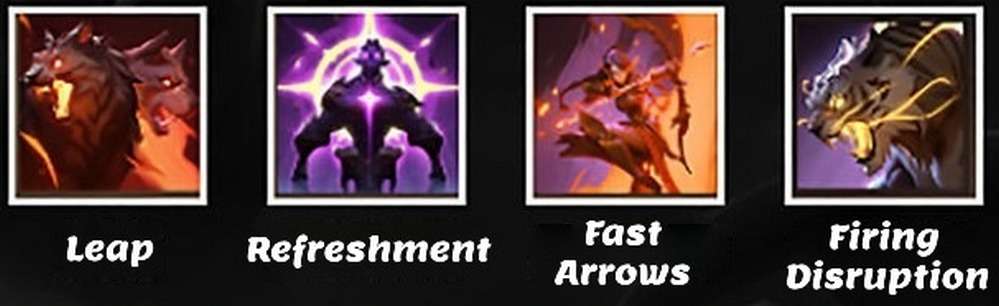
Recommended Ults: Leap + Refreshment + Fast Arrows (PVP, Knockback Enemies) / Firing Disruption (PVE, Boss Mechanics).
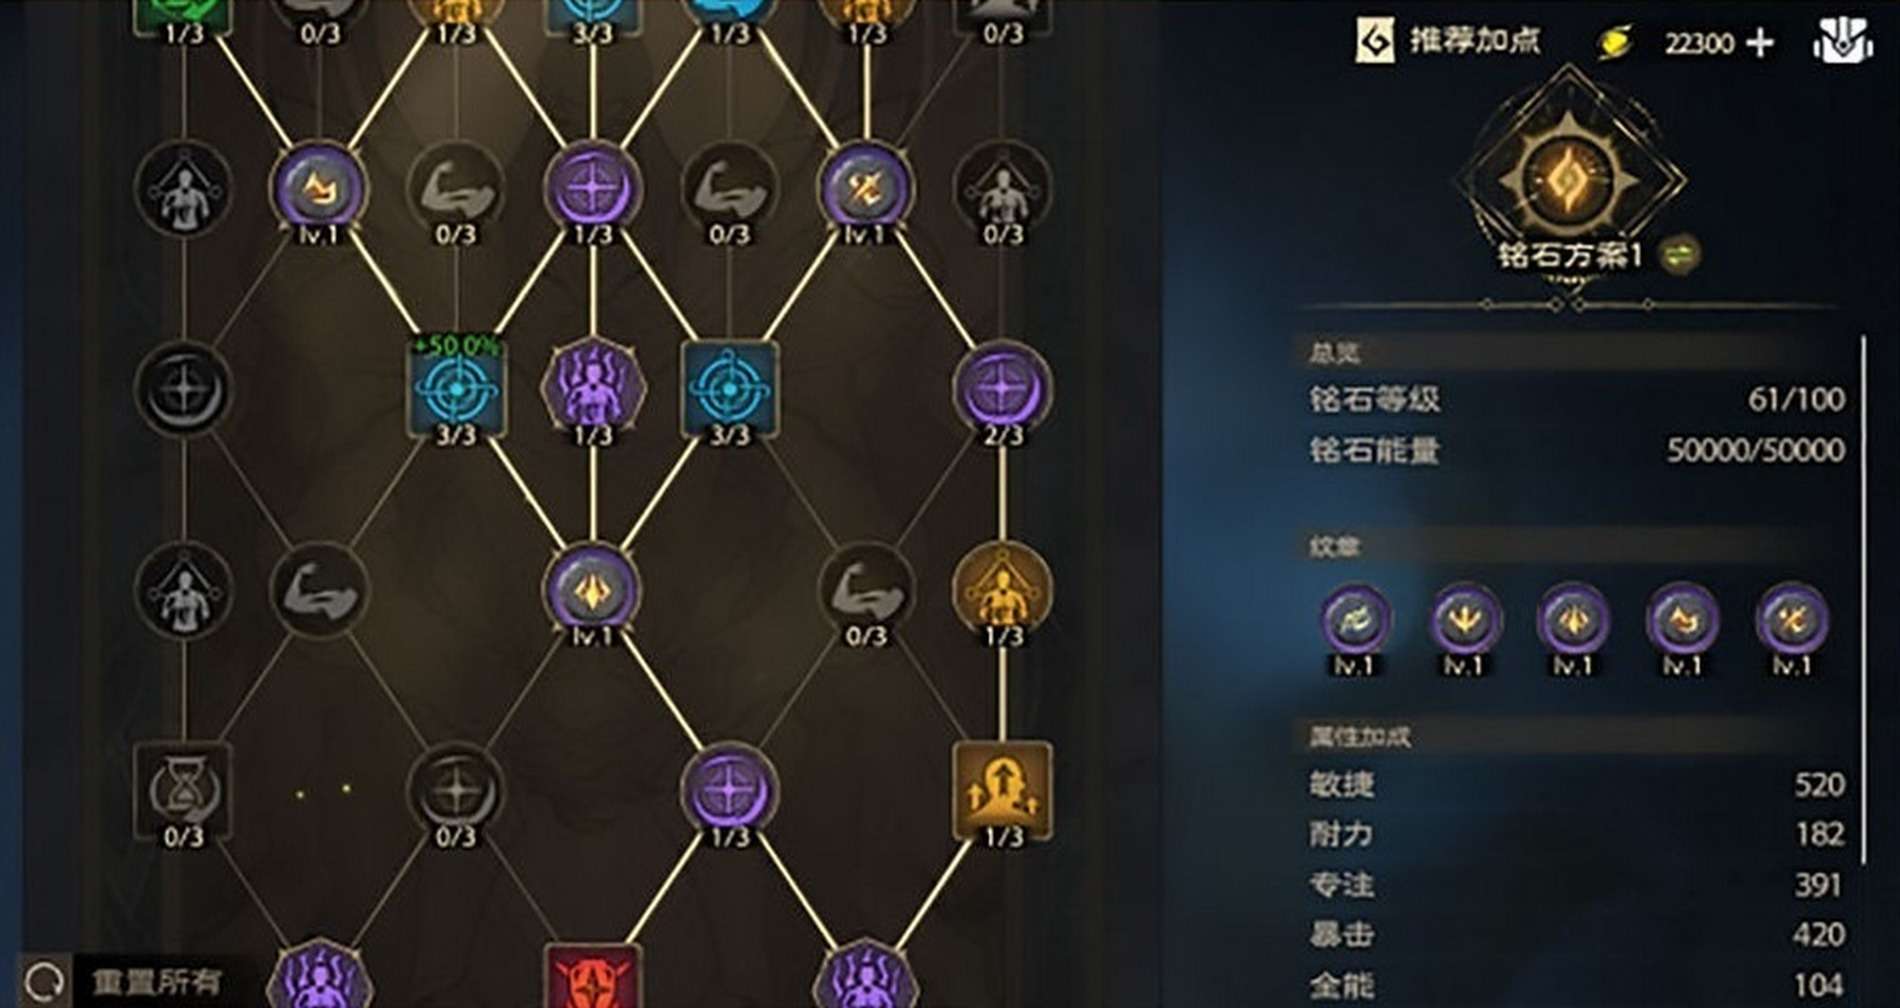
Inscribed Stone:
For inscribed stones, it is recommended to allocate one point in each attribute during the early stages, as you benefit the most from the first level cost. Additionally, we need to prioritize unlocking the core nodes in the center and the five emblem slots, as these will significantly increase combat power.
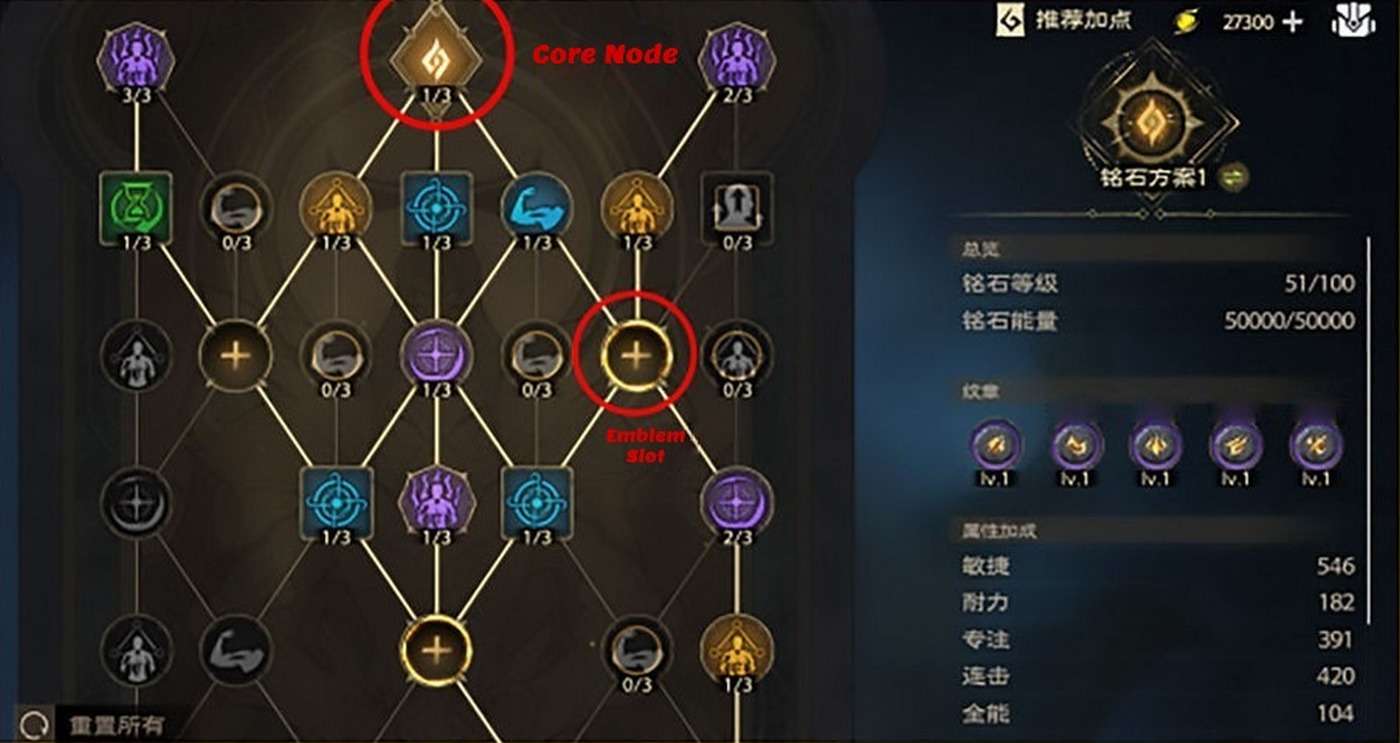
In the later stages, prioritize fully unlocking the core node, then upgrade according to the following attributes:
- Inscribed Attributes: Resonance > Combo = Specialization Effect > Omni = Cooldown > Agility > Focus
Note: Prioritize Resonance because it enhances the charging efficiency of the Inscribed Stone Skill (skill 7). During battles, we need to pay attention to the charging time of “skill 7” and try to match it with the cooldown of “Skill 6” (buff). This way, we can maximize the effectiveness of the inscribed stone skill. When the charging time is consistently improved, you no longer need to add points to Resonance. At this point, you can choose between “Omni” or “Cooldown”.
- Equip Attributes: Hit > Resonance > Combo > Specialization Effect > Omni > Cooldown > Agility > Focus
Having an excessive “Hit” attribute is unnecessary. So, you should stop adding points as soon as it reaches the required amount for the current group instances you’re facing.
Hunting
Rotation:
Firstly, use the buff skills:
By following this sequence, you can instantly get full stability:
Prioritize in order whichever skill lights up next. Make sure to always keep Skill 1’s buff up by using it twice consecutively. Use Skill 3 before Skill 2 for increased damage. Maintain your rotation with Skill 5 if all your other skills are on cooldown. Don’t move! If you mess up your stability, Skill 1 is your savior since we need the other skills for DPS output.
Talents:
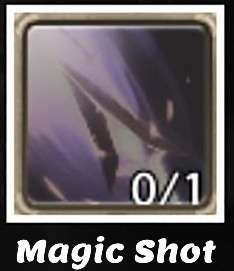
Recommended build:
Among them, “Magic Shot” and “Sniper Shot” feel slightly different in usage, but both of them are considerably strong. Thus, they should be chosen based on personal preference and/or situational scenarios.
Recommended Ults: Leap + Refreshment + Fast Arrows (PVP, Knockback Enemies) / Firing Disruption (PVE, Boss Mechanics).
Inscribed Stone:
In terms of inscribed stones and equipment attributes, Hunting is very similar to Tamed Beast. Simply change all “Combo” attributes of Tamed Beast to “Crit” and it’s done.
- Equip Attributes: Hit > Resonance > Crit > Specialization Effect > Omni > Cooldown > Agility > Focus
Note: The Hit attribute just needs to meet the requirements of the current boss you are facing. Resonance is prioritized until Skill 7’s recharging time is roughly matched with Skill 6’s cooldown.


Be the first to comment