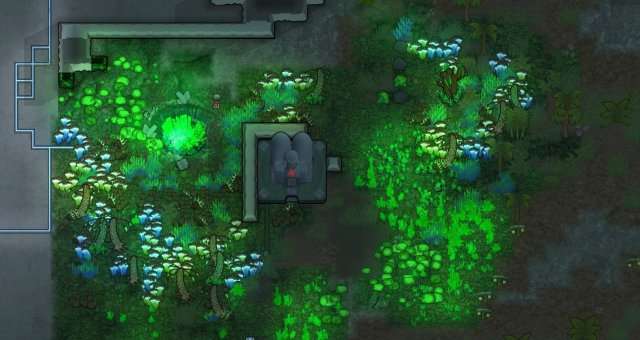
Basic, step-by-step SOS2 guide for the derelict ship start. Suitable for medium-new players and people who have never touched the SOS2 mod before. Includes basic Combat guide.
Basic Guide to Derelict Ship Start
Before You Start
Colonist choice
You obviously want at least one doctor. You’ll also need someone who spends a considerable time planting, although both planting and cooking can/will eventually be learned by your colonists. If you have the “Gain Skill Passions” mod and you get lucky, you might even get passions that way. It’s still a good thing to look out for.
What you’ll probably underestimate (and what I underestimated) is how important it is to have at least one researcher. You start with an industrial tech level, and unless you have a technology upgrading mod (like “Tech Advancing”), getting to starflight basics will take you ages.
Keep in mind people assigned to researching will also scan. They’ll prioritize researching, but if you also want to scan with a lower-level research colonist, you’ll have to micromanage them using drafts to make sure your best researcher is on that high-tech research bench whenever they have time.
Feel free to have one artist, preferrably not your researcher. Unless you go and get animals and plan on handling them like a glass vase (or you can get those weird bugs that can survive in space), animals will be redundant at first. Construction is important, but can be trained (see tipps and trivia).
So You’ve Started
1. Lower your shields
Before you do anything, click on the scanning bridge (big building across the research bench with lots of screens), and you’ll see the option to deactivate shields below. If you keep them up, your ship will eventually start overheating and exploding. You only need to get your shields up in combat. Otherwise, keep them down. While your shields are up, cooling vents and solar panels won’t work.
2. Explore
Get your colonists to wear some EVA suits, draft them, and lead them around your ship. Poke your head into all the doors until you have full intel of it. Then you can undraft them, and start setting manual priorities.
3. Setting up
Firstly, set your entire ship to be your home area. Secondly, you want to set up some stockpiles, since your ship won’t have any. I use a mod that allows storage buildings called “LWM’s Deep Storage”, making stockpile problems a lot easier to handle.
I also recommend making an allowance area to be inside the ship and always in breathable air to restrict colonists to if need be.
Deconstruct the cryosleep caskets. You won’t be needing them for now.
First and foremost, you want to research Microelectronics. Why? Because without them, your comms console is useless, and you won’t be able to trade with ships unless you have orbital trade beacons, which are locked specifically behind this research.
4. Prolonged Survival
Get some rice growing in the basins. Set the stove to cook simple meals (I always do until 4), and make a small, one-tile stocking zone where they will put the simple meals. I also moved my poker table to the left side of the ship, near the chess table, for some space. Set your colonist beds. Get them some weapons.
Time sensitive: If you click on the two red rotating reactors, you’ll see they show how many years it will take for them to run out of fuel. Your nuclear reactors make a LOT of power, and you don’t really want them running out, but refueling them is only possible with uranium fuel pods. These are locked behind the reasearch “Ship fission reactor” in the Ship tab. Make sure to get there on time.
5. Research
Before you can start upgrading/adding to your ship in the slightest, you will need to do a LOT of research, as mentioned above. Once you have microelectronics, you want to start moving to starflight basics in one way or another, especially to get Ship fission on time. When you click on your scanning bridge and view ship info, the goals listed there are some long term goals you should go for, along with upgrading your ship.
Combat
1. “I’m being attacked! What now?”
The game will pause automatically, just like during a raid. If you’ve already panic clicked some stuff, make sure it’s paused.
2. Get your shields up
Click on the scanning bridge, then on shields.
3. Get someone to man the ship bridge
Pick one of your colonists (probably the one that’s closest) and prioritize manning the ship bridge. This is for the case that you’re boarded, to make sure your turrets do some of the fighting for you.
4. Decide: Will I use torpedos for this fight?
Torpedos are heavy af (unlootable from enemy ships through personal shuttles), extremely useful, and extremely expensive. Let me tell you a secret: The ship you start with is increadibly badass, on top of looking absolutely amazing. If you’re on community builder or lower difficulty, you’ll be getting things like Light Frigates – in other words, tiny space craft that you can eat for dinner. If you vaguely know what you’re doing, you’ll have torn them to pieces before they even get your shields down.
You don’t want to waste torpedos on every fight. In the beginning it can be difficult to judge when that is the case, but that’s something of practice. If you play on some extreme difficulty, you might have to use them for EVERY fight, in which case, of course, use them. But be sparing.
5. Set up your weapons
Click on the scanning bridge, then on weapons. Now click on “set forced target” when you have all of your weapons selected. This will immediately take you to the enemy ship, where you want to set your focus on where you think the enemy ship’s scanning bridge is. Usually it’s somewhere in the middle, or if you’ve encountered this type of ship before, you’ll already know where it is. Once the enemy scanning bridge is destroyed, you automatically win.
6. Fight!
Unpause the game, click on the red ship symbol at the top and watch your weapons hit the enemy shield. “But they’re not doing any damage!” They will. Your enemy (often, not always) has shields just like you do, and you want to break them by firing at them until they’re gone.
If you’re using torpedos for this fight, you have to re-prioritize loading in a torpedo after every single one you fire. Once you see/hear them pop out, you have to click on your colonists again (who think their job here is done and it’s time to go eat while watching TV) and prioritize loading in the next torpedo again.
If you’ve already destroyed a big part of the enemy ship, you might want to reselect your weapons and force them to attack a different target, to make sure they aren’t firing into empy space.
7. “What’s the heat meter for and why is it going up?”
The heat levels are crucial. While your shields are up, heat generated by your weapons can no longer escape into space, and will collect in your ship. (This is what the heat sinks are for, as they increase your capacity for this). Once heat goes above maximum, your shields will automatically go down. The ship will start cooling itself using vents once that happens, but during that time, you’re open to enemy attacks. Keep your shields up until you can’t anymore.
If you’re super bored and want to play a pro move, you can stare in concentration at the enemy shooting stuff at you on the bottom right corner and flick your shields on and off accordingly. Different weaponry moves at different speeds, and you won’t be able to stop all attacks. Faster attacks however, such as lasers, don’t do as much damage as for example torpedos do.
Keeping some more distance to the enemy is recommended for this. Your shields also have a certain delay when rapidly clicking them on and off. I personally haven’t been able to utilize it yet, but if anybody with enough practice can get their ship to hold out longer with this tactic, do tell.
Extra tip against enemy torpedos: You can set your laser to point-defense mode, and it will attempt to intercept incoming enemy torpedos.
Often you will find your heat is going up too quick and your enemy’s shields are somehow still standing. Don’t be afraid to use the Emergency purge port, which ejects molten silver out into space to cool the ship. This lowers your shields, but doesn’t break them, so you can reactivate them afterwards and hold out for much longer.
8. “My shields broke!”
If you’re fighting someone your size (or bigger), or it’s your first time fighting or you just got unlucky, the enemy might get your shields down. If you got their shields down first, you’ll probably be fine so long as you keep firing. You’ll rarely be able to outrun a ship unless you’ve already upgraded yours or you’re facing a particularly slow one.
Make sure your colonists stay indoors. Get them to start loading those torpedo tubes if they aren’t already, or if they’re out of torpedos, draft them and get them to stand somewhere to the middle of the ship. Otherwise your absolute genius of a constructor might decide now is the high time to do ship repairs and get sniped by an enemy torpedo the second they step outside.
Theoretically, the enemy ship could also attempt to board you at this point.
9. “I’m being boarded!”
If your shields have been down for a while now and that of your enemy are still up, they will attempt to board your ship. A few personal shuttles, notably announced by the game informing you that “shuttles are ready for launch”, drop down somewhere near your ship on your map, and a couple people with EVA equipment try to come and kill you.
In my experience, they first spend a sufficiently long time dealing with your turrets. So long as you have someone manning the ship bridge, your turrets will fire without putting your colonists in direct danger.
If you’ve already destroyed the enemy ship and they’re still boarding you, but you’re no longer under direct fire, you can draft your colonists and have them shoot from out a corner or behind some barricade to speed up the process and prevent the loss of any more turrets. Sometimes when one of the enemies is currently firing at a turret, they will ignore your colonist firing at them from a different angle.
10. “I won, what now?”
You can salvage the ship either directly via the salvage bay, or send your colonists in with personal shuttles, first. Do NOT salvage the ship while your crew is still there.
You use the salvage bay by clicking the scanning bridge and then clicking “salvage ship”. You’ll also see other options there, such as just abandoning the ship wreckage and leaving.
To use the personal shuttles, make sure they’re loaded with enough chemfuel to go there and back, and potentially to sit in hover mode for a little while. Shuttles act a bit like caravan animals while in hover mode, and slowly consume fuel over time. You can order them to “sit down” at any time, though. Before they can take off, you’ll have to remove some roof. All doors on your ship are airlocks, so as long as your colonists have EVA suits, you can confidently remove some roof to allow your shuttles to take off. Feel free to seal the roof later, if you feel like it.
Collect resources by making your colonists pick up things until they can’t pick up any more, and then loading them back into their personal shuttle and tossing them back onto your ship. They’ll need some place to stand without roof, enough chemfuel to go back, and sufficient roof needs to be removed where they’re going to land on your ship.
“But OP! I have a cargo shuttle right here, and it can pick up a lot, why not use that?”
Because, and this isn’t evident immediately, the cargo shuttle is NOT fueled with chemfuel. It’s fueled with uranium pods, locked behind the research “Ship fission reactor”, which is in the “Ship” research tab and requires starflight basics to be researched first. Chances are you won’t have enough fuel to go there and back, and you really don’t want to leave it behind, especially since you can’t rebuild it any time soon.
Tips & Trivia
- Use your soil (not the hydroponics basins) to plant some cotton. You can then use this cotton to build a shooting traget for recreation. “But OP!”, you’ll say, “my colonists are constantly going to be shooting the walls!” Yes, well, that’s the point. Ship hulls have ridiculous amounts of hitpoints (or at least enough to withstand a few bullets), and your constructor will gain very valuable experience when repairing the walls (and your colonists shooting exp). Just make sure the bullets only hit ship hulls and nothing else of importance.
- I’ve said it in the guide, but if you didn’t get to that part: Once you start the game, you’re on a time sensitive mission to get Urianium Fuel Pods, locked behind the research “Ship fission reactor” in the Ship tab. You have a sufficient amount of time for this, but I’ve not seen a single trader selling the fuel pods, and if you run out, your nuclear reactors generating 10 000 W each shut off. You can click on them to check how long you still have.
- Uranium is pretty heavy, so you’ll want to get it from orbital traders (if you can), since looting it off of enemy ships takes up a lot of space in your salvage bay. Always loot it if you have the extra space, though.
- Your ship currently has a small life support system. The only drawback to this is that it’s less power efficient than a big one to save space, but you don’t exactly have (too much) of a problem with that. Feel free to try and research your way into getting the bigger version.
- Steel is more valuable than plasteel. Sounds weird, but most repairs/buildings will require more steel than plasteel, and steel is heavier, so salvaging plasteel is always easier. Make sure you have some backup amount of it for emergency repairs. Don’t forget to loot the slag from enemy ships as well: There’s a lot of it, and if you melt all of it down, you’ll have a lot less problems with steel.
- If you absolutely can’t live without a freezer, all you need is an open room. The temperature outside is -100 and it freezes everything instantly anyway, but usually you don’t even really need one. Things might deteriorate, but you can try to go around this by building a simple door instead of an airlock. Might need testing.
- If you were boarded, you’ll find a bunch of personal shuttles stacked on top of each other somewhere on the map. You can claim them, set them to hover mode, draft them, and then have them float inside your ship all on their own. There you can just use them as they are, or deconstruct them for resources.
“The heavy frigattes/corvettes/mech hive ships/etc. keep destroying me!”
One of the tips I can give is: Reload. Yeah. Ship battles can be very damaging at the moment, and if your shields went down in one fight, it will take ages until you’ve repaired all of the damage. Reloading causes the encounter to be re-rolled, and you might get a tasty light frigate or mining rig, instead.


Be the first to comment