
In Mir 4, you can cooperate and make friends with other players through clans. Build your clan into a mighty and influential powerhouse.
Definitive Guide to Clans
Join/Create Clan
- Tap Clan> Clan List tab in the Menu to open the Clan List window.
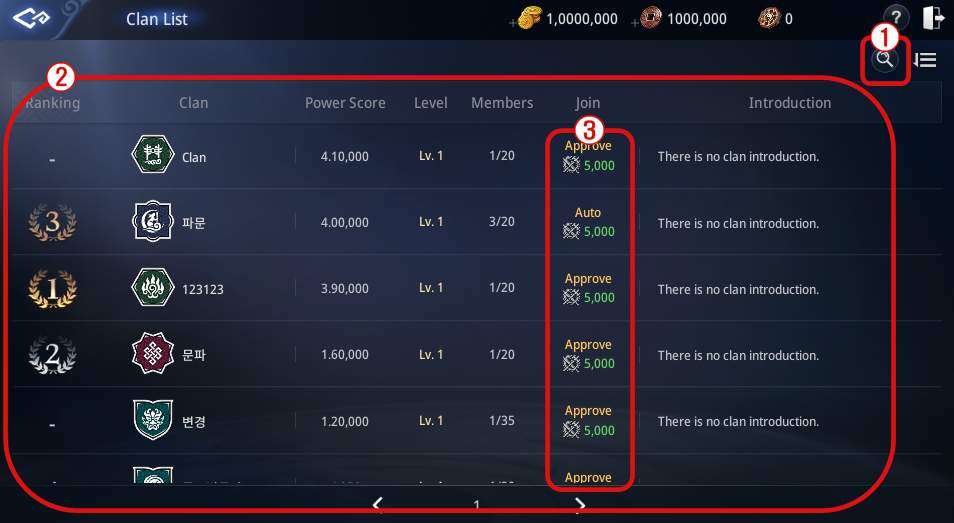
- 1. Tap the Search button to search for clans with keywords.
- 2. View the Clan Power Score, level, number of members, join method, and introduction.
- 3. Tap the clan you want to join and click the Join Request button to apply for the clan.
*If the clan’s join method is ‘Free’, you join the clan automatically. If it is ‘Approval’, then you need the clan’s approval to join.
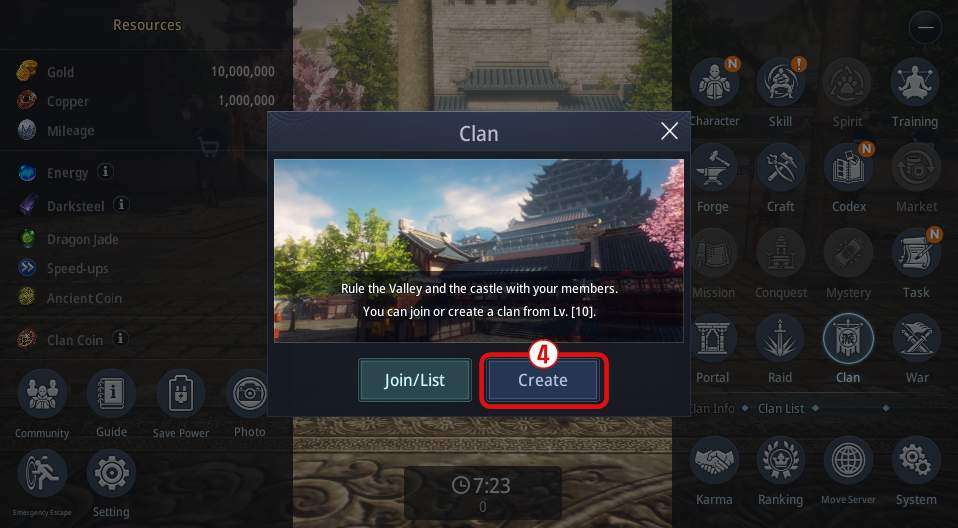
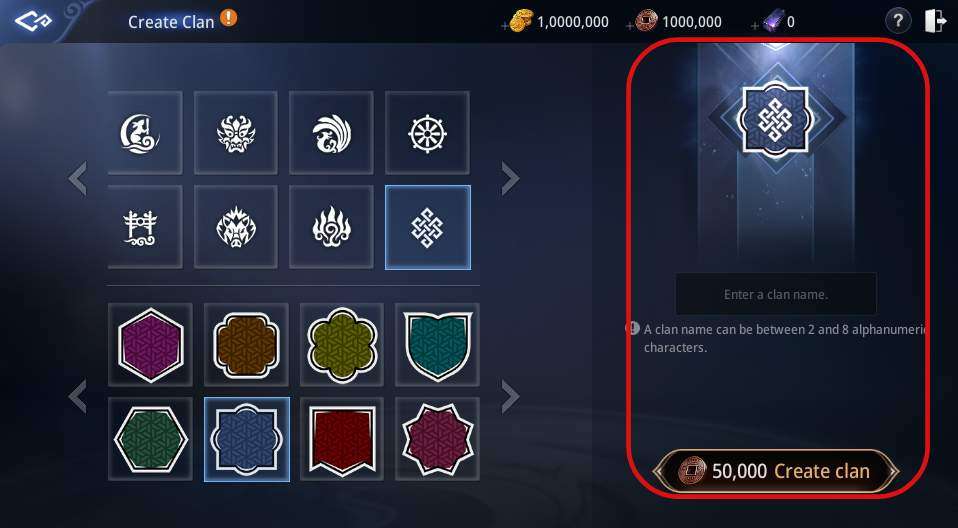
- 4. Creating a clan: Tap the Clan icon at the top right or click Clan > Clan Info tab in the Menu, then press the Create button in the window that opens to create a new clan.
Your character has to be at least Lv. 10, and the cost of creating a clan is 50,000 Copper.
Clan Info
- Tap the Clan icon at the top right of the main screen or click Clan – Clan Info tab in the Menu.

- View the clan’s basic information, introduction, Clan Techniques, and other clan features.
Member
- Tap the Member tab in the Clan Info window.

- You can view member information by rank.
- Tap Member to open the Member Info window and set or change the Aliases of members.
- You can set ranks to members in the Member Info window, and up to 8 Elders can be appointed.
- You can give Elders permission for Personnel, Finance, Diplomacy, or Warfare.
- You can transfer the clan leadership to an Elder.
- An Elder can appoint another member as a Chaperone and share their authority.
Clan Management
- Tap the Clan Management tab in the Clan Info tab to open the Clan Management window.
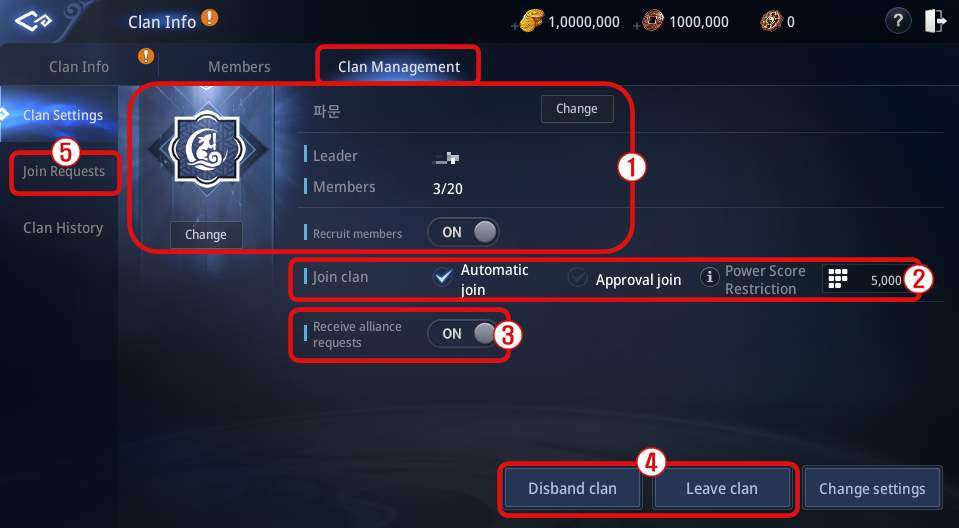
- Change the clan’s name and crest, and check the clan leader and the number of members.
- Set whether the clan is recruiting, the method of joining the clan, and the Power Score requirement.
- Set whether to receive Alliance Requests.
- Disband or leave the clan.
- Tapping the Join Requests tab shows the players who are awaiting to join the clan.
Support
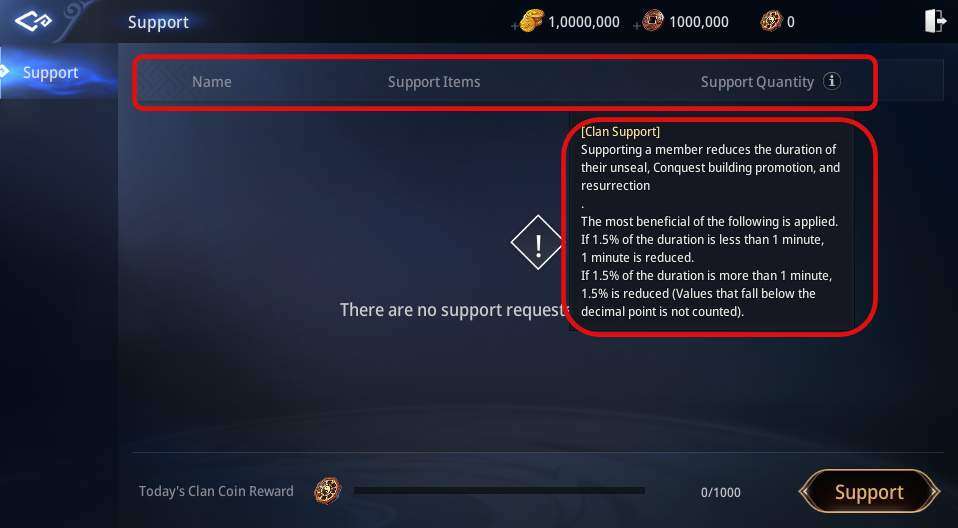
- Tap the Support tab in the Clan Info window. – You can check the requests for support made by clan members.
- You can support other members’ Unsealing or Conquest building promotion efforts in return for Clan Coins. You can earn up to 150 Clan Coins a day.
Supply
- You can report activities completed by playing the game such as gathering and entering contents.
- All activities can be completed and reported a set number of times each day.
- Daily counter is reset at 4 am, and the progress rate does not reset if you do not claim rewards via reporting.
- Tap the ‘Clan Gift’ tab to open the Clan Gift window.
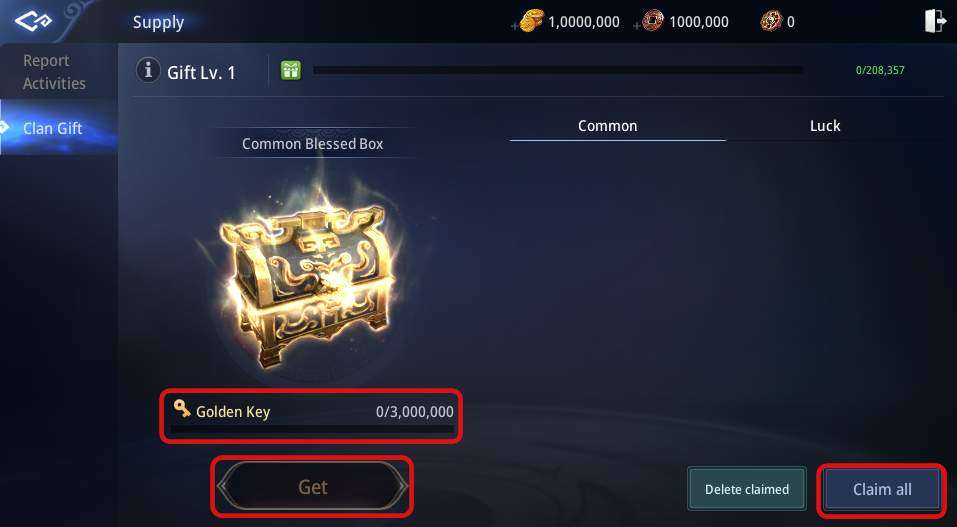
- Tap the Receive Gift button within the time limit to claim the obtained boxes.
- As your Gift level increases by claiming gifts, the rewards from Blessed Boxes increase at certain levels, which can be obtained by collecting Golden Keys.
Technique
- Tap the Technique tab in the Clan Info window.
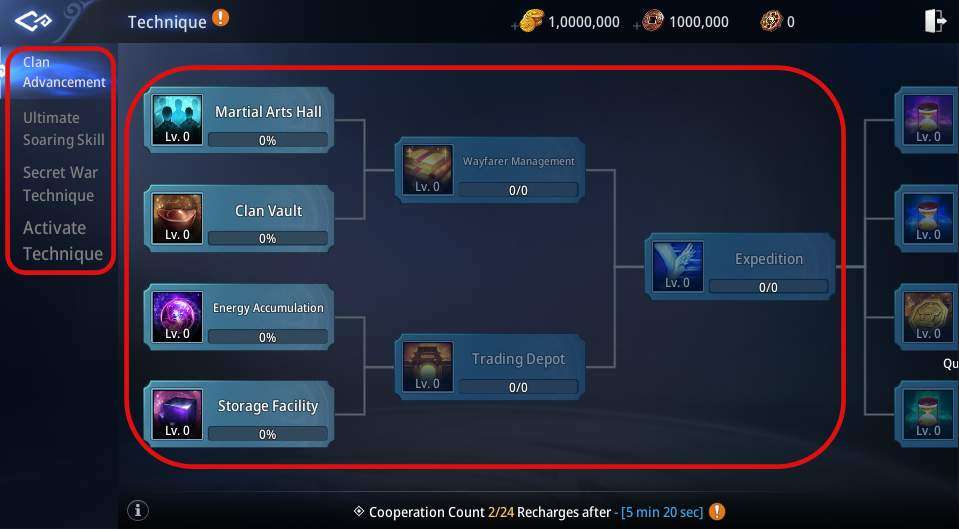
- You can use your resources to level up Clan Techniques.
- Clan Techniques include Clan Advancement/Arcane Development/Secret War Technique, and leveling up each technique brings various benefits to the clan and members.
Shop
- Tap the Shop icon in the Clan Info window.
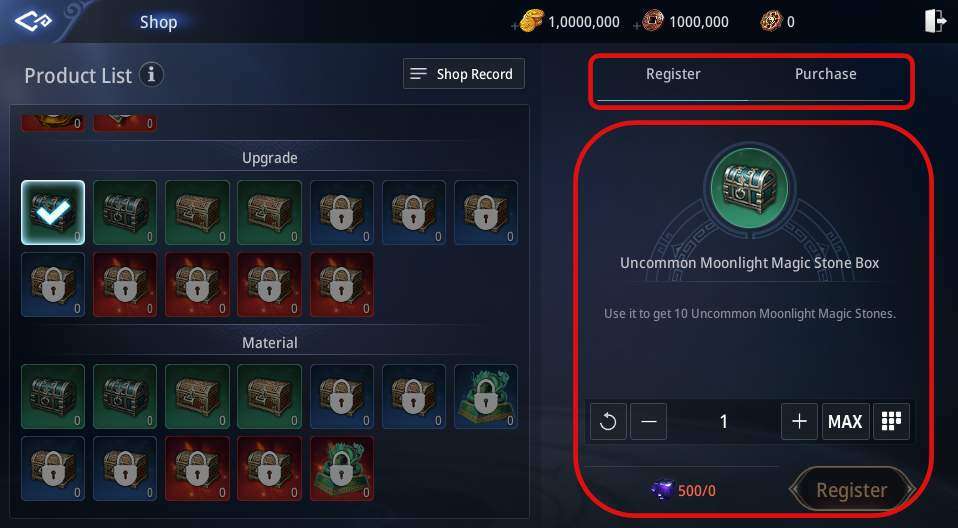
- The Leader and an Elder with Finance permission can spend the Clan Fund to register items in the shop, which can be purchased with Clan Coins.
Warehouse
- Tap the Warehouse icon in the Clan Info window.
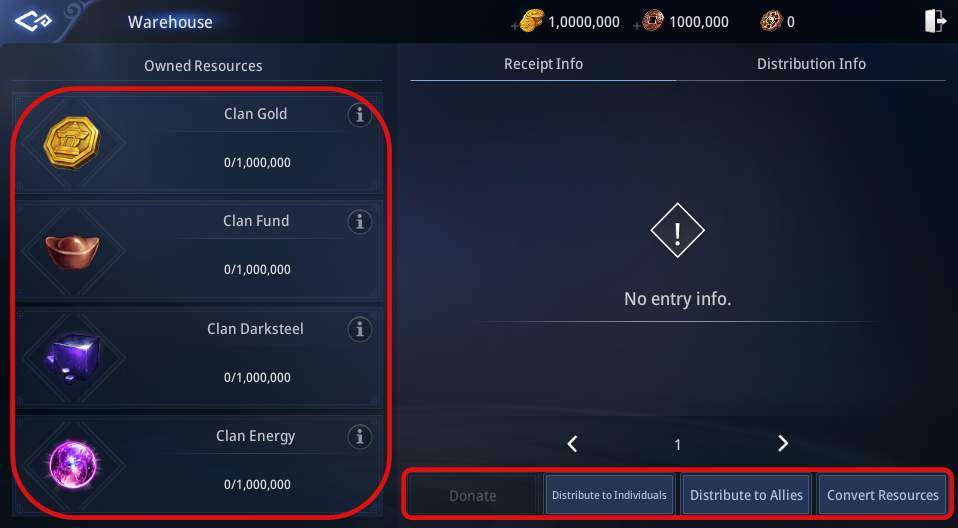
- You can check the resources owned by the clan. The Leader and the member with Finance permission can distributes the resources in the Clan Warehouse to clan members or other users.
- Members who donate resources to the clan receive a certain proportion of their donations back in Clan EXP and Clan Coins.
- Members can donate Copper, Darksteel, Energy, and Gold to their clan.
Kill
- Tap the Kill icon in the Clan Info window.
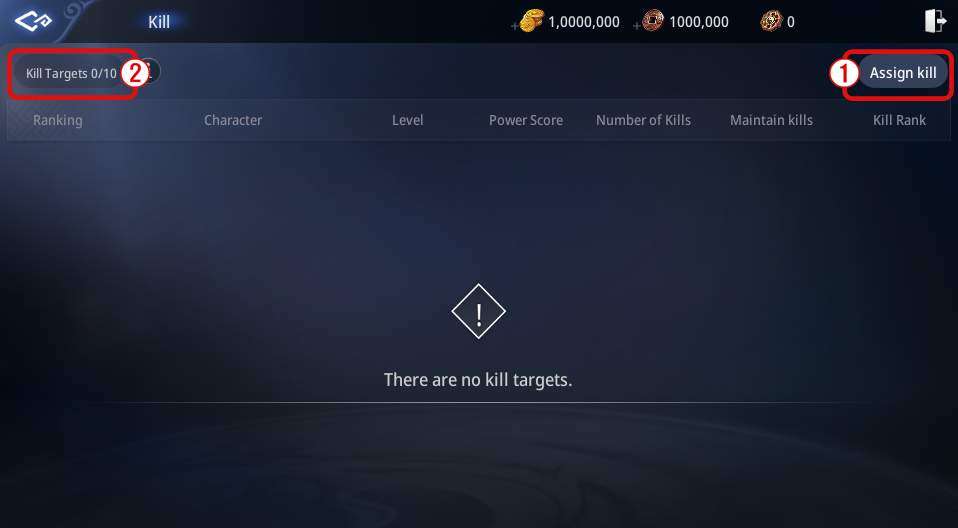
- The Leader and the member with Diplomacy permission can register any character except clan members as a Kill Target, and registering someone as a Kill Target consumes resources in the Clan Warehouse. Also, you receive rewards each time you hunt down a Kill Target.
- Characters registered as Kill Targets are removed from the list when they are defeated.
Diplomacy
- Tapping the Diplomacy icon in the Clan Info window opens the Diplomacy window, where you can view the list of allied and hostile clans.
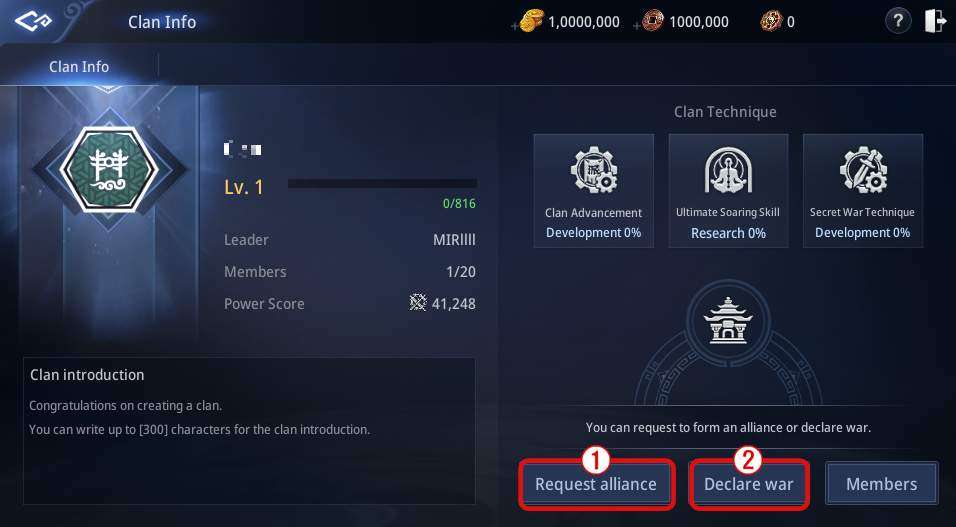
- The Leader or the member with Diplomacy permission can request or break an alliance.
- The Leader or the member with Diplomacy permission can declare war against other clans.
- There are rewards for defeating members of warring clans, and Alignment penalty does not apply.
- The hostile relation is removed automatically when the duration of war ends.


Be the first to comment