Dual Destiny Mechanics Guide
By Satellizer – Skimmer Gang Manager.
Requirements:
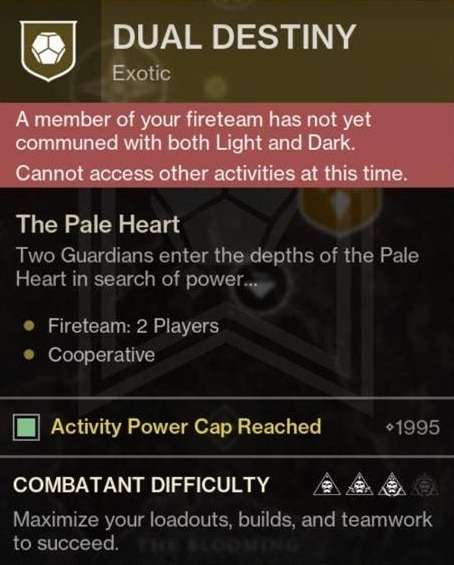
- 2 Players, one on a light subclass and one on a darkness subclass, or both players be on prismatic.
- There is a timer in the mission. If it reaches 0, you will be returned to orbit.
Entrance
Players will load into the mission and be given a buff. One being Light and one being Dark. There will be 2 platforms in the front of the room by a locked door. Both players need to stand on their respective platform at the same time for the door to open.

Once past the door, run through the cave until you get outside. You can continue to run past all the enemies until you reach another locked door. There is a darkness platform to the left, and a light platform to the right. Both players stand on them to open the door, and proceed to the first encounter.
Eye Spy (Encounter #1)
When you enter the room, there will be a darkness platform on the top and light platform on the bottom. Both players stand on both to start the encounter. Kill adds to spawn a Yellow Bar Cabal and Knight. The Cabal can only be damage by a light player, and the knight by a darkness player.
Once they die, a mote of light or dark will drop for either player. You can hold 2 in the first room, 3 in the second room, and 4 in the last room. For each mote you have, you can either shoot a symbol or see symbols to call out.
The first room requires the light player to read and the darkness player to shoot, the second room dark to read and light to shoot, and finally the last room light to read and dark to shoot. Upon doing so a pop up appears indicating that you passed the energy test, and you will be teleported to the next room. If you shoot the wrong symbol, all stacks of motes you had will disappear, and you will need to get them again. Once you finish this 3 times, you will pass the encounter. If you shoot the wrong
Jumping Puzzle #1
This Jumping puzzle is fairly simple, but requires you to use light and dark platforms to proceed up a stacked stairwell. Darkness is on the left whilst light is on the right. But, when you get to the 4th platform, they will be switched, so the light and darkness players will need to switch sides to activate them. After getting up the stairs, you’ll reach the next encounter.
Clocks and…Tormentors? (Encounter #2)
When you enter the room, there will be darkness and light platforms on each side. Once the players stand on them, the encounter begins. 3 Pyramids will form in the room, the middle one having 9 knobs that spawn around it.
For both the light and darkness players, the light connections on the clock will be completely separate for both of you. The goal is to both say which numbers you do not have connected and shoot the missing numbers (Example: Light player says 1, 2, 3 and the Dark player says 7, 8, 9, meaning the 3 knobs you need to shoot are 4, 5, 6.)
After you kill ads a tormentor spawns in the middle of the room. Whoever kills it will get a buff that allows you to shoot the clock. Shoot the correct knobs and a pop up will appear indicating that you found the correct knobs. If you shoot a single wrong one, it will reset the clock. The knobs are different no matter if you pass it or fail it. Upon doing this 3 times, you will pass the encounter.
Jumping Puzzle #2
This jumping puzzle is also fairly simple. Kill ads to spawn darkness and light platforms. After standing on them, boosters will appear that launch you to the next island. Do this until you reach the boss room.
Frozen Strings (Encounter #3)
When you enter the arena, there will be a light and darkness platform used to start the encounter. A Boss Variant Stasis Subjugator will spawn and you will need to get it’s first bar of health down. Upon doing so, it will teleport to the middle arena platform and shield itself. Kill all the ads in the room to spawn witches, both requiring a light or darkness player to kill. The light player will see 3 symbols above the boss. Call them out to the darkness player to shoot, and you may proceed to take the boss’s 2nd health bar down.
Once the boss is on it’s final bar, it will teleport into a shielded room and a Boss Variant Strand Subjugator will spawn. Repeat the same process with the strand subjugator and it will also teleport into a shielded room.
When both bosses are in their rooms, 2 clocks will spawn with 12 knobs on the opposite sides of both bosses. To the light player, you will see one clock flashing with 4 knobs and the other clock having all 12 knobs lit up. The same goes for the darkness player.
The goal is for one of the players to call out which numbers they have glowing, and then shoot the same number that is glowing on both sides at the same time (Example: If the light player’s knobs are 1, 4, 5, and 9, and the dark player’s numbers are 2, 7, 8, and 9, then the nob you both need to shoot at the same time is 9.) If you shoot the correct knob, the nob will disappear and the clock starts again. You need to do this 3 times to pass this part. If you shoot the wrong knob or too early/late to shoot it, it will reset the clock to its full number count.
After the clock mechanic is done, the bosses will come out of their shielded rooms, and you may finish them off, completing the encounter.
Savathun’s Test
You will proceed to claim your Exotic Class Items in the room after the boss fight. But, there is an amazing twist when you go to claim them. So, I will let you guys enjoy that sweetness for yourselves.
I sincerely hope this was helpful. Good luck to you!


Be the first to comment