
The new raid’s been out for a while, and it’s a pretty tough one mechanically. This guide was written to help new teams have an easier time with it!
Destiny 2 Guides:
- Beginners Guide 2019.
- Returning to the Game? Start Here!
- Moon Lost Sectors Locations Guide.
- Moon Region Chests Locations Guide.
- All Essence Locations (Lectern Guide).
- Materials and Glimmer Farming Guide.
- How to Open the Locked Rune Chests on Moon.
- How to Acquire: Outbreak Perfected Exotic Pulse Rifle.
- How to Spawn the Vex Overlords (Vex Invasion Zones).
- How to Acquire: Truth Exotic Rocket Launcher.
- How to Acquire: Lumina Exotic Hand Cannon.
- How to Acquire: Year 2 Pinnacle Weapons.
- How to Get the Wish-Ender Exotic.
- Codes to Redeem (2019).
- Crucible Map Callouts.
Contents
- Introduction
- Loadouts
- First Encounter (Escape the Consacrated Mind)
- (Optional) Secret Chest #1
- Second Encounter (Lure Out the Consacrated Mind)
- Third Encounter (Slay the Consacrated Mind, Sol Inherent)
- (Optional) Secret Chest #2
- (1/2) – Fourth Encounter (Slay the Sanctified Mind, Sol Inherent)
- (2/2) – Fourth Encounter Strategy
- Overview
Introduction
All credit goes to Xael!
Welcome to the Vault of Grass!

The Vault of Grass, sometimes called Garden of Salvation, is a new raid that’s been added in Shadowkeep. The whole thing is just a glorified wallpaper generator and while the mechanics aren’t hard, they are very complex and will require a lot of coordination to get right. Make sure all 6 members of your fireteam have voice comms and are able to properly communicate.
This guide covers all secret chests, but does not cover the steps to get the Divinity. You can find a guide on how to get it here:
Corrections
- Confluxes aren’t confluxes, they’re relays. Some people also call them “banks” in both of the boss encounters. Whoops.
- Angelicals aren’t called Angelicals, they’re just Angelics. I played D2 on another language for a while before I switched over to English and never noticed.
- Izanagi’s Burden is only better than Whisper of the Worm if you have the catalyst and someone with Lunafaction.
- In the third encounter topic, in the image where I marked the inner an outer eyes for the Consacrated Mind, I marked one wrong: The right one is just from the damage phase, the one from the Overcharges is to the bottom right of it, but you get the idea.
- Tethers seem to prioritize player over signal receptors (plus signs and bosses) most of the time. I didn’t know where to include this, so if you see a tether being made and you’re not a part of it, stay the hell away!
Loadouts
If you’re new to this game, know that team composition rarely matters. Every class is good enough to do anything on their own and you will likely get at least one of each in a raid, even if you’re doing a completely random LFG, so I will be assuming you have at least one of each class and not be touching on that topic much.
Hunter
As a hunter, you have two options. Your first one is to run a top tree (Way Of The Trapper) Nightstalker with Orpheus Rigs. With your invisibility roll and Shadowshot, you can easily clear out ads and safely deposit motes and link tethers whenever needed. You can use The Sixth Coyote for more invisibility on the first two encounters, but you should use Orpheus for the third and fourth so you can shoot the bosses with your Shadowshot and give you entire team a nice damage buff. You should be using this during the first two encounters and you should have at least one hunter using this during the boss encounters.
Your other option is to run a bottom tree Gunslinger (Way Of The Sharpshooter) with Celestial Nighthawk for the third and fourth encounters, assuming there is already another top tree Nightstalker. Your role is quite simple, actually. Great ad clearing with your grenades and throwing knives and 300k – 800k+ damage with your Golden Gun, especially if the boss is tethered with Shadowshot. Celestial is mandatory if you’re running this!
Marksman’s Dodge so you can quickly reload!
Warlock
Only one choice here, really: Middle tree Dawnblade (Attunement of Grace) with a healing rift and Lunafaction (if you have it). Teammates need healing? Rift. More healing? Nade. Damage phase? Well of Radiance. Simple enough, right? Use your Well during damage phases to give your team a nice boost to survivability and damage.
Titan
Also only one choice here: Top tree Sentinel (Code of the Protector) with Rally Barricade. During ad clearing phases and encounters, you can use your shield to be a good tank and clear out a good portion of ads, and during damage phases, your Ward of Dawn and Rally Barricade will seriously help your team with DPS, just make sure that you’re not placing them in a terrible spot!
Optimal General Loadout
Remember that you CAN use anything and A LOT of weapons have as much DPS as you need for the raid, but these are the optimal loadouts for the best versatility and DPS.
Kinetic / Primary
Here you have plenty of choices! Any good weapon with a good roll is good for here, but a kinetic sniper with Firmly Planted is an amazing choice for DPS as well as killing Cyclopses and tough enemies, making it the second best choice for the slot. What’s the best, then? Well…

The quest for it is currently glitched, but if you have Izanagi’s Burden, chambering the 4 shots with all of the aforementioned buffs is the highest DPS in the entire game, so it’s an obvious pick for the kinetic slot, especially if you have the catalyst.
Energy / Secondary
Recluse with Overload (First encounter) or Anti-Barrier (Second, third and fourth encounters) rounds, no choice here.

This gun is too much of a beast to use anything else, although another void energy weapon with a good roll can kinda make up for it. It has to be void because of shields, though, so honestly just farm for the Recluse, it’s not that hard. Your Vex and ad killing machine.
Heavy
Here you have a few choices. If you are using Izanagi’s, you can use any grenade launcher with spiked grenades or a maybe a good machine gun such as 21% Delirium and Hammerhead.
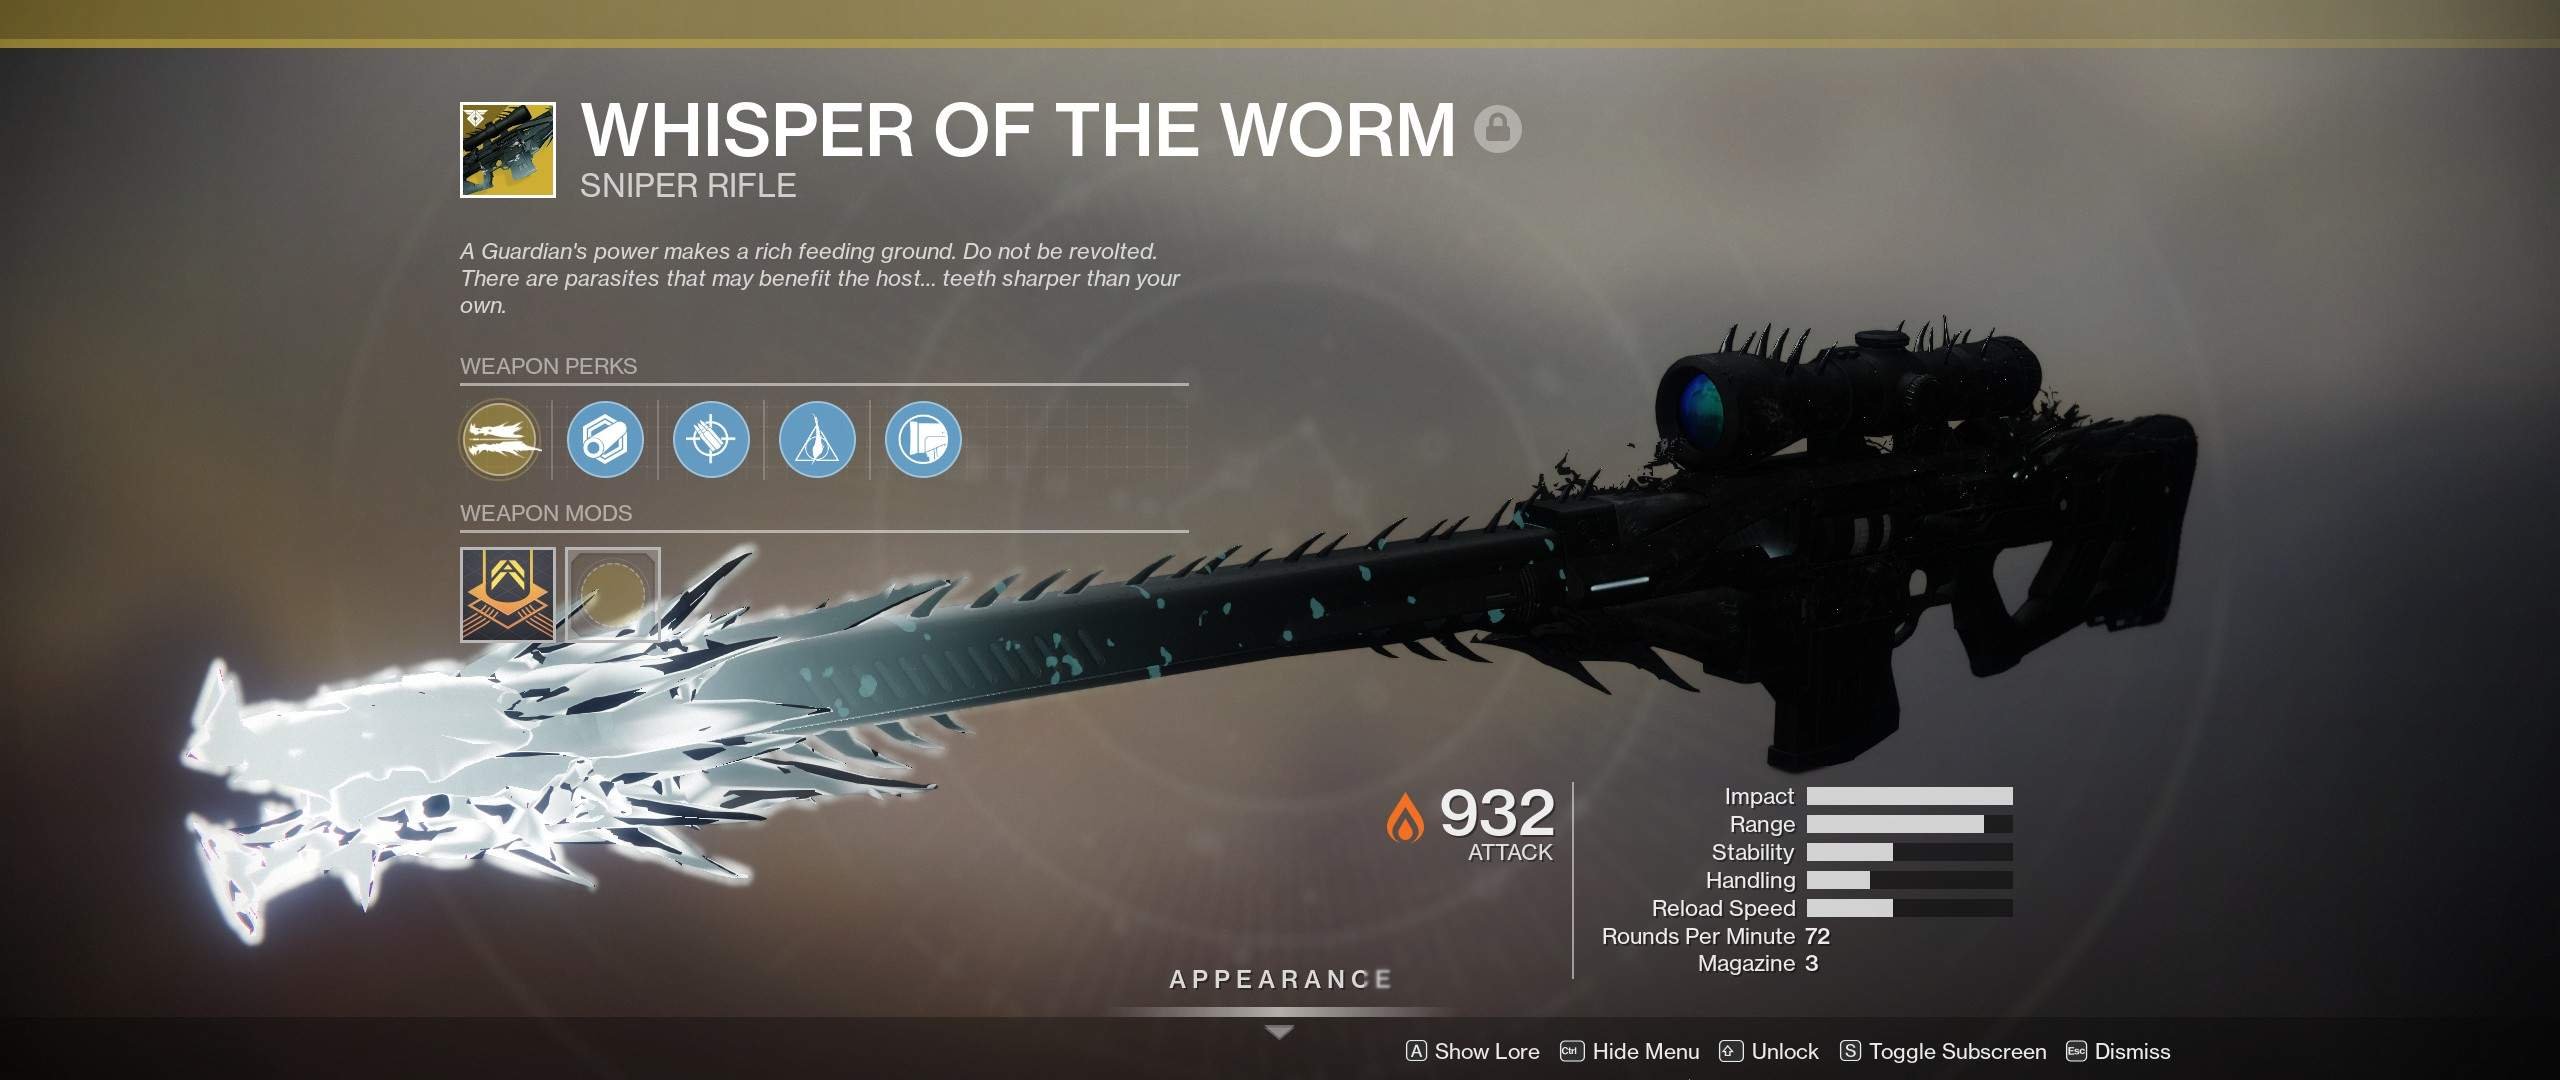
If you don’t, this will be your main damage weapon: the Whisper of the Worm.Even without the catalyst, this weapon provides a very good amount of DPS without the need to reload, making it optimal for bosses and tough enemies alike. Another choice if you don’t have the Whisper is the D.A.R.C.I., though it has lower sustained DPS.

Overview
Best Loadout: Izanagi’s Burden / Recluse / Spiked Grenades Grenade Launcher
Second Best Loadout: Kinetic Sniper (Preferrably with Firmly Planted) / Recluse / Whisper of the Worm
Third Best Loadout: Kinetic Sniper (Preferrably with Firmly Planted) / Recluse / D.A.R.C.I.
With loadouts done, you’re ready to begin the raid, clear out a few ads, go through the portal and proceed into the first encounter.
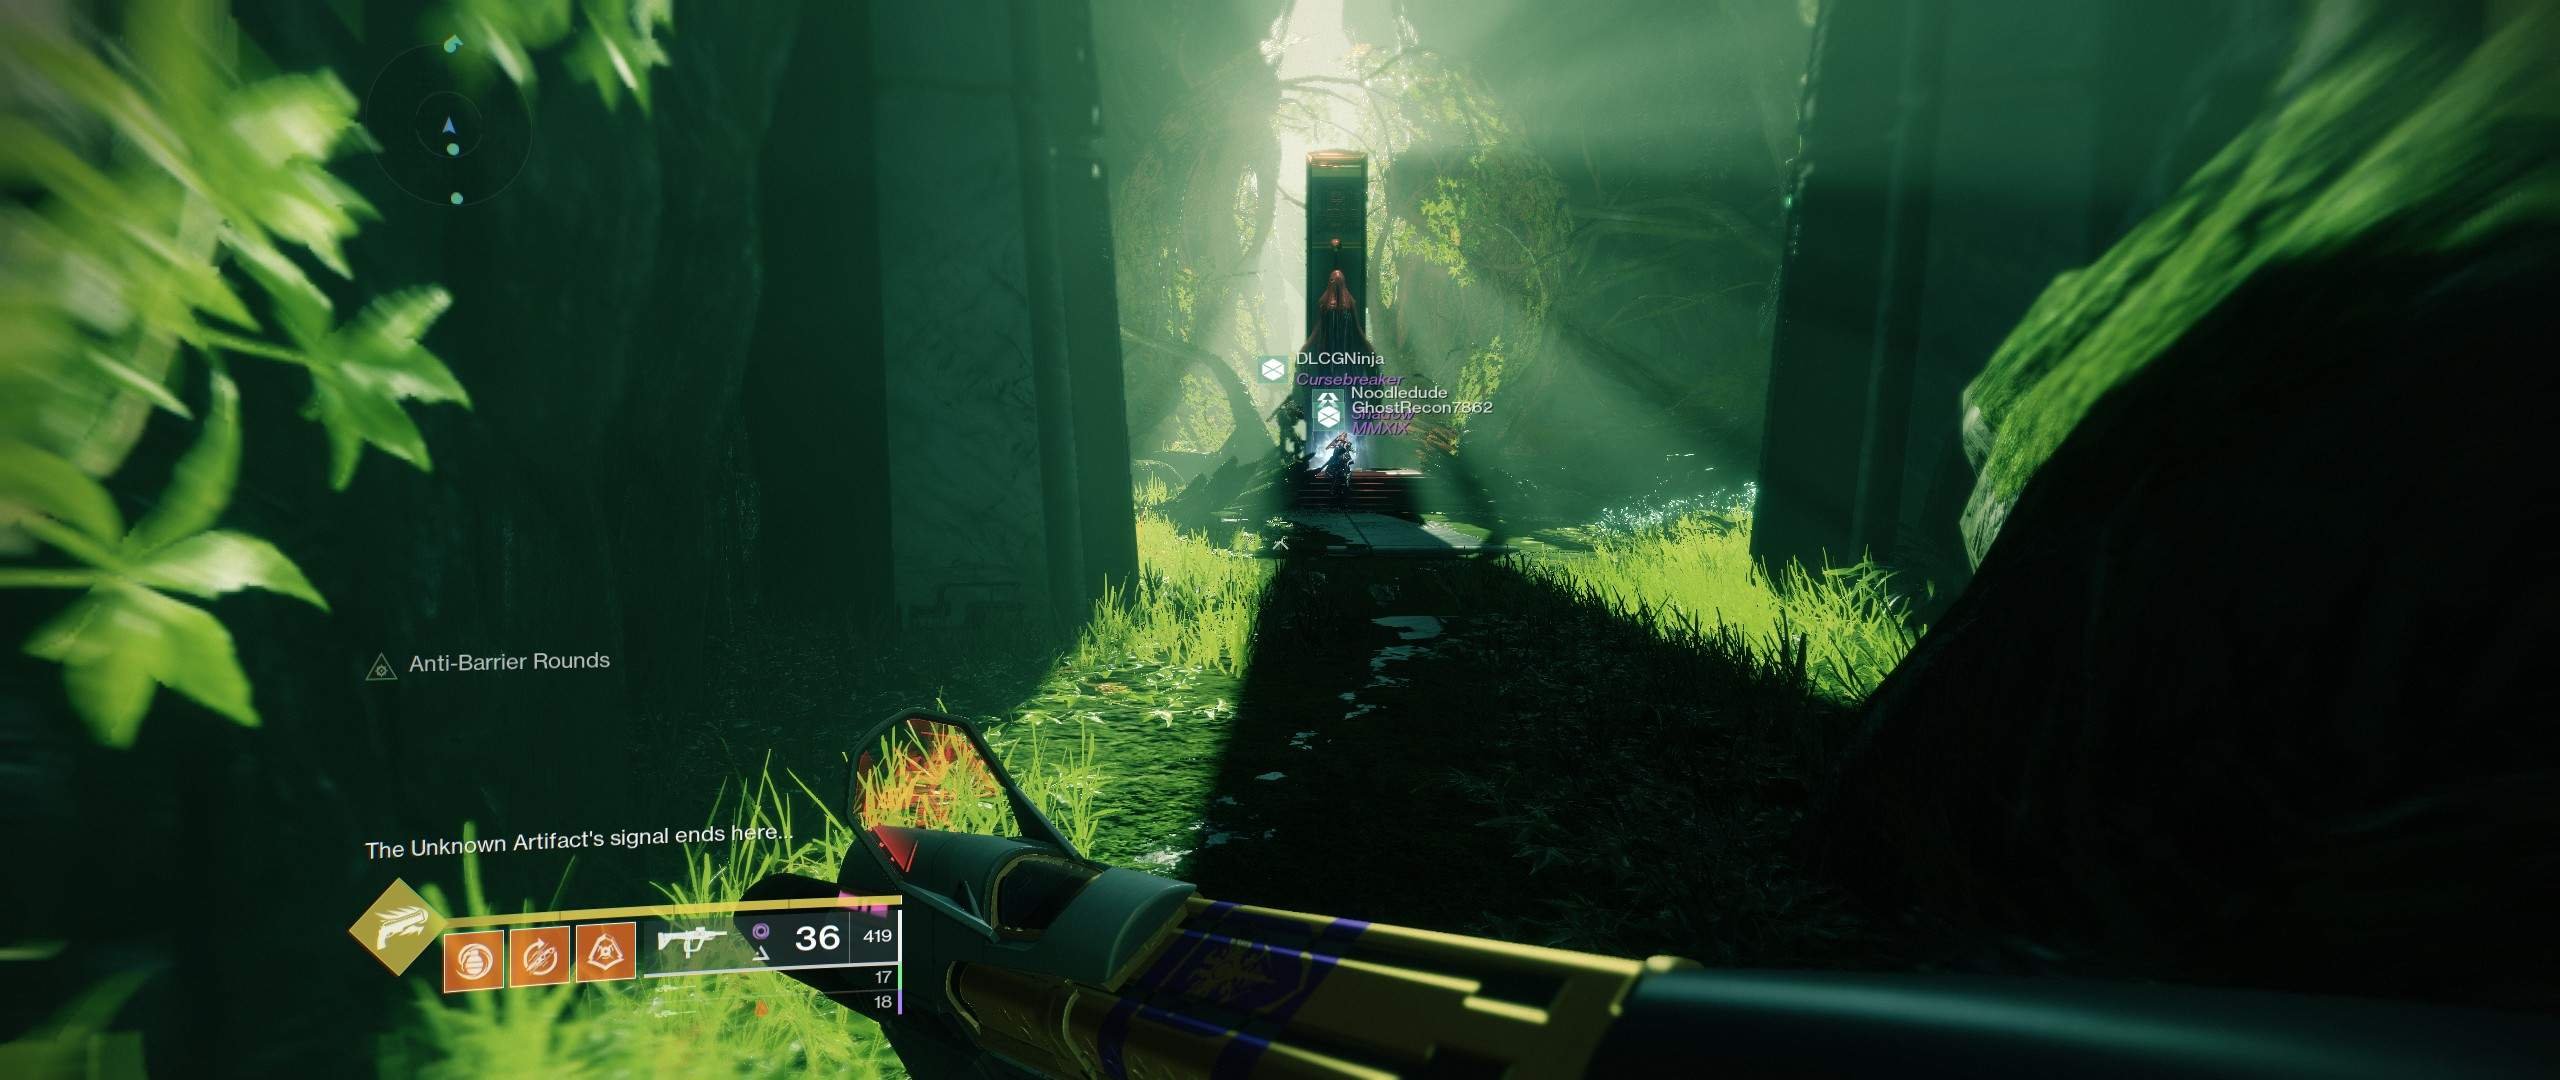
First Encounter (Escape the Consacrated Mind)
Here, you will find a giant Harpy eating (???) a Minotaur, as well as a glowing blue box in one of 3 random spots and a “plus” sign looking box near a locked gate. This blue box is a recurring feature of this raid and shooting it will allow you to “tether”. Tethering makes you unable to shoot and brings you to third person, however, it allows you to tether to other nearby teammates. The teammates you are linked to will be displayed with a blue line, that will get thinner and eventually red when you get too far and it’s about to break. Tethering is also broken if line of sight is broken, so stay in your teammate’s line of sight at ALL times when tethering!
Each shot will activate and deactivate the box (If it’s open, it’s activated), and it automatically deactivates after an objective is completed. Use 3 teammates (You can use more, but you’ll need to use 3 later on anyways, so better start practicing now) to tether the box to the plus sign near the gate. The plus sign will become blue and expand and the gate will open. Proceed to do this or kill the Minotaur (Which I do not recommend) to get respawn restricted and start the encounter.
The Mind will wake up and start firing at you, though it deals little damage. It will also constantly spawn Fanatics and orange bar Minotaurs throughout the fight, so make sure to clear them. After a gate is opened, two cyclopses will spawn in the current room.
- In the first room, they’re near the pillars next to the raid banner area.
- In the second room, they’re on top of the big pillars in front of the gate.
- In the third room, one will already be there and is to the left of the second gate, kinda far away. The rest are random: One is in front of the fourth gate, another is around halfway through the room and the last is next to the last one.
- In the fourth room, there’s only one and it will already be there when the gate is opened, immediately above the gate to the third room, on top of a platform.
In the room the boss is currently in, they will continuously shoot “Voltaic Overcharges”, approximately one every 30 seconds. They are white squares that look kinda like an oracle and have a grenade marker on them. If you do not pick one up within 5 or so seconds, you WIPE. After picking a charge up, you’ll get a debuff called a “Voltaic Overflow”, which lasts 2:30 and prevents you from picking up another Overcharge without dying. Dying gets rid of the debuff, and considering you have 6 revive tokens per attempt per encounter, it’s worth it to sacrifice yourself or a teammate to get it if nobody else can to prevent a wipe.
After killing every enemy in the next room (Every room has a Disruptive Minotaur, so make sure to put Overload rounds on your Recluse!), a yellow health Hydra named “Angelical” will spawn. They will appear in every encounter except the third and their purpose is consistent: Unlocking the tether boxes. If you look closely, every room has a tether box and a plus sign next to the gate, however, the boxes are always protected by a transparent blue square. Killing the Angelicals gets rid of this square and allows you to tether to the next plus sign. You will only need 3 people for most tethers, but you will need 4 for the last. Their locations are:
First Room
Obvious enough, you can tether before you start the encounter.
Second Room
- In the middle of the stairs, you might need 4 people to tether this one.
- Right in front of the top of the stairs, right below a platform near a corner.
- To the right of the gate, on top of a platform.
Third Room
- To the right at the very end of the room, right below the platform.
- Near the end of the room, at the fracture dividing the left and right of the room, near the tree branch.
Fourth Room
All three tethers are immediately visible. Only one will be active at a time and it will start with the right one. Requires 4 people to tether.
After opening a gate (with the exception of the very first one), the boss will teleport to the next room and continue shooting Voltaic Overcharges there. When you link the first tether in the fourth room, the boss will teleport away to behindthe locked gate there and won’t shoot any Overcharges. You do not have to link the other two tethers, as the gate opens automatically after 1 minute. Use this time to rest and cool down on your Voltaic Overflows. After the gate opens, the boss will teleport away and to the immediate right will be a huge open corridor full of cyclopses and two Disruptive Minotaurs. The boss will shoot one Overcharge and teleport a bit further away, shooting two or three times (Don’t remember exactly, but it’s ok to sacrifice yourself since this is the last stretch) before retreating into the ether and completing the encounter.
Strategy
Divide your fireteam into two smaller teams of 3. One is the “go” team, and one is the “stay” team. The “go” team will proceed into the next room and tether the next gate, while the “stay” team will stay with the boss and clear out ads and get Overcharges.
Remember what I said about the Voltaic Overflow lasting for 2:30 minutes and the boss shooting an Overcharge every 30 seconds? If you do the maths, that means that if nobody dies, you will always have at least one person who’s able to get an overcharge. Which means that you will have to rotate teams as the encounter goes on.
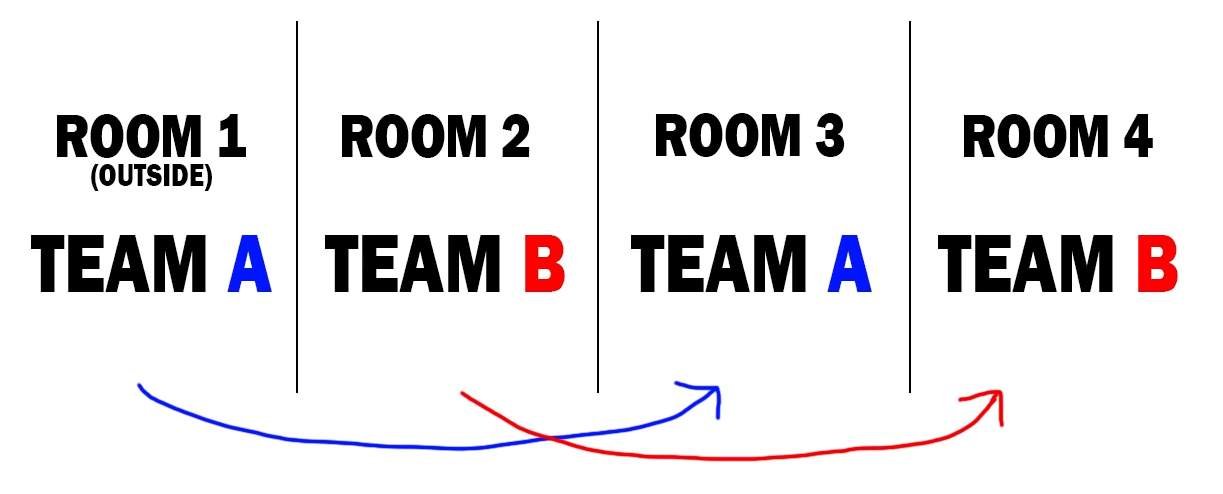
Following that scheme, you’ll be able to get through most of the encounter, but I’ll talk about some specifics. In the first room, the first person to get an overcharge should bolt out of there and go help the “go” team with ads, since if you follow the strategy above and don’t clear out the second room fast, you’re bound to run into problems. The second person shouldn’t leave, since the last person remaining could get overwhelmed with ads.
After the gate on the second room is open, if you have a Sentinel titan on the new “go” team (Team A in the scheme), make sure they pop their super and kill as many ads as they can, especially the cyclops and the hobgoblins in front! Another choice is just to use the Ward of Dawn kinda far back, or both, your choice. Ideally, one person should stay near the back of the third room not only to pick ads from afar with a sniper, but also to help kill the Cyclopses that are about to spawn on the second room. You can rotate people from both teams in the second and third room if you need someone to pick the Overcharge.
For the fourth room, whoever picks up the buff first on the third room should go help out with the fourth, and you can also rotate between yourselves. On the last stretch, make sure EVERYONE is using a sniper to kill out the cyclopses and designate people to go pick up the Overcharges. As long as one person finishes alive, you win, which means dying to the Overcharge is fine, but not dying before reaching the Overcharge due to the ads. This one takes a bit of practice and I can’t really explain it too well over text, but popping roaming supers and rushing in (Middle tree nightstalker is a good one for here as well as the rest of the encounter) is the safest method.
Finish the fight, grab your loot and jump on the chasm in front of you.
Tip: You can jump to allow you to maintain contact with teammates when tethering. Use this to your advantage!
(Optional) Secret Chest #1
Right at the start of the first platforming section, turn left and follow the tree branches until you find an elevator platform slightly to your right. Right in front of it, near the bottom of the wall is a small hole you can fit through that holds the first secret chest. Both of the secret chests can drop raid loot, but this one only will if you have already completed the raid once. Otherwise, it’ll drop raid mods (Which are still really handy!).
Second Encounter (Lure Out the Consacrated Mind)
Every single encounter after the first is simple to explain.

Every small circle in the map denotes a portal, every big circle with an “X” in the middle denotes a conflux / relay, hard lines denote barriers or gates and every square in the map denotes a tether box. Every conflux except the spawn one is initially guarded by two Barrier Hobgoblins and an Angelical, so pack heat and use Anti-Barrier rounds on your Recluse! Kill the goblins to start the encounter.
You’ll see the goblins sacrificing themselves at the start of the encounter. From now on, enemies will try to sacrifice at confluxes; stop it at all costs since it will most likely result in a wipe. Go to the front of the conflux and kill an Angelical to unlock the tether box, then tether back to the conflux with all 6 members of your fireteam to get the “Enlightened” buff, which lasts ~45 seconds. Enemies with white shields will start spawning, and you need to have the buff to break the shields! Know that one shot will do the trick though, so if you are running low on the buff and backup is underway, just break the shields first before killing the enemies… that’s the encounter.
No, seriously, all you have to do is take the 4 confluxes and defend them. Nothing fancy happens other than the need to refresh the buff and occasionally kill Angelicals, and there IS a second phase, which is even easier and I’ll talk about right now.
Once everyone has defended their confluxes for a while (The trigger seems to be everyone killing their second Angelical), the gates to the middle room will open and everyone must abandon their confluxes and run there. There, you will find a copper tunnel and another tether box, tether everyone again and rebuff. What’s not included in the map are small holes on the 4 triangles that divide the map, in which Angelicals will spawn. Several will spawn at once, so just kill them. “Supplicants” will also start spawning, they’re literally just suicide Harpies. Kill them and you’ll be done in a minute or so.

Strategy
For this encounter, you won’t have any teams, so it’s important that everyone can hold their own. You’re going to have 2 people who stay on the first conflux to kill the Angelical and rebuff, and the other 4 are going to start running left and clearing out every conflux. Once the left one is cleared, one of the two people from the first conflux will move there. After the top is cleared, the 4 people will buff and one will stay there. After they clear the right conflux, they will buff again and one person will stay there.
The two remaining people are roamers. One will stick to the right conflux and one will stick to the left conflux, using the portals to quickly teleport to their positions. You can have Left help Top and Right help Bottom or Right help Top and Left help Bottom, whatever works best for you. Basically, the original 4 people are going to guard their confluxes and stop enemies from sacrificing themselves and call out when they need to rebuff or when an Angelical spawned. Then, the roamer that is helping their position will use the teleporters to move there, help them kill the Angelical and/or rebuff. That’s it.
Do this for like 2 minutes, move to the center, kill everything there for 2 more minutes and you’re done! A tether box will spawn opposite to the copper tunnel and it’ll be time to start the third encounter.
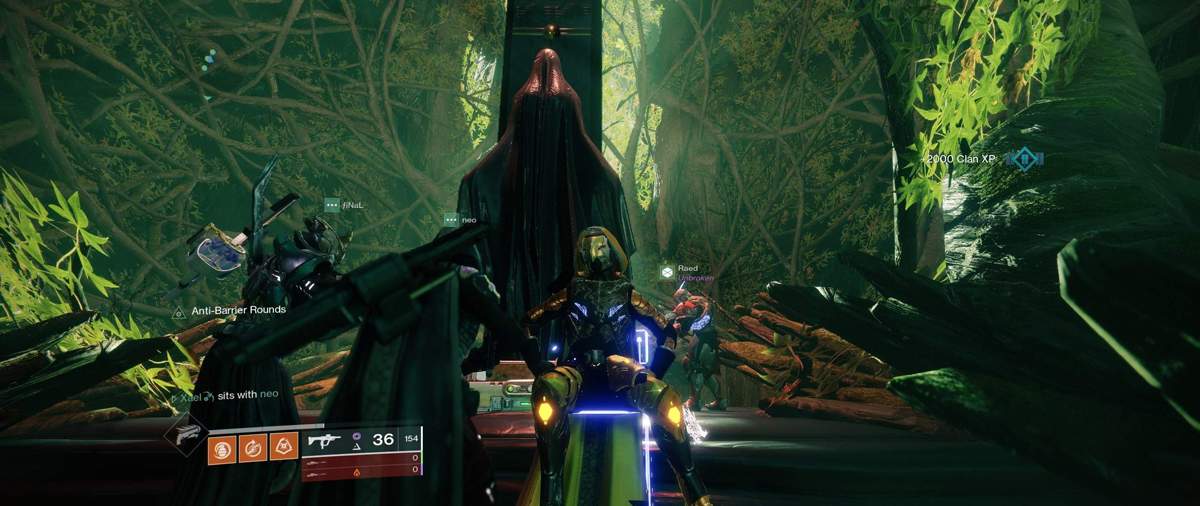
Third Encounter (Slay the Consacrated Mind, Sol Inherent)
This one is even easier than the last one… in theory. The mechanics are simple and there’s little to get confused about, but the execution can be kinda iffy. Tether from the new box into the conflux to start the encounter… and make sure to not stand near the conflux, or else this will happen.

The mechanics for this fight are super simple, divide your fireteam into 2 teams of 3 again, this time there’ll be no need to switch if your team is good enough. The boss will go around shooting Overcharges (again), so one team is going to deal with that while the other team does the mechanic for this encounter. What’s that encounter? Literally gambit.
Orientating yourselves with the copper tunnel as “top” or “front”, the 4 old confluxes from the last encounter will be top left, top right, bottom left and bottom right, and a giant beam of light will come out from one of them; that’s the one you gotta defend. In the same side as the conflux, a yellow health minotaur will spawn, and killing him will drop 5 motes, which will be displayed with a buff and a timer (No clue what happens if the timer runs out, I assume you lose the motes, so don’t take too long).
Once you bank the motes in the designated conflux, you’ll get the “Enlightened” buff and be able to destroy the shields from the enemies attacking the conflux. These enemies will try to sacrifice at the conflux and they will take away 5 motes FROM the conflux per sacrifice, and WIPE if you don’t have any. Your goal is to deposit 30 motes to start the damage phase and finally kill this mother♥ing Harpy that has been bothering you for 3 encounters now.
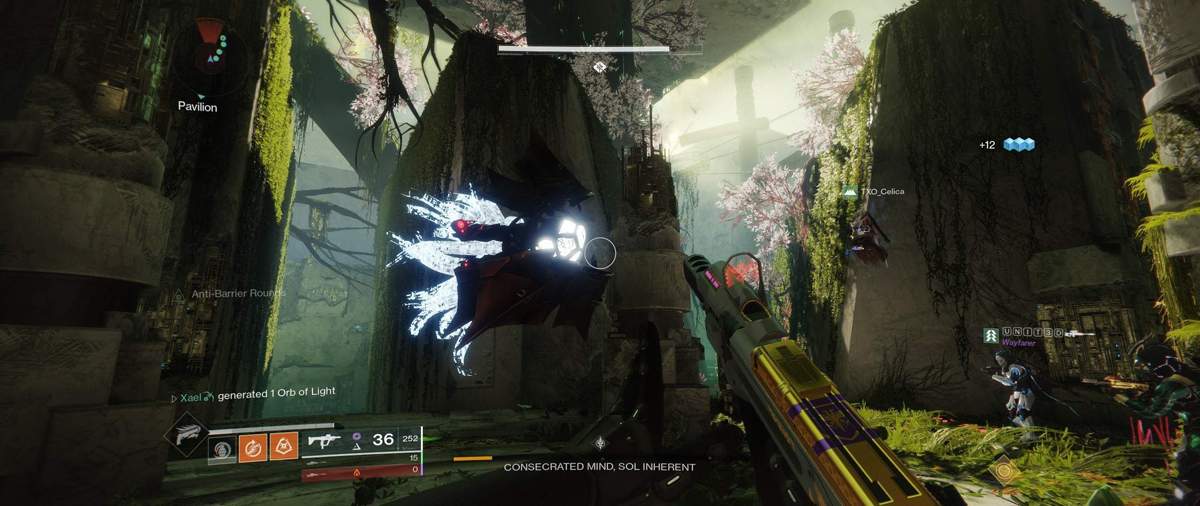
While the mote team is collecting motes and protecting the conflux, the other team (I’ll just call them “charge” team) will be disarming the Overcharges. If you take too long, you can have people from the teams switch to get the Overcharge, I’ll get into that later. However, now there’s a new mechanic: Once someone picks up a charge, they will be trapped and the Consacrated Mind will prepare a killing blow that will kill the trapped person in 5 or so seconds. The Mind will open up, displaying 6 eyes, of which 3 will light up. These will always light up in a specific order, “inner” or “outer”.
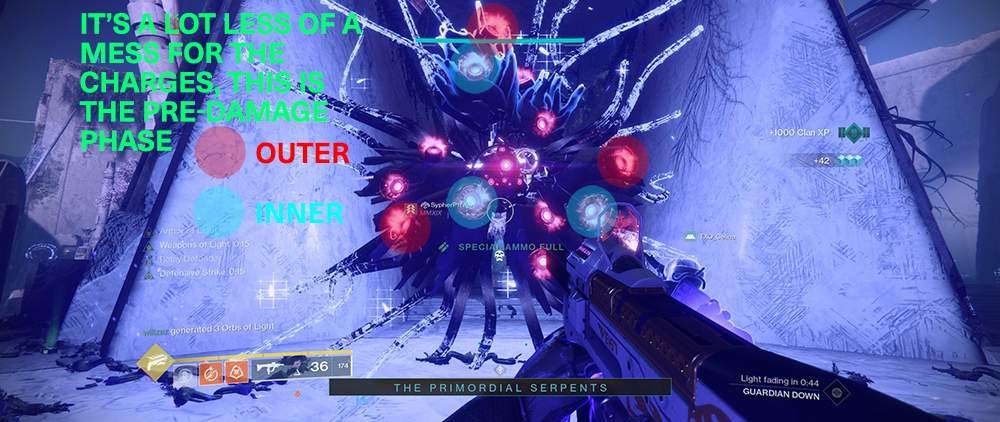
Notice how inner is always closer to the main body.
The person trapped on the inside will call out this order and shoot the top eye. One person from the outside will be standing left and the other will be standing right, and each will shoot their respective side. The callout is important, however, because everyone on the outside is going to see all eyes open, and shooting the wrong ones will result in death. Once the correct eyes are shot, the person that was trapped earlier will be released.
After 30 motes have been deposited, a message will pop up and the Mind will start going to the mote conflux. When there, ALL of its eyes will light up, including the ones that shoot at you (as seen above), shoot them all out or you will wipe. After that is done, its head will turn into a giant white crit spot crystal and the boss will start running away; follow the Mind and unleash everything you got in it and then go back to your teams. Rinse and repeat until the Consacrated Mind is dead.
Important note! Keep in mind that the mote conflux will change locations after every damage phase! And also, if you take too long (Boss survives 3 damage phases), the boss will enrage. A warning pops up right on your face, it’s hard to miss, but I don’t know how enraging works in D2, so it’s best just to avoid it.
The boss was glitched in the screenshot, but that’s how its weakspot looks.
Strategy
So, you already have everyone divided into teams and they all know what to do. For the charge team… that’s all they have to do. Of course, they can’t hold charges for too long, but it’ll suffice for a good team until the damage phase. For the mote team, they can divide pickup in two ways: 5 10 10 5 or 10 10 10. In the first one, the first member picks 5 motes, the second picks 10, the third picks another 10 and the first one picks 5 again. This is a safe strategy since it allows you to have the enlightened buff to defend the conflux earlier. The 10 10 10 strategy is pretty self-explanatory.
A good pace would be the first person picks up their motes, the second comes around the time they’re running out of Enlightened, the third comes around when they’re halfway through the first comes back some 10 seconds after for the damage phase. Everyone should get around for the damage phase ASAP, but you should have enough time for everyone to get there and buff since you still have the eye phase to do.
What I said earlier about switching, if the mote team chooses not to sacrifice, one member of the mote team who currently has no motes can switch with the person with the longest timer on their Overflow and tell them how many motes they need. The problem with this is that it requires pretty damn good communication, and considering that you have 6 revive tokens and that a sacrifice nets you at least 2 Overcharges, it’s more worth it to just sacrifice someone to get the Overcharge.
This encounter has a TON of ads, so if you’re in the middle and not killing a Minotaur, kill ads, whatever your team is. Make sure to not melee or finisher the minotaurs if you’re not the next one picking motes.
For the damage phase, the boss will wiggle a little, so make sure to pay attention if you’re using the Whisper. A good set of buffs for the damage phase is a Shadowshot + Ward of Dawn + Well of Radiance, preferrably with Lunafaction. You can maybetake away the Shadowshot slap a Tractor Cannon or Divinity in there for more damage, but I don’t know if the bonus damage from having one more Celestial Nighthawk shot will outweight the damage loss from having one less Whisper or Izanagi’s.
Before I finish – the damage phase should be enough for at least one person to cool down on their Overflow, but you can also just switch up the entire teams if you so wish, just keep in mind that it’s more complicated and you shouldn’t need to do it anyways.
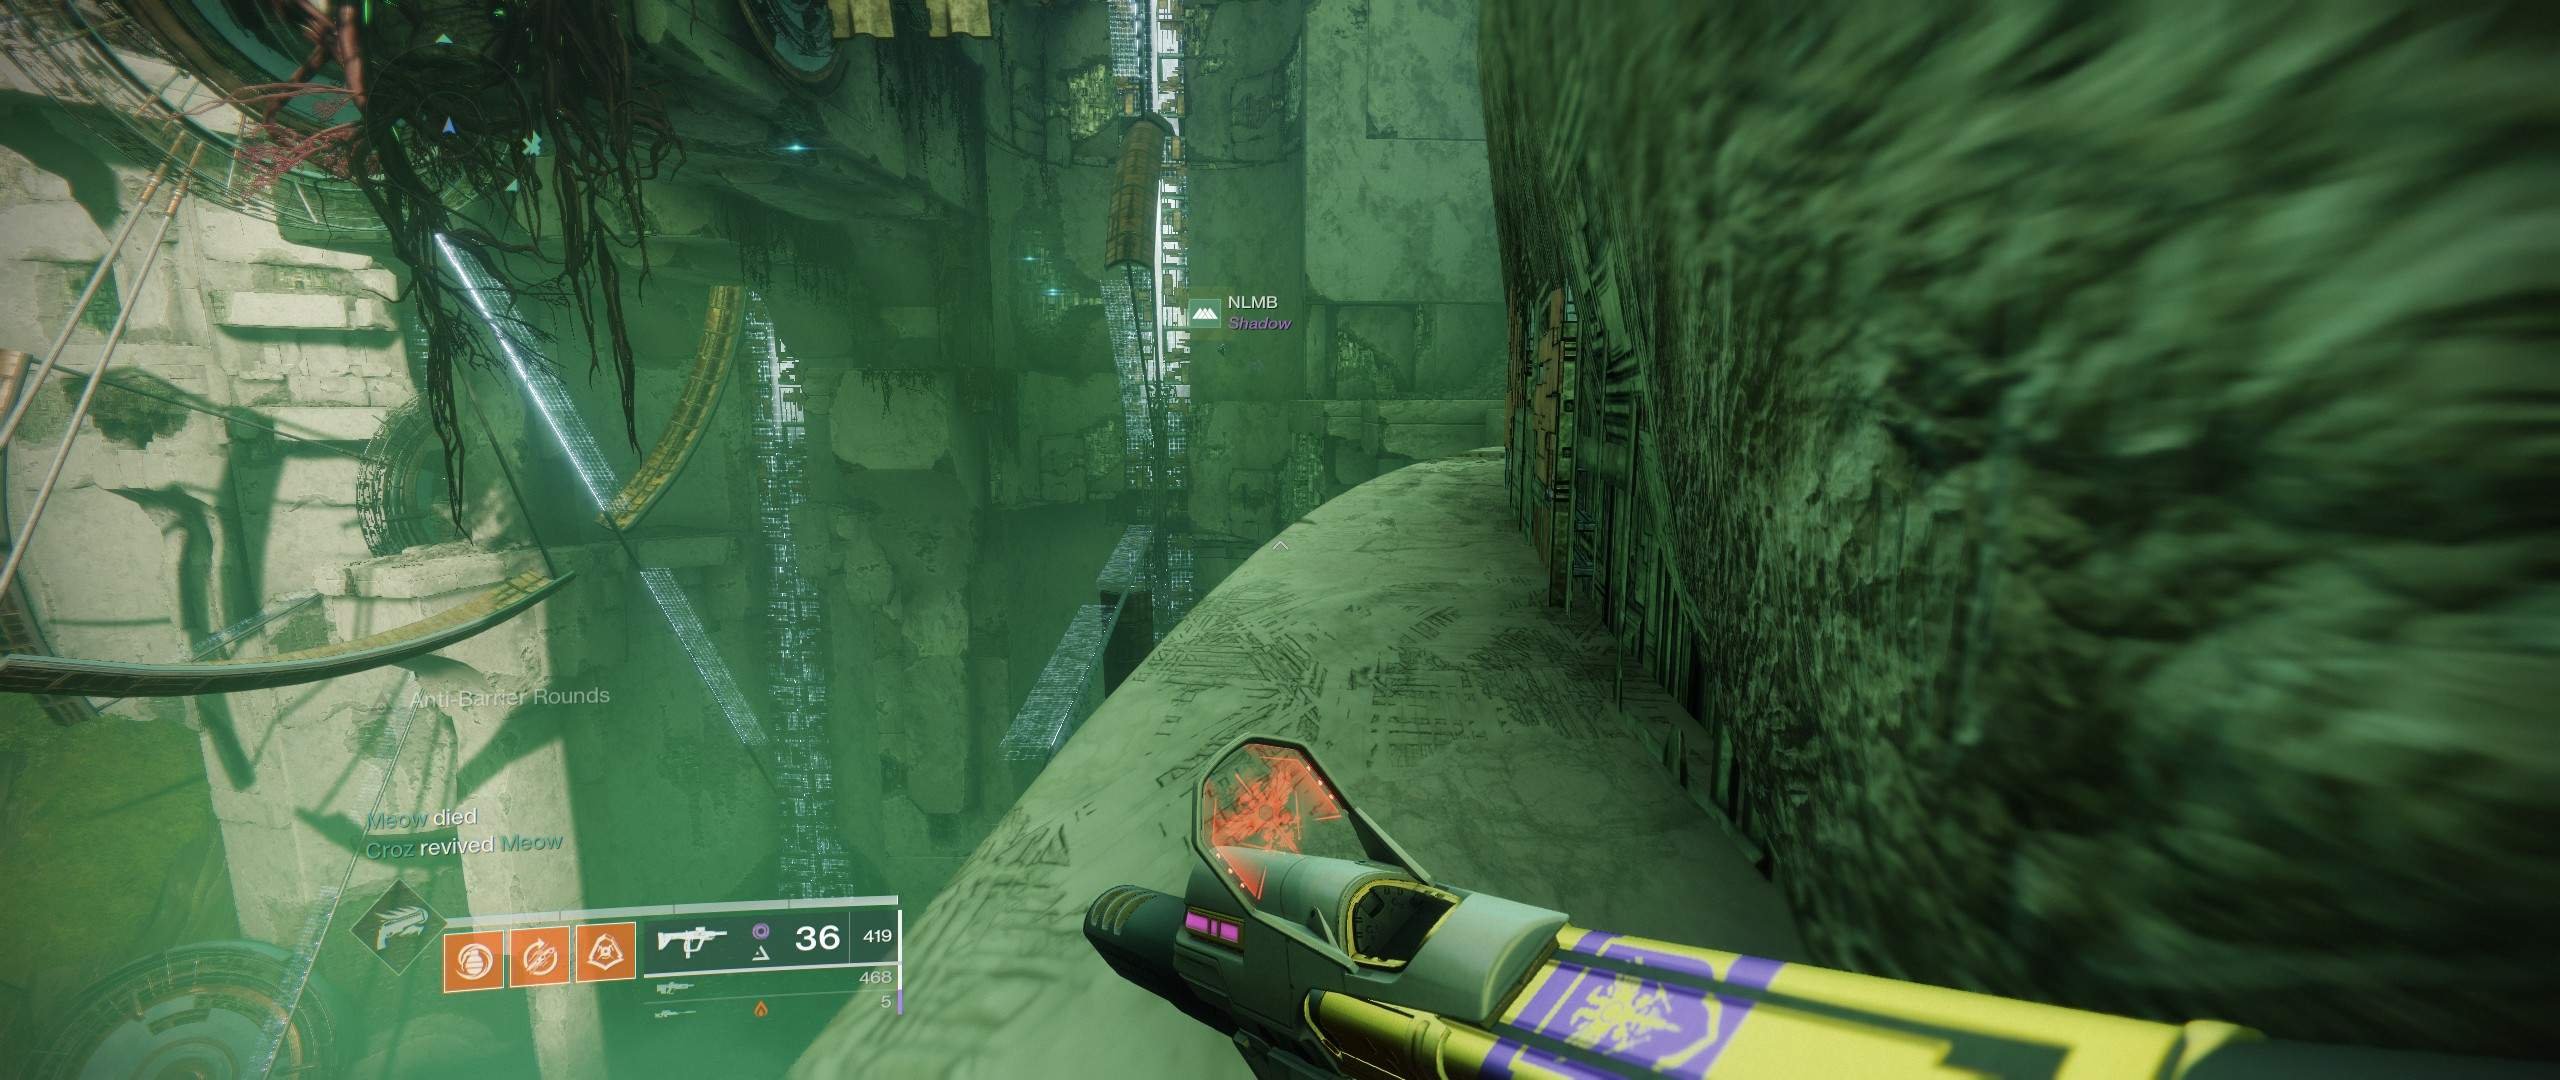
Once the boss is dead, proceed through the copper tunnel: Follow ahead into the portal if you don’t care about the chest, turn left immediately after you’re on the same platform as the big portal if you do.
(Optional) Secret Chest #2
Once you are in the same platform as the main portal, turn left. You’ll know you’re in the right platform if you see a portal right below the platform, hooked to a wall.
You’ll see a giant void and a small path you can follow, just keep on going. The path is very straight forward until you reach a giant spinning wheel with transparent handle thingies. If you wish, I’m sure there are easier ways to do it if you keep following the path, but we’re stopping there.
As one of the two segment handles is coming up, jump on top of the second segment (Furthest from the center) and stay near the edge. As the wheel turns, try to get on the little piece of stable ground at the very tip of the segment. If you slide, just jump into one of the two higher up platforms in front of you and follow the path.
If you don’t, you should be seeing something like this:

Here’s a video guide following a slightly different, safer route.
Follow all the way up and you’ll find your new wallpaper… after you kill all the Harpies, of course. Follow to the right into the cave marked below:

Once you’re in, don’t die to the trillion harpies following you, jump on the tree stump to the left, jump ahead and grab your secret chest.
I honestly don’t know the way out from there exactly, but you have to parkour around tree branches in the cave with vex milk, there’s an exit from the one you’re in that leads there.
Take some nice screenshots and proceed into the next encounter.


(1/2) – Fourth Encounter (Slay the Sanctified Mind, Sol Inherent)
Before we start, I’d like to point this out: This is by far the hardest part of the entire raid and if you don’t have at least 4 people on your team with Whisper or Izanagi’s, this one is gonna be very long.
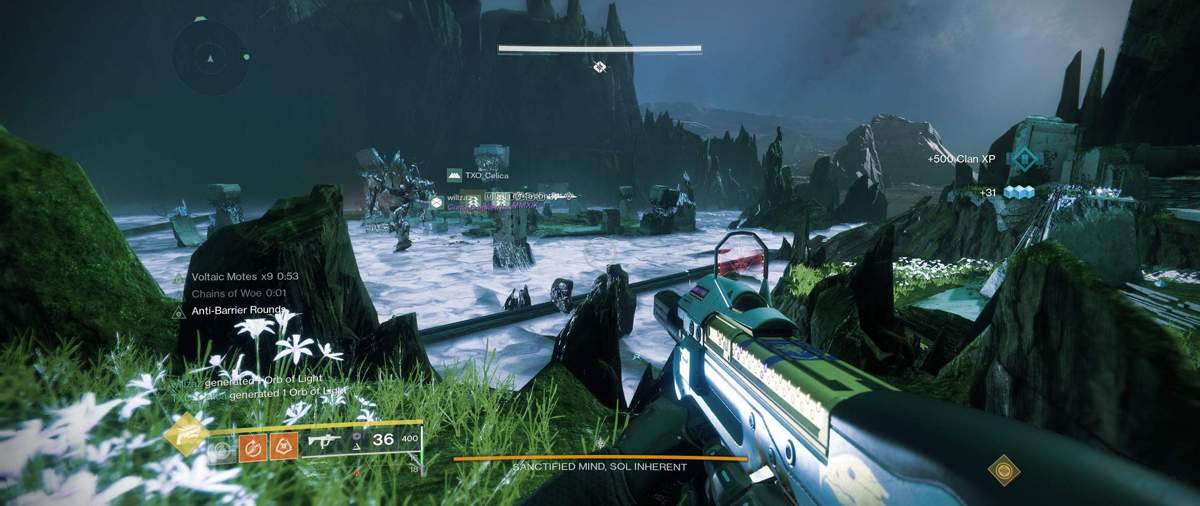
You’ll start on a completely different area with all of your 6 teammates cramped into a small space with a raid banner space, a platform up ahead and a giant Vex. It looks something like this, though the boss probably won’t be awake if your team isn’t full of flustered idiots.

And here’s a very crudely drawn map of the encounter that I made specifically for this guide. It’s mostly accurate, but what’s important is that you have an idea of everything.
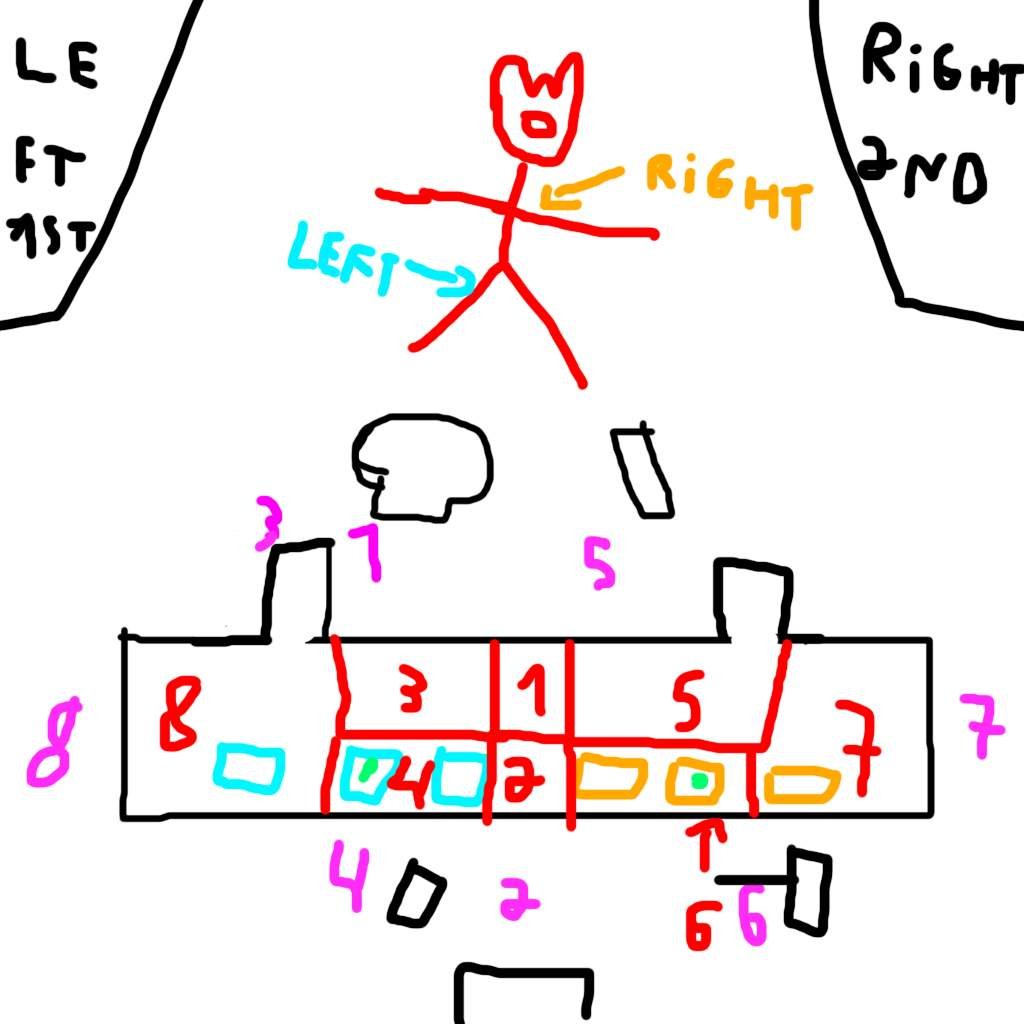
Caption
- Blue Boxes – Left Mote Conflux
- Orange Boxes – Right Mote Conflux
- Left Arrow – Weakspot that opens portal to left motes island.
- Right Arrow – Weakspot that opens portal to right motes island.
- Black Lines – Surrounds ground, elevation not considered.
- Green Mark on Boxes – This will always be the first conflux.
- Red Lines and Numbers – Parts of the map.
- Purple Numbers – Tether boxes that rebuild the corresponding part of the map.
Real Callouts
- Top Middle
- Back Middle
- Top Left
- Back Left
- Top Right
- Back Right
- Far Right (do not discard this one as useless)
- Far Left (do not discard this one as useless)
Shoot the boss once with any weapon to start the encounter. The boss will wake up and start shooting you, some ads will spawn as well. Take this time to explore the area, kill the ads and take note of the locations of the active confluxes. This time, there’s a normal one (left) and an orange one, (right) and each has a tether box above them. Your goal is to deposit 30 motes on EACH conflux to trigger the pre-damage phase.
After a while, an Angelical will spawn and lock the tethers, and two glowing red weakspots will show up on the boss, one on the left foreleg and one on the right shoulder. Destroying one of these will do the following:
- The red orbs from the weakspots will fall into lake and open up a portal to an island that will allow you to get motes, the type depending on the portal. It doesn’t last long, so be quick it you’re going in!
- A cyclops will spawn on the far away platform of the corresponding side (Far left / right and to the front).
- Any players already on an island will be brought back to the spawn platform.
- The boss will charge an attack that will remove one of the 8 parts of the main platform marked above. A red outline will show up around it and you will die if you stand near the ground of that platform.
- The destroyed weakspot will disappear and regenerate after around 20 seconds.
The foreleg weakspot will open a blue portal that will bring you to the left island where you’ll be able to collect normal motes for the left conflux.
The shoulder weakspot will open an orange portal that will bring you to the right island where you’ll be able to collect tainted / orange motes for the right conflux.
After the first mote(s) is (are) deposited, the person(s) depositing will get the “Enlightened” buff for 1 minute and shielded ememies will start to spawn and try to sacrifice themselves at either conflux. Each island will spawn a certain set of enemies, as seen below: (Keep in mind that both islands have a set layout).
Type 1
- Goblins (1 Mote)
- One Minotaur (3 Motes)
Total: 15 Motes
Type 2
- Harpies (1 Mote)
- Hobgoblins (2 Motes)
Total: 18 Motes
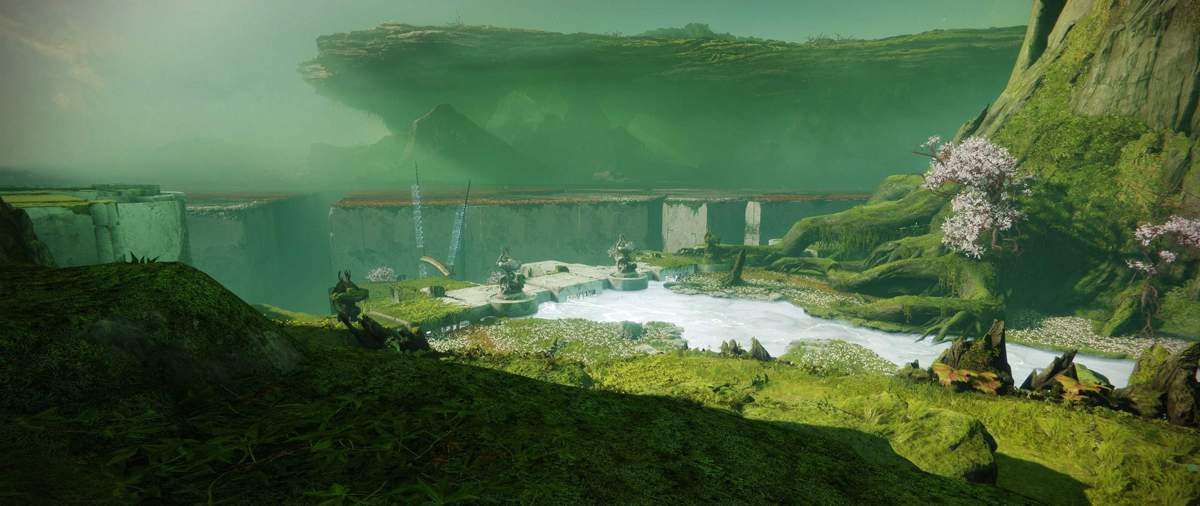
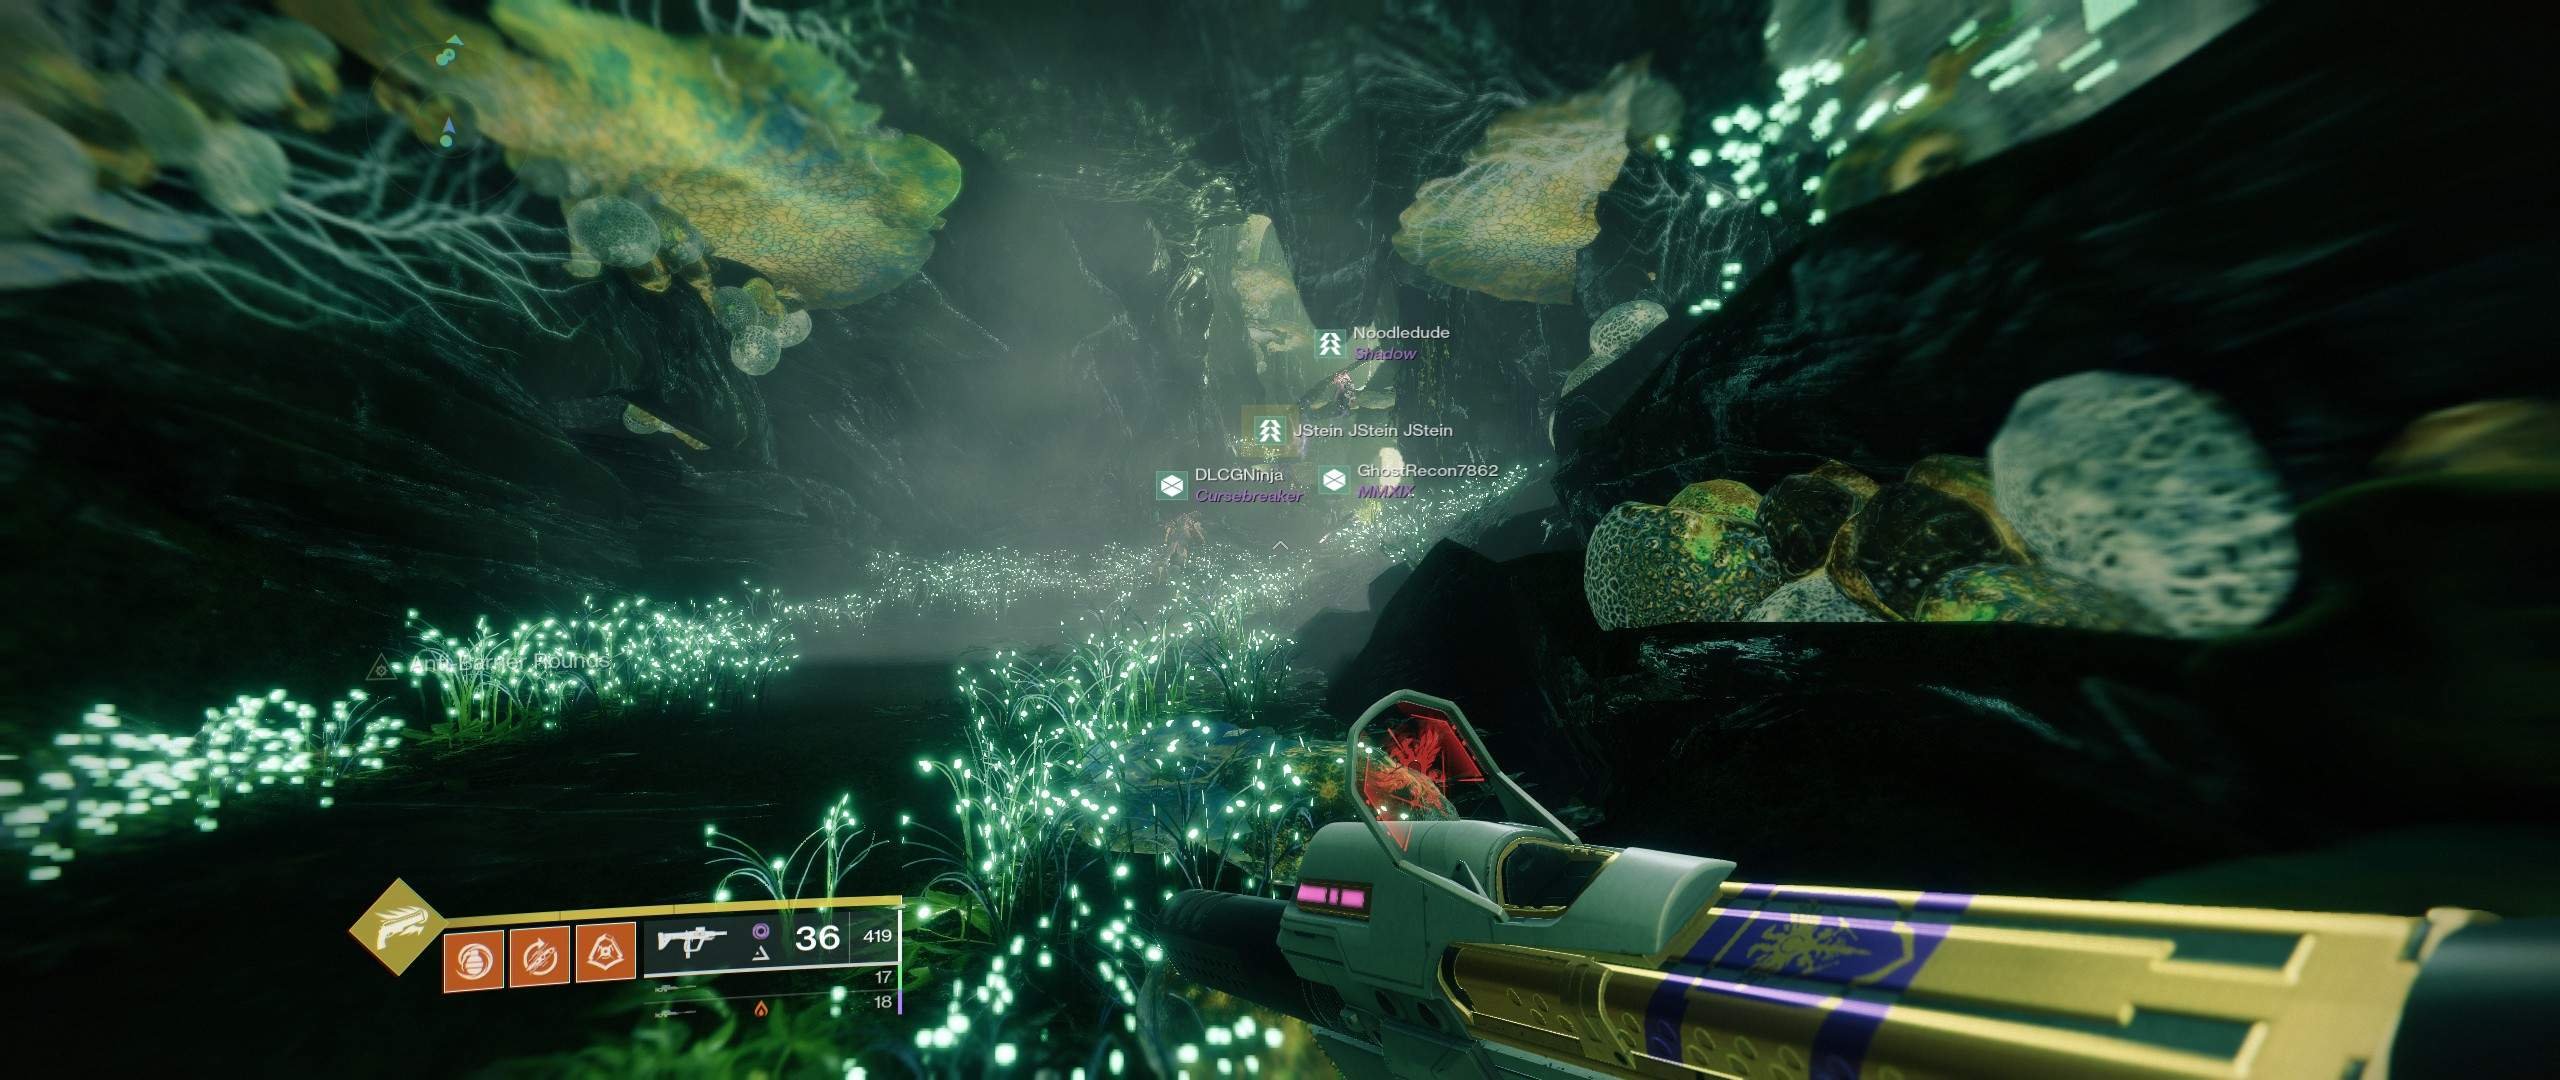
Nice sight from the left island.
Once a conflux is full, ads won’t be able to sacrifice at them. Back to the main platform, you’ll be losing parts of the platform to stand on, bit by bit until you have none left. There IS a way to rebuild them, however. In the map, I marked with purple numbers all of the plus signs and the parts they’re related to. They will only appear if its part has been destroyed, and tethering to them with either conflux will create that red outline around the part again and will rebuild it shortly. You’ll still die if you’re standing on the ground near it, though, so… don’t.
After enough time has passed, or after you have both confluxes full, the pre-damage phase will start. The boss will hold forth a plus sign with the color of the tether you need to link to it. An Angelical will spawn and lock your tethers and a bunch of ads will spawn as well. The sign gets brighter over time and will eventually wipe (I think??? There’s a lot of time to do it and it’s hard to ♥♥♥ up) your team if you don’t tether with the correct color (I think tethering with the wrong one just makes you lose the damage phase).
After that, more ads will spawn and the boss will show a crit point on its belly, shoot it. The boss will then start floating shortly after, and a BLUE plus sign will appear, then tether again with the conflux OPPOSITE of the first, even if it was originally blue (left). You only have around 5 or so seconds to do it or you will lose a significant portion of your damage phase. If you tether successfully, he’ll walk around a bit, float again with no way to tether and then become invulnerable again. Use this time to damage him, rinse and repeat until he’s dead.
One last thing, tethering with a conflux that’s NOT full will successfully tether, but not trigger the crit point to appear and continue the fight as usual.
(2/2) – Fourth Encounter Strategy
A few things before we start, to make this a lot quicker:
- The second person to bank their motes will always shoot the Cyclopses while the first person is banking.
- Only build after all ads are clear, but be quick and try to get at least two builds done before more.spawn.
- Angelicals are a TOP priority, take them down at all costs.
- If more than three goblins sacrifice during a cycle, just wipe. Same if you’re taking too long, wipe earlier rather than later.
- If you take too long, don’t have enough motes on only one conflux and don’t want to wipe, you can still get the first damage phase tether and just deal damage there, assuming it matches the conflux’s color.
- If you miss a few reasons for whatever reason and don’t get Type 2 (Harpies + Hobgoblins), Team 1 should jump back in immediately after Team 2 is back and be brought back ASAP when they have the motes.
- Builders should always call out when and where they’re building so that nobody else gets tethered and your rebuild turns into a team effort to untie a knot.
- You can miss a few motes if you get Type 2s.
- Don’t be afraid to bring back your teammates earlier if you need someone with the Enlightened buff!
- If you’re late to an island portal and it disappears, keep running into it! There seems to be a weird bug where the teleport will stay for a little bit after the portal has visually closed.
- Keep in mind that the boss takes away platforms every time you destroy his weakspot, and not every time someone goes in/out of the islands, so you can save your builders trouble by not taking too long.

Tethering done right.
First, divide your fireteam into 3 teams of 2. Team 1, Team 2 and Builders, and assign each of them to a side; it’ll be important later. You’ll be doing two 15 15 runs: Team 1 will jump in first, get their motes, and come back. At the same time that they come back, Team 2 will go in while builders are at work rebuilding all of the lost platforms. After Team 2 is back, the shoulder weakspot should be broken and Team 1 will go into the portal, etc.
Once both confluxes are completely full, divide your team into left and right as I instructed earlier and kill the Angelical and ads. Only after the ads are dead, tether the first conflux to the boss. The team that tethered should start doing DPS without using their supers just yet, and the other team must wait a little and hastly tether again. A good trick is to have everyone except the last person (person who’s tethering to the boss) in position and have them only come in for when the boss is already available for tether to avoid dying. After that, everyone should gather up in a pre-designated spot, pop their supers and go ham on the boss.
I feel like it’s also worth mentioning a strategy in which only one teams tethers and the other team is constantly on DPS. This nets you more damage per phase, but I found that we wiped a lot because the person in front was getting shot at my literally 10 Goblins at once and had no way to regenerate efficiently between both tethers. If you want, you can have a team composition set up in a way that allows both teams to use a Well of Radiance + Ward of Dawn and save additional buffs for when both teams are on DPS, or maybe even one of the two I just talked about.
Anyways, after the boss is dead, drop down from the hole that just opened, collect your loot and you’re done!

Pro tip: The right side tether is a mix of orange and black and doesn’t change in shape or color when about to snap. Use that to orientate yourself and be mindful of your tether range!
Overview
Overall, I don’t think this is a particularly “hard” raid, but it’s definitely one that requires a lot of communication. The final boss is definitely the hardest part and he’s actually really painful to do with a less-than-exceptional team. This raid is very high quality, though; it tried a lot of new concepts and executed them in a fun and creative manner, such as the tether and Voltaic Overflow mechanics.
As for loot, 90% of what you get from this raid is good. I’m pretty sure exotics can drop, but they’re still not very common. I think that the only weapon you really don’t wanna get is the bow, because well, it’s a bow (though it’s one of, if not the best in the game with a good enough roll). The pulse rifle, auto rifle and sniper are definitely the highlights, but the armor is pretty sick and so is the hand cannon, too.


Be the first to comment